Create a service principal with Power Platform CLI
Introduction
To perform an integration with Dynamics 365 you typically need to set up a service principal in Azure.
To achieve this goal you must complete several steps:
- Create an Azure App Registration
- Create a secret for that App Registration
- Set up API permissions for Dynamics 365
- Create an Application User in the Power Platform Admin Center
- Assign permissions to the Application User
A tutorial to perform those actions : https://dynamics-chronicles.com/article/step-step-connect-d365-clientsecret-use-apis
All these manual steps take time. But you can perform them with a Powershell command (pac admin create-service-principal).
Create your service principal
First you have to install Power Platform CLI on your machine.
Power Platform CLI is a command-line interface used to perform various operations in the Power Platform related to environment lifecycle, authentication, and work with Dataverse environments, solution packages, portals, code components.
You can download the MSI file here : https://aka.ms/PowerAppsCLI
Power Platform CLI reference guide : https://learn.microsoft.com/en-us/power-platform/developer/cli/reference/tool
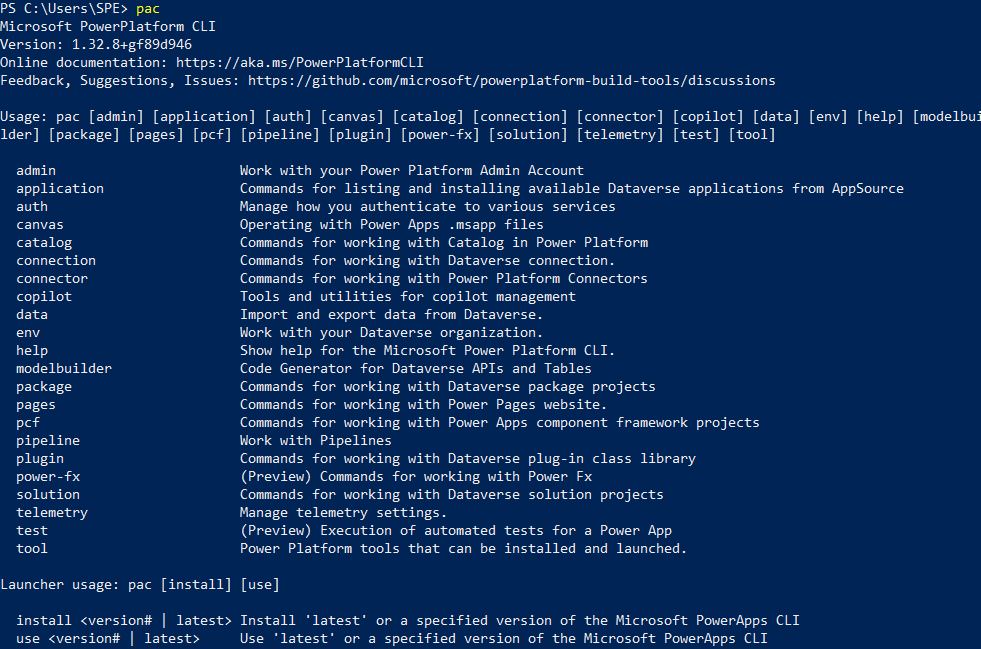
After installing Power Platform CLI open a Powershell command prompt and type the command pac to check that the installation was successful.
Then type the following command to update to the latest version.
pac install latest
Next step is to connect to your Dataverse environment with an authentication profile.
To get a list of all authentication profiles type the following command :
pac auth list

As you can see I have no authentication profile installed.
To create a profile type the following command:
pac auth create -env <env id>
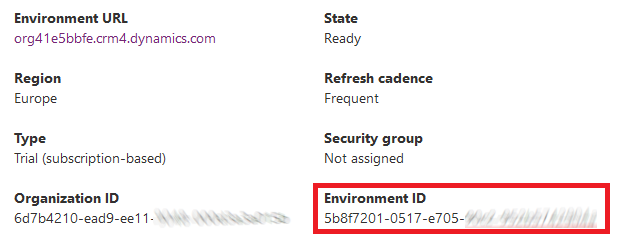
<env Id> is the environment id of your organisation, which you will find in the Power Platform Admin Center.
You will be asked to provide your credentials. Below the result :

The last step is to use the command below :
pac admin create-service-principal --environment <env id>
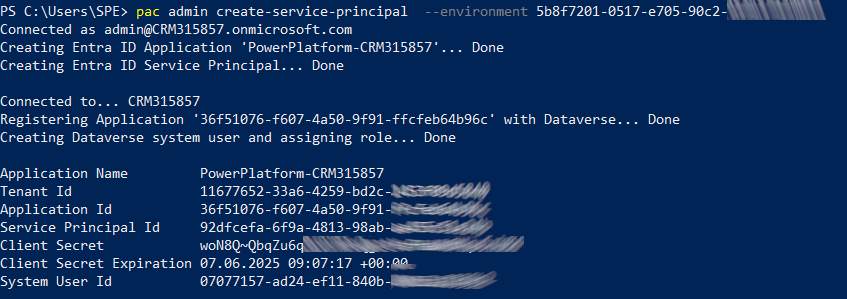
Now you can check the result in your Azure Portal.
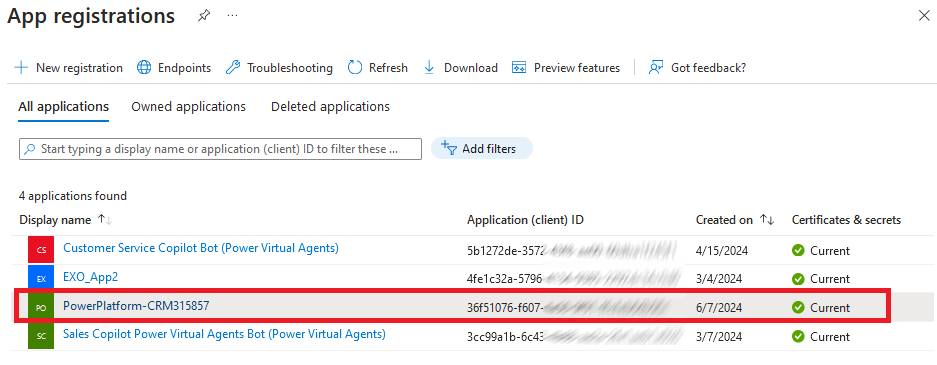
As you can see below a new App Registration has been created.
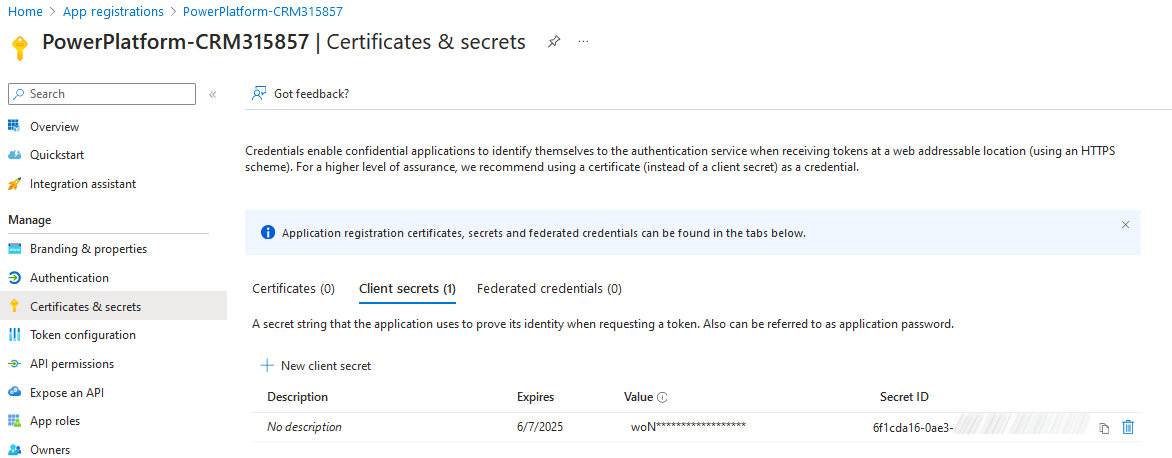
A secret with one year validity has been created for the App Registration.
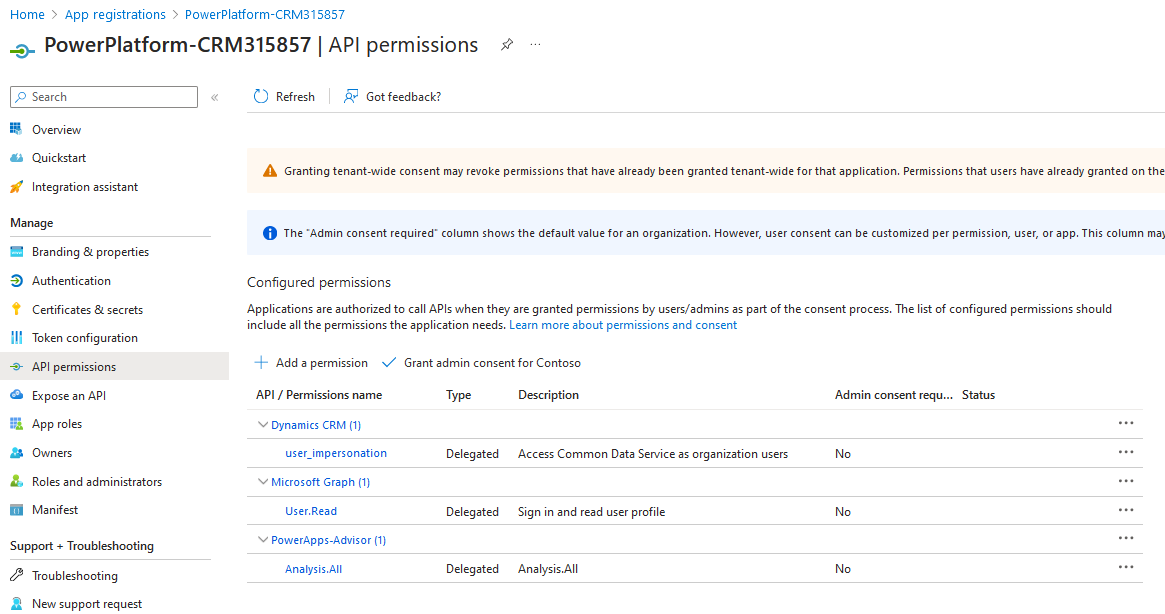
And correct permissions have also be added.
You can see your new application user in the Power Platform Admin Center.
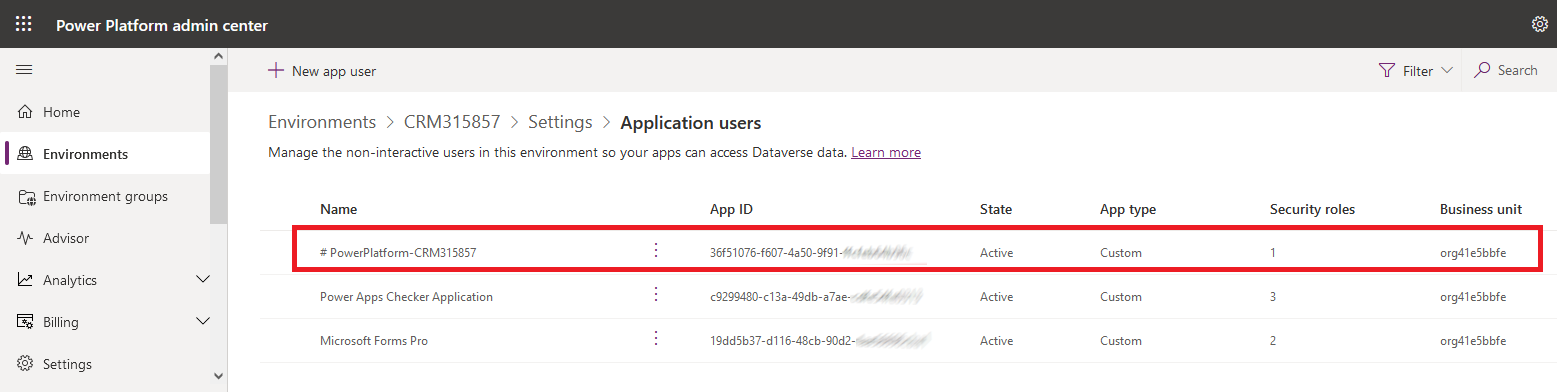
The application user has the security role 'System administrator'.
It is the default security role when you use the command pac admin create-service-principal.
If you want to associate another security role you have to use the option --role.
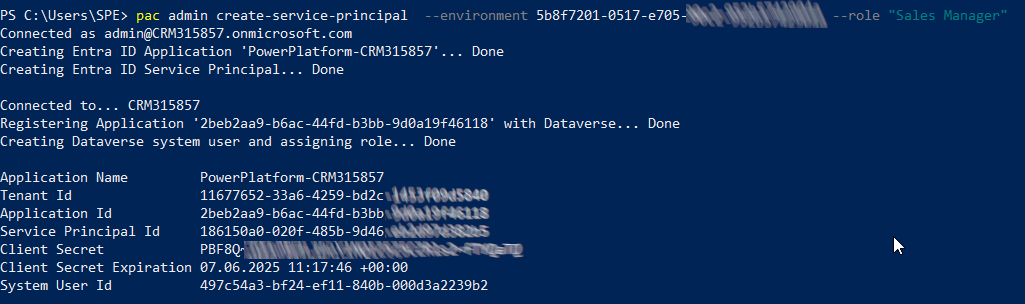
pac admin create-service-principal --environment <env id> --role <role>
Where <role> is the name or ID of security role to be applied to the application user.
Below the command to create a service principal with security role 'Sales Manager' assigned to the application user.
Create a service principal with Power Platform CLI