

Dataverse for MS Teams. This article can be completed by this previous one introducing integration between Dynamics 365 and MS Teams.
Presentation
History
The history of this new features is a real soap opera !
Let's review it from the beginning.
- In July 2020, a new feature was announced named Dataflex, and the CDS was renamed in Dataflex Pro.
- A few days later, the term Dataflex for Teams is used for Dataflex.
- But a litigation from the owner of the trademark “Dataflex” forced Microsoft to rename their products. Then Dataflex for Teams became Project Oakdale, and the Dataflex Pro reverted back to CDS
- But these names were temporary. At the end, CDS is now called Dataverse and the Project Oakdale became Dataverse for MS Teams
Dataverse, the new CDS
As we just explained, Dataverse is the new name for CDS. But it is not only the main name that changed. Responding to customer feedback, they also changed some terminology terms. It is now more similar to SQL vocabulary.
| CDS terms | Dataverse terms |
|---|---|
| Entity, entities | Table, tables |
| Field, fields Attribute, attributes |
Column, columns |
| Record, records | Row, rows |
| Option set, multi select option sets Picklist, picklists |
Choice, choices |
| Two Options | Yes/No |
Dataverse for MS Teams
It is a limited CDS environment created for each team in Microsoft Teams. You can easily create Apps, workflow and chatbot directly through Teams. The good point is that this environment supports backup and point-in-time restore. As the environment is intimately linked to the team, the deletion of this team with also remove the environment.
There are some case that using the Dataverse for MS Teams will be very helpful.
- Dataverse For MS Teams is included in your Dynamics 365 subscription
- The licensing for Power Virtual Agents are expensive. Using Dataverse For MS Teams will allow you to create simple bot for your teams included in your current price.
- You can create all your needed components through Microsoft Teams. No need to install several software.
Pricing, limitation and solutions
You only need a Dynamics 365 subscription along with subscription for MS Teams.
But there are limitation using the Dataverse for MS Teams.
- You can only create one environment per team, up to 500 teams.
- You can't copy or reset an environment.
- The size can't exceed 1 million rows or 2Go. If you exceed this limitation, you can continue to use your environment but won't be able to create more Apps, chatbot or workflow. You can check the consumption of each environment through the Power Platform admin center -> Resources -> Capacity -> Microsoft Teams Capacity
- As it is a light version of Dataverse, keep in mind that all premium feature as connectors can't be used for free. If you're not aware of the premium functionalities, it can become really expensive
If these limitations is an issue, you can at anytime upgrade your Dataverse for MS Teams to Dataverse. After the upgrade is complete, your environment will have the full capabilities found in Dataverse. You can find a documentation of the upgrade process here.
Start using Dataverse for MS Teams
In the following tutorial, we will create a simple canvas app that will be used within your team. It will let any user of the team to add suggestions.
Then we'll create a simple chatbot that could be used in Microsoft Teams.
Prerequisites
You only need a Dynamics 365 subscription, and to download and install the Microsoft Teams software.
My first canvas app on Teams
A few months ago, a chronical has been written about the Integration between Dynamics 365 and Microsoft Teams. At this time, it wasn't possible to create canvas through Microsoft Teams.... but that was before !
So once Microsoft Teams is installed on your computer, open it and connect with your Dynamics 365 credentials.
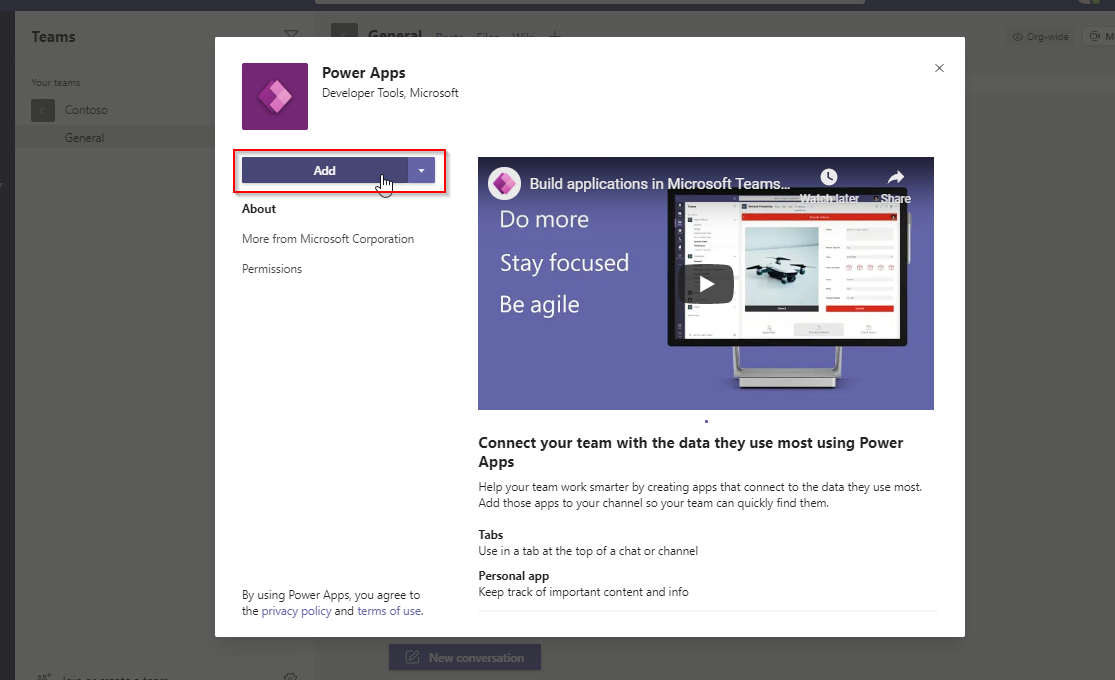
On the left pane, you will see the list of default application. We will need to add the Power Apps one.
Click on the dots (...) at the bottom of the list, and search for powerapps. you can right click on it and click on Pin to have it on your left pane permanently.

If it is the first time you open it, a popup will be displayed to install this new app. Just click on Add.
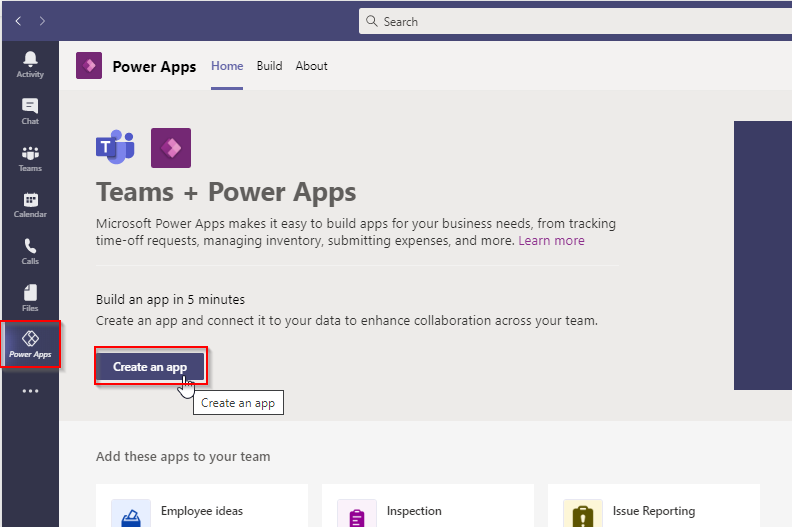
Once this installation is done, the homepage of powerapps will be displayed.
To create a new app, click on the button Create an app.
You must now choose which team will have access to this new canvas app.
In my case, I selected the default Contoso team but feel free to create a new team in Microsoft Teams before creating your app.
After selecting your team, click on Create.

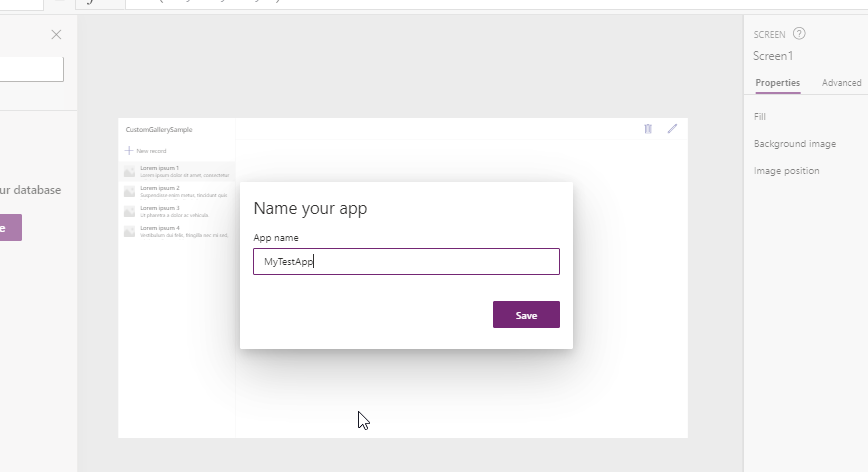
Now enter the name of your application and click on Save.
After saving, the creation page of your new application is displayed and you can start the building of your app.
If you already created a canvas app through make.powerapps.com, it won't be a change of scenery for you.
For the other ones, a tutorial will soon be available on this website. Meanwhile, you can find nice documentation on internet.
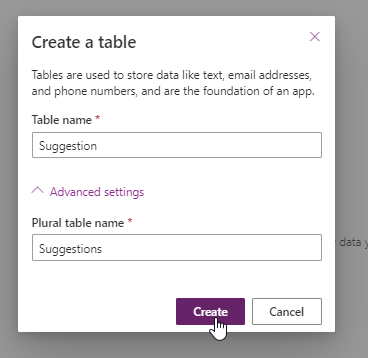
Now we are going to create a new table (remember, it is the new entity) called Suggestion to collect them.
For that, go to Data and click on Create new table. if you want, you can also click on Add data to find a lot of different connector to get data from others sources like excel, dynamics or many others.

Enter a name. In the advanced settings, you can add the plural name exactly when you created a new entity in Dynamics 365.
Then click on Create.
Now you can define the columns. By default, you have a column Name. You can of course rename it. But if you want to change the type of a created column, you will have to delete it and recreate it again.
Let's add a new column by clicking on Add column or on the big +.
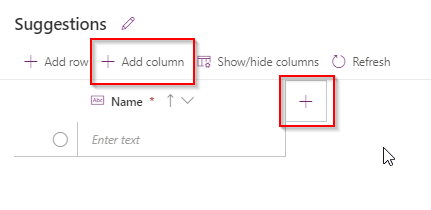
You can define the name of your new column and its type. You can see the all list in the printscreen below.

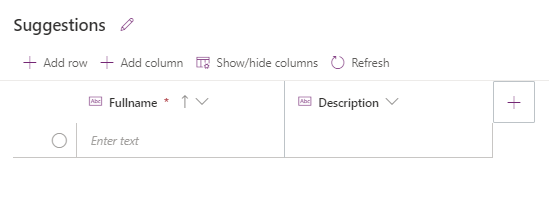
For my example, I have two columns. The fullname of the one who suggest and the description of its suggestion.
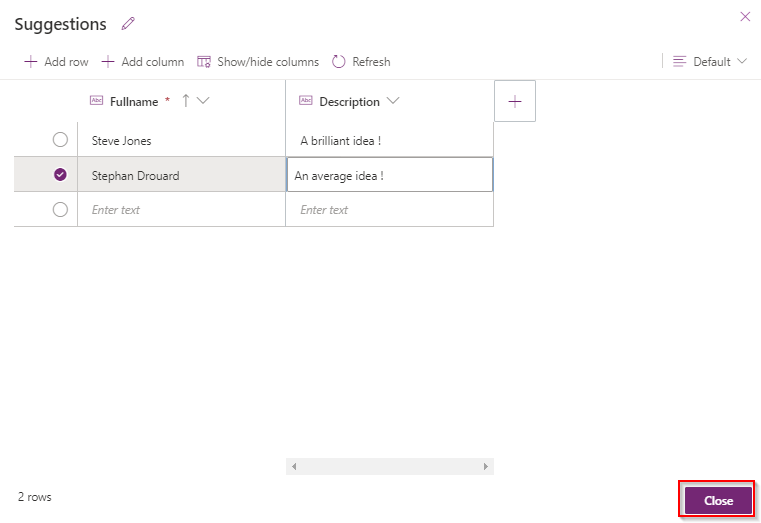
I also added manually data in my table but you don't have too. It is just for my example.
Then click on Close.
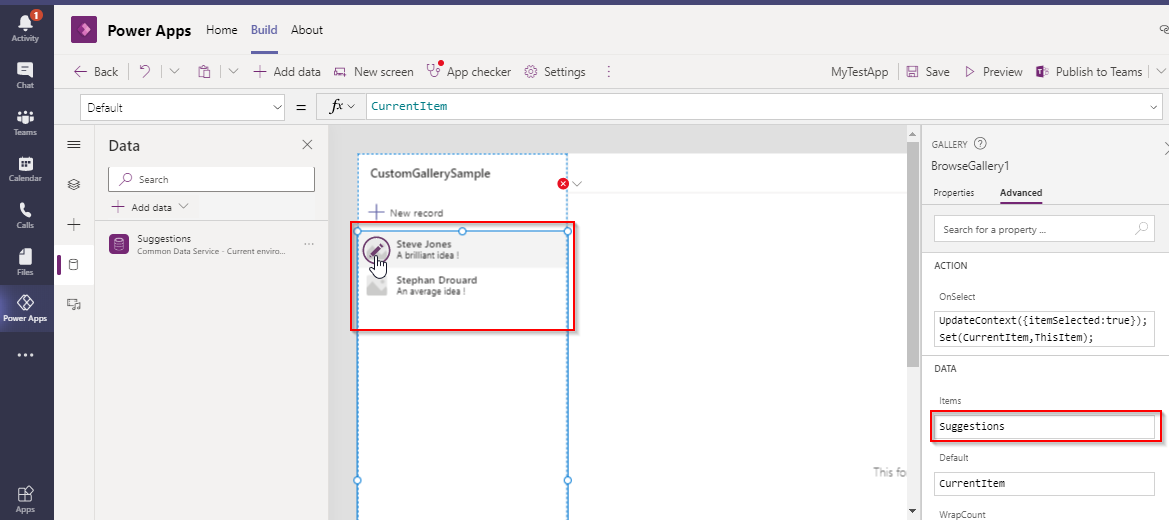
Now let's go back to our app. In the data panel, you can see that our new table Suggestions is now available, and it is delivered with the fully CRUD functionalities !
Click on the Gallery and set the Items property with your new tables. You will see all the data containing in your table been displayed in the list.
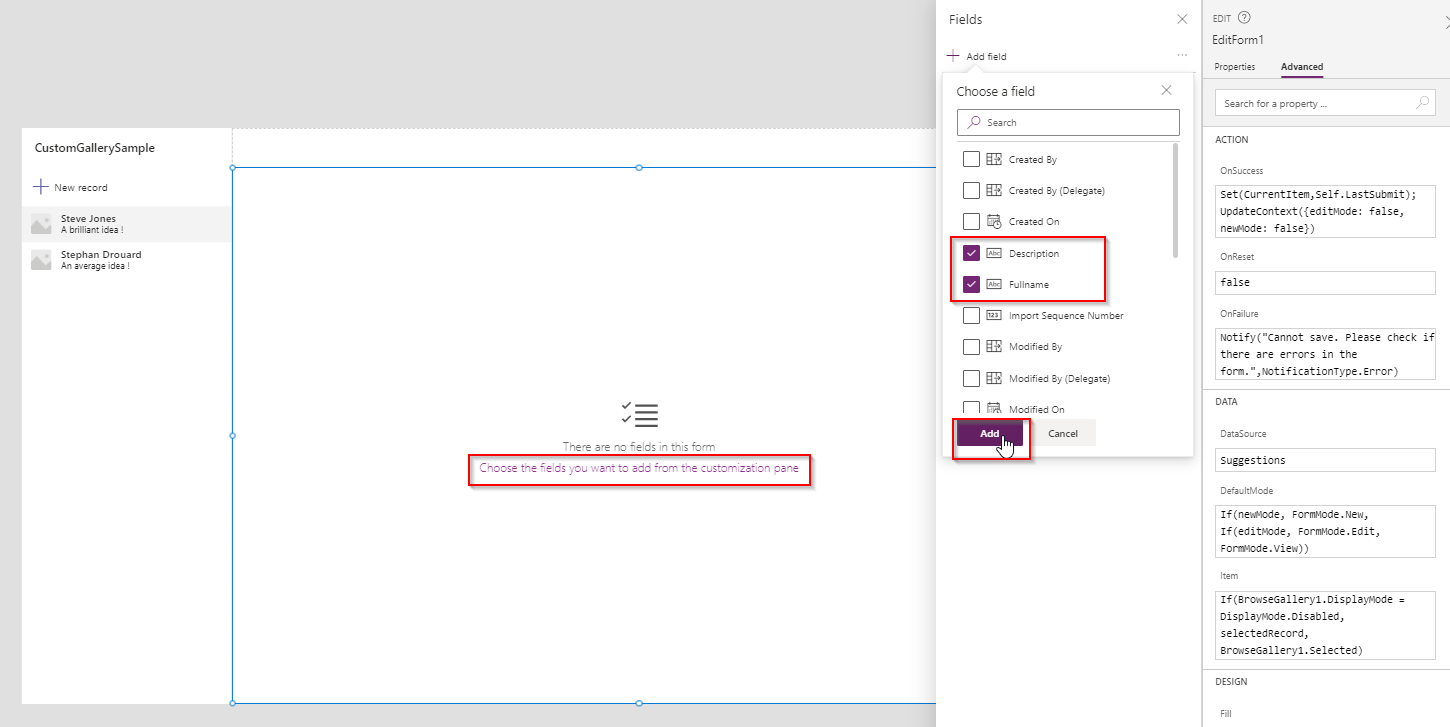
Now, click on the form in the middle and set the DataSource with your new table.
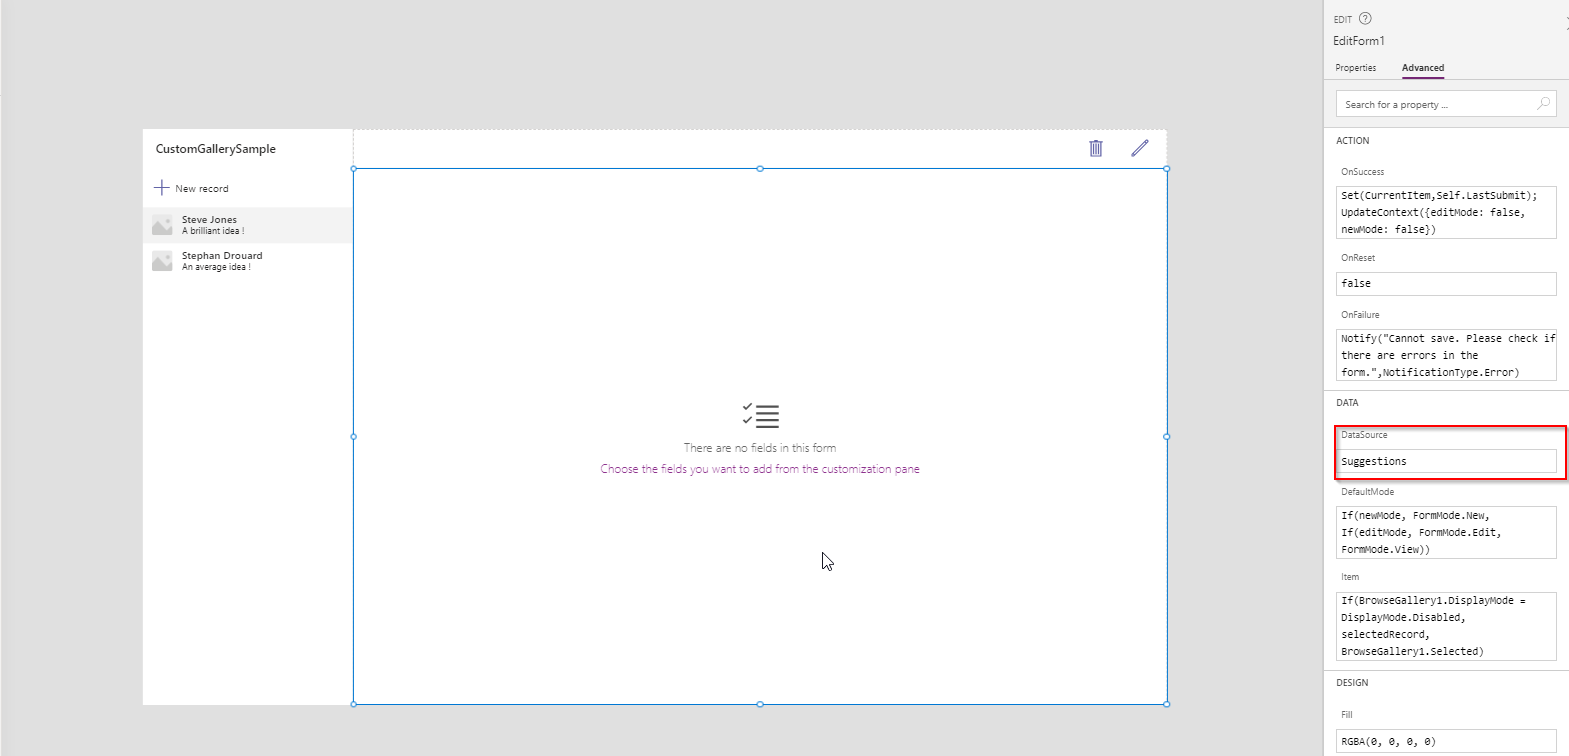
By clicking on Choose the fields you want to add from the customization pane, you would be able to add all the fields you want to display in your form.
It will create fields form following the type of each chosen fields.
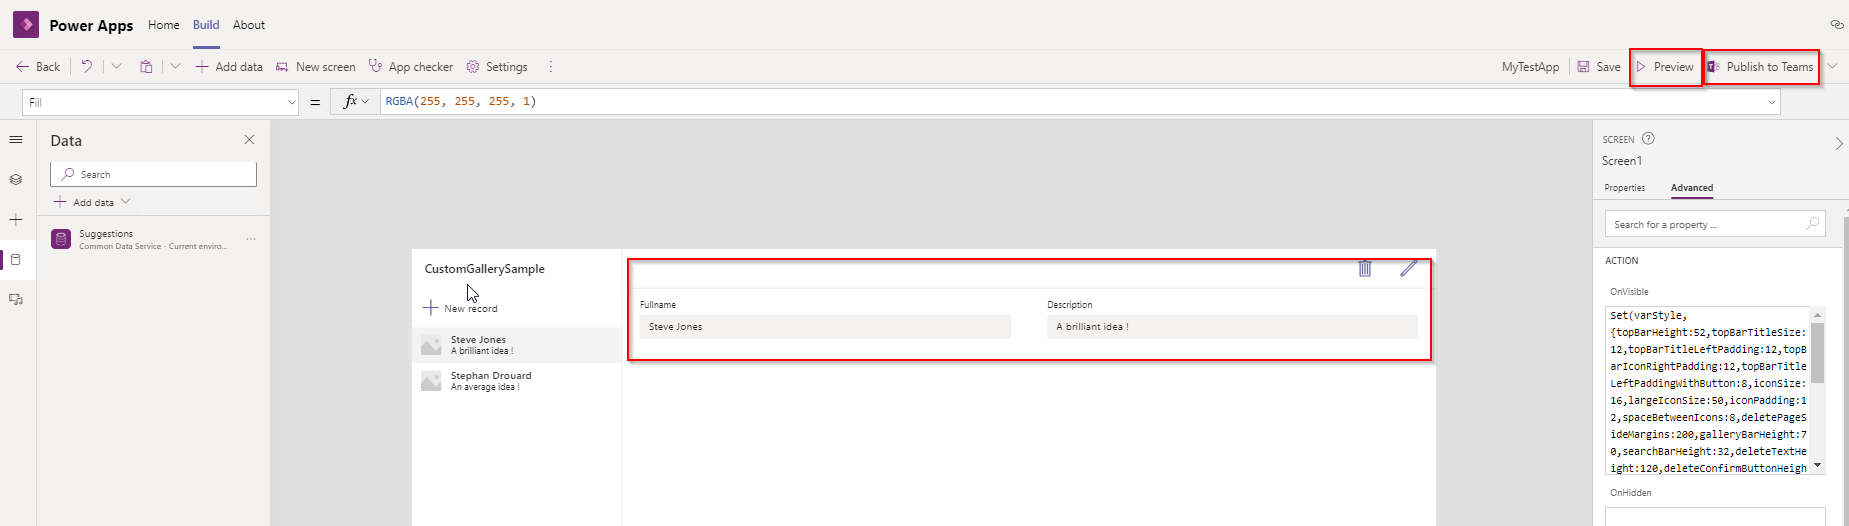
Now that we have our form, you can test it thanks to the Preview button at the top or by pressing F5.
When you app is ready for deployment, click on Publish to Teams at the top.
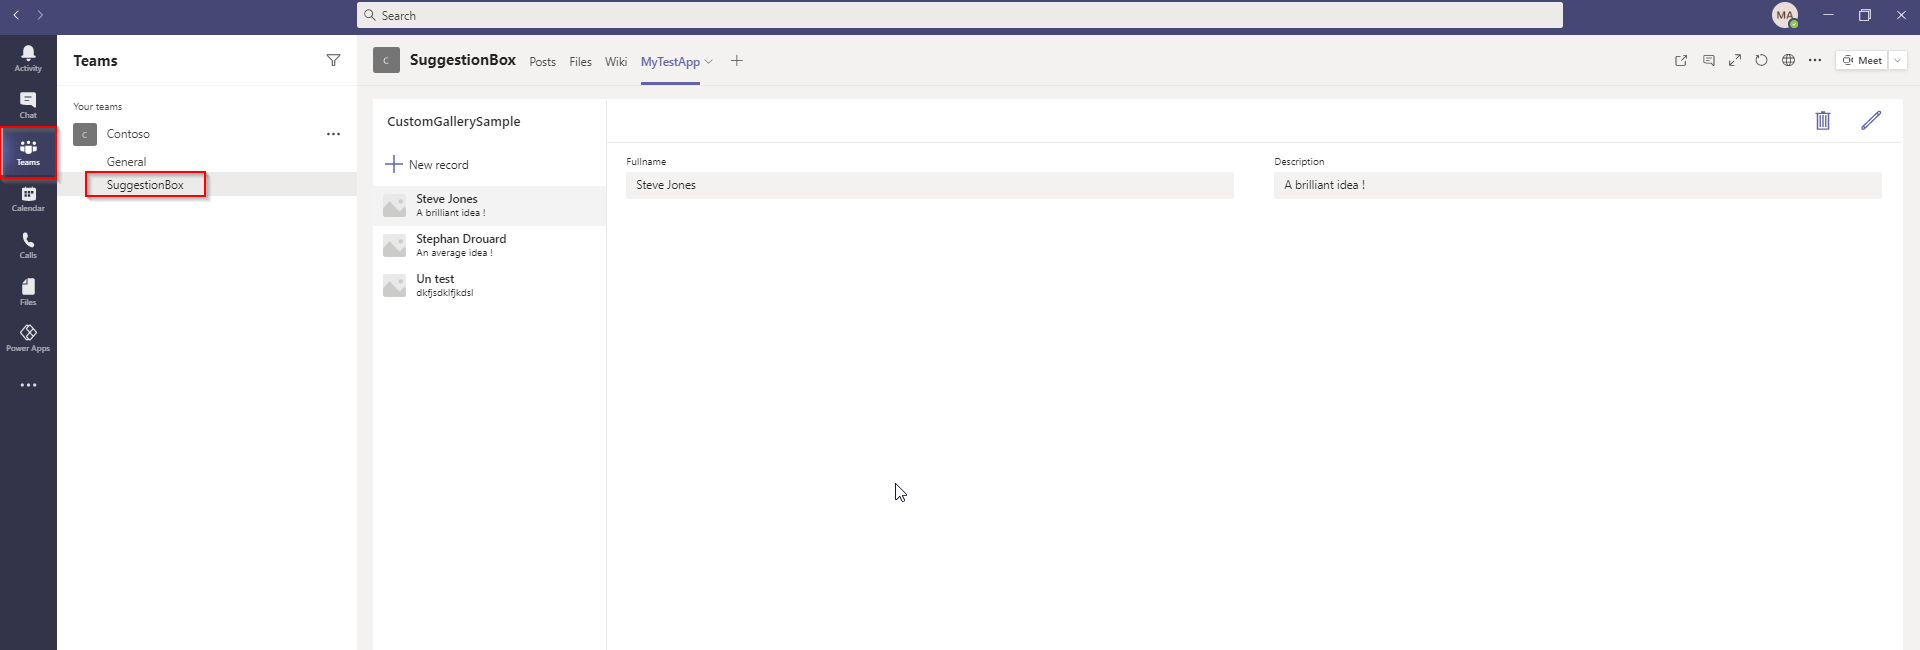
On the next screen, you will choose which team will have access to this app. For the purpose of this tutorial, I created a custom channel called SuggestionBox into my default Contoso team.
By clicking on the +, I will add a menu in this channel to access my new App.
Then Save and Close.

Now go to your Teams -> the SuggestionBox channel. As you can see, MyTestApp is now available in the menu of my channel.
By clicking on it, I can use my new app and start adding suggestions !
My first chatbot on Teams
Once Microsoft Teams is installed on your computer, open it and connect with your Dynamics 365 credentials.
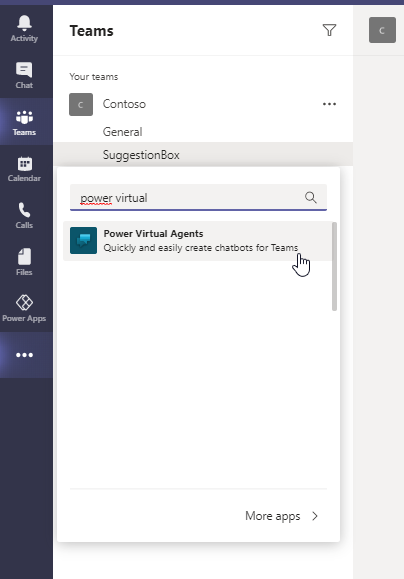
On the left pane, you will see the list of default application. We will need to add the Power Virtual Agents in order to create ChatBot.
Click on the dots (...) at the bottom of the list, and search for power virtual agents. you can right click on it and click on Pin to have it on your left pane permanently.
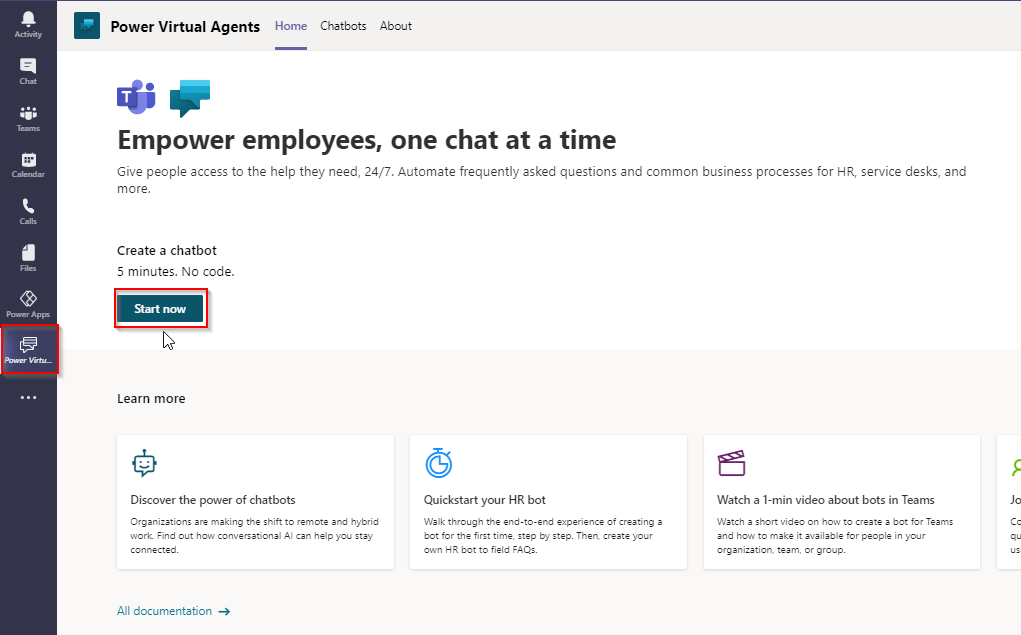
Once this installation is done, the homepage of Power Virtual Agents will be displayed.
To create a new chatbot, click on the button Start now.
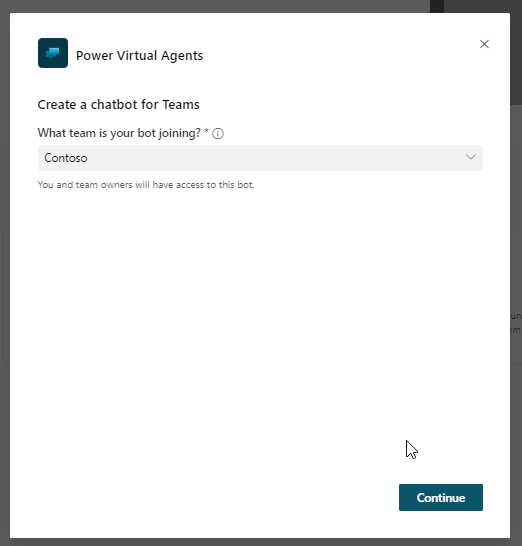
You must now choose which team will have access to this Chatbot.
In my case, I selected the default Contoso team but feel free to create a new team in Microsoft Teams before creating your chatbot.
After selecting your team, click on Create.
Now enter the name of your new bot. You can also select the language you want to interfere with your robot.
Then click on Create.

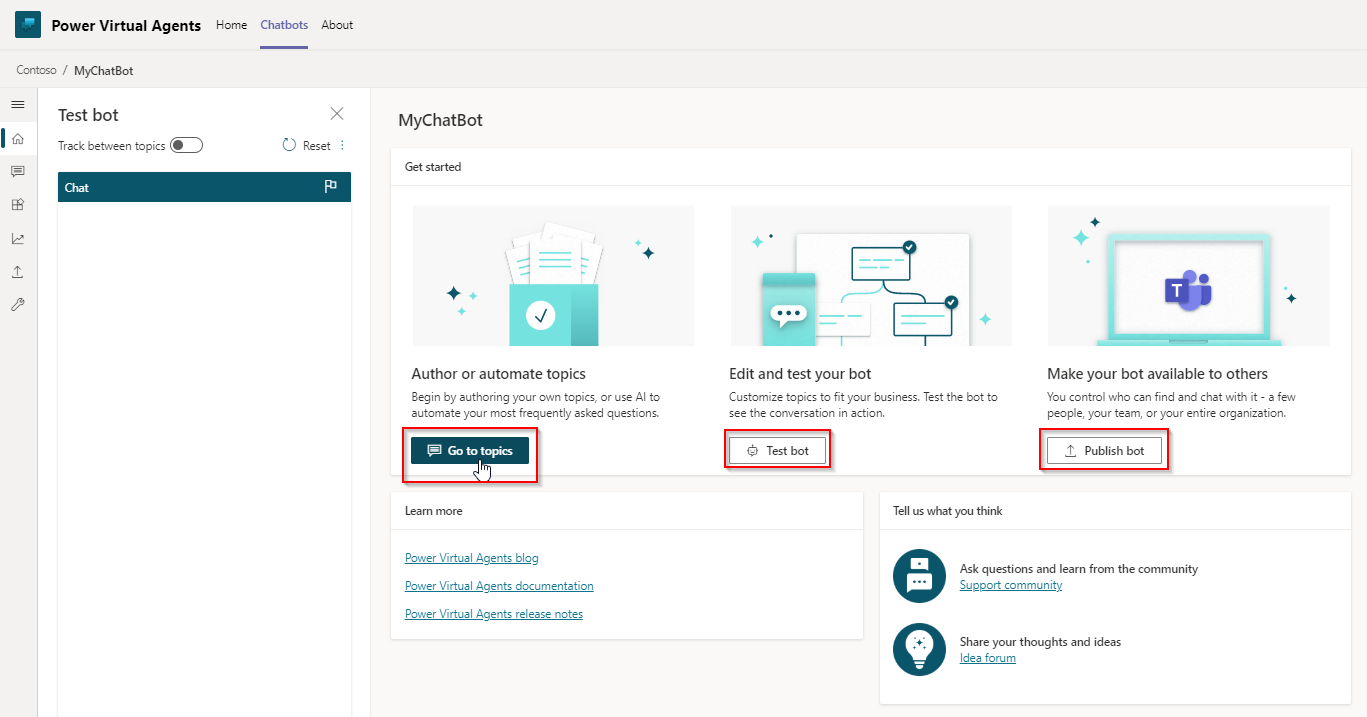
This action will create a default chatbot with pre-set automatic answers.
On the homepage of your new bot, you have different action available:
- On the left side, you can test you chatbot at anytime.
- Go to topics will display every interaction topics set for your bot.
- Test Bot will display the left pane side to test your bot
- Finally, Publish bot will make your bot available for a defined team.
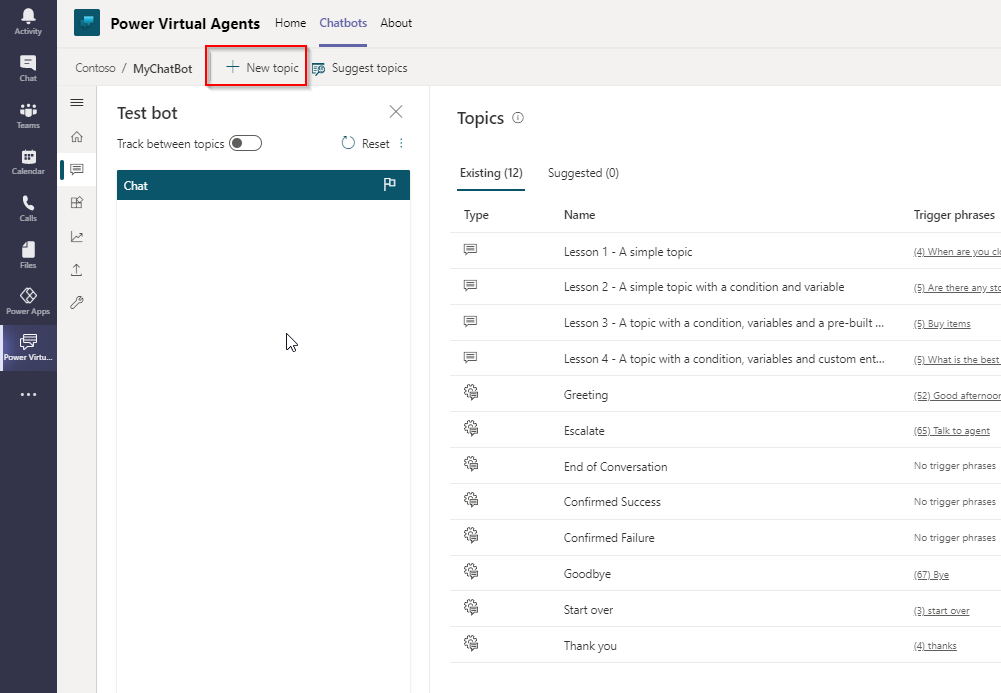
Let's click on Go to topics to enrich our bot by creating a new topic.
As I said earlier, when creating a new bot, it will automatically add pre-set topic. You can modify or delete them as you wish.
Let's create a New topic by clicking on the button at the top.
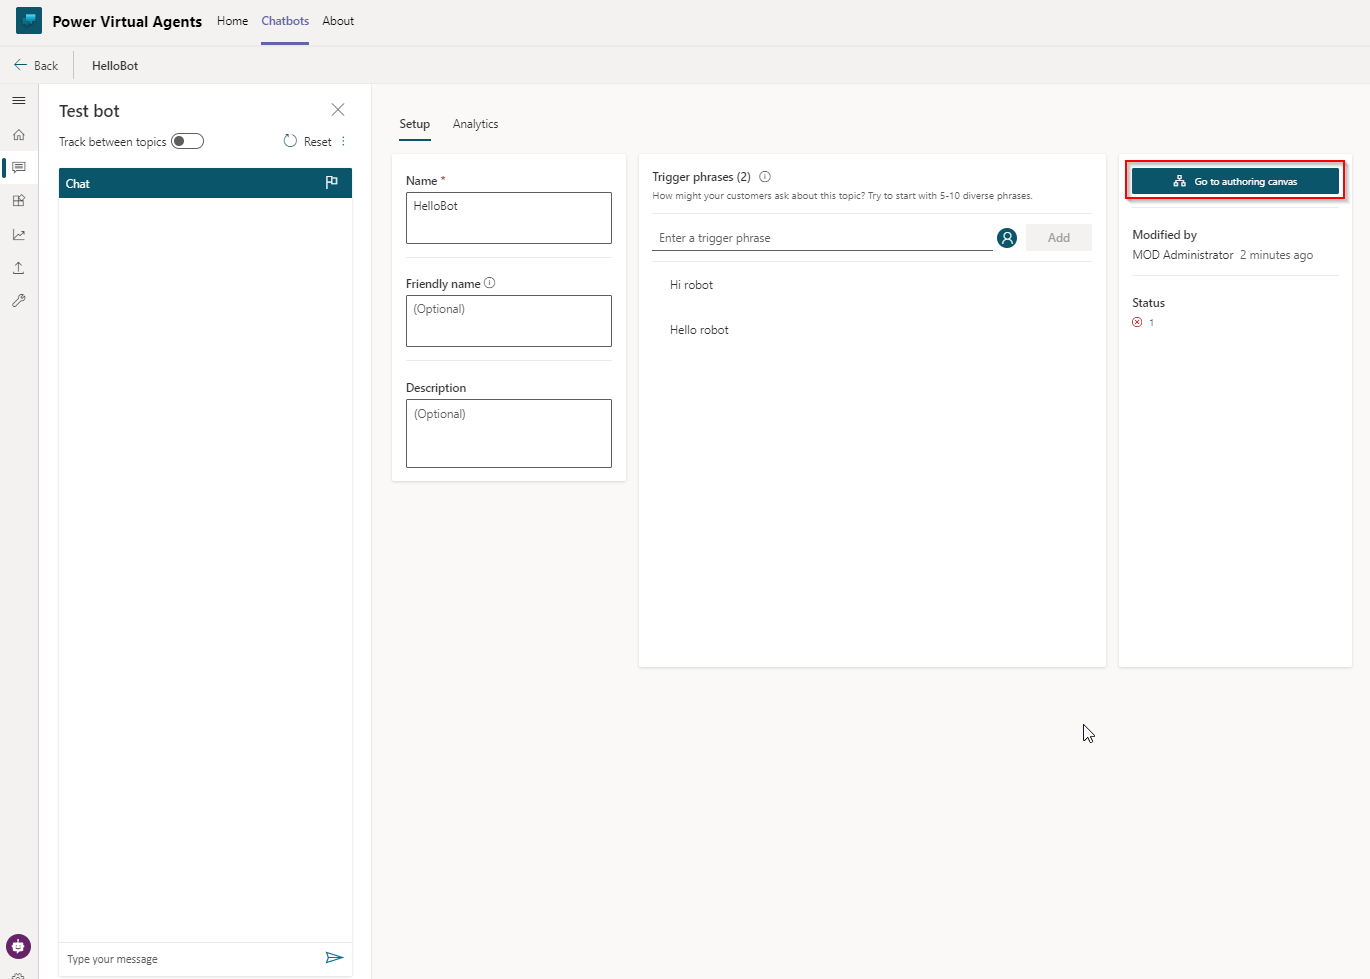
First set the principal information of your bot, like its name and its trigger phrases.
Trigger Phrases are the sentences that the user will have to type to enter this topic.
For the example, I added the term Hi robot, and Hello robot. These triggers are NOT case-sensitive.
Then click on Go to Authoring canvas to start defining your bot answers workflow.
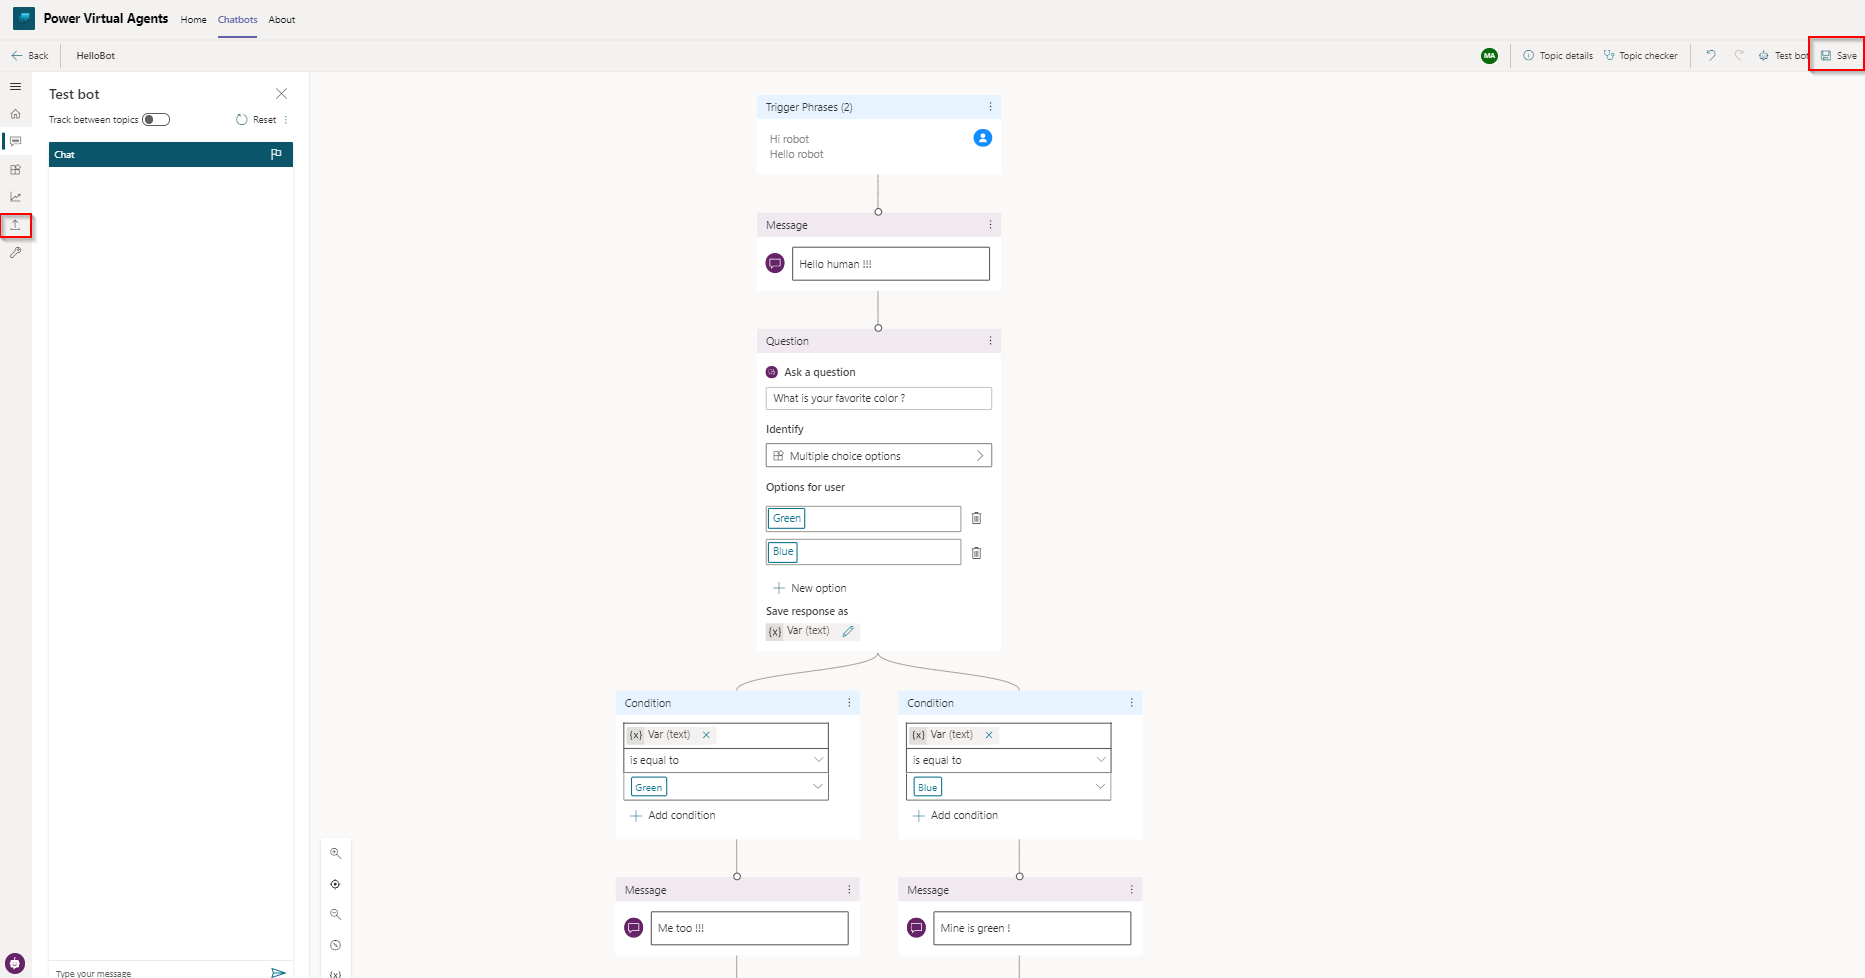
In the example below, I invented a dialog where the bot will ask me wat is my favorite color and answer me different thing following my own answer.
When you're done with your workflow, save it. If you need to test it, use the left panel.
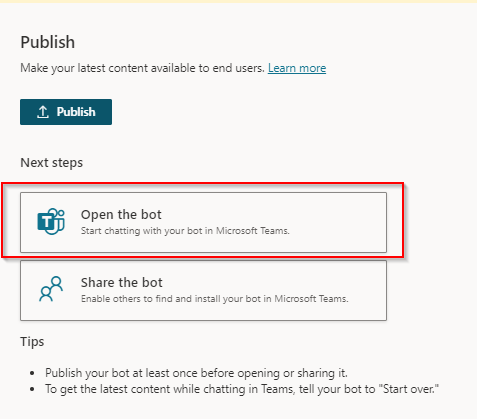
If you're happy with the result, click on the publish button on the left side of the screen (see below in red square) to access the Publish screen.
On the new screen, click on Publish.

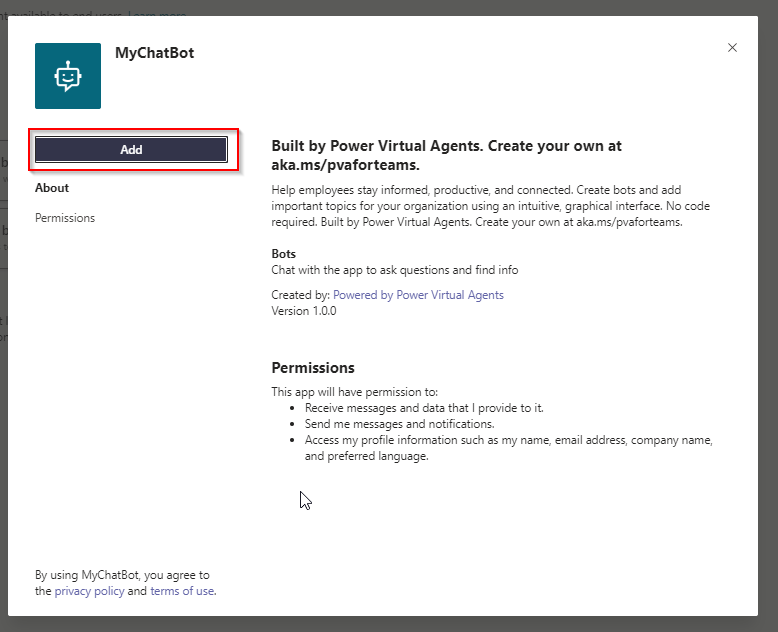
Now click on Open the bot in order to install it in your Microsoft Teams.
Click on Add to finish the installation
Your chat bot is now ready to be used. Once again, you can pin the menu on the left menu by right clicking on it.
As you can see below, the new topic we created is now functional!

You can now create your own chatbot really easily and really quickly, and thanks to Dataverse For MS Teams, you can do it directly though Microsoft Teams !
Quick review
Dataverse for MS Teams is a really great way to set a nice environment quickly and at a cheaper price.
It will also be time saving to create these things directly through one and only one software: Microsoft Teams.
Now it's your turn to enjoy Dataverse for MS Teams !
Dataverse for MS Teams

Comments
A few corrections
Stephan, thanks for the detailed review. Especially appreciate the step by step guide on how to create your first app.
A couple of quick clarifications. You do not need a Dynamics 365 license to use Dataverse for Teams. You need M365 license (i.e. it is seeded in most Office licenses). Second, the 500 limit was recently relaxed. Now you can have up to 10000.