Dynamics 365: Data Migration with SSIS KingswaySoft and PowerPack
No matter what industry you work in, there’s a high chance that your company will need to transfer large sets of data from one platform to another at some point. Known as data migration, this process can help your company store a larger amount of data at a time, maintain the integrity of said data, and boost productivity. There is no exclusion for Dynamics 365 and its customer. The company not only need migration to maintain data from other platform but also expand their system to connect with multiple platforms. It leads to data transformation become more and more important.
Before starting, SSIS is compatible completely with both Online and On-premises version with the same supports and features. The only difference is the login method, for example we use Active Directory authentication in On-premises while the Online version supports various login methods like using client ID and secret key, username and password,... . Moreover, the online version leverage the power of integration between multiple systems due to its easy connecting, we totally could deploy the package to Azure and use in Data factory to connect and communicate to all system likely.
In this article, I would like to share how to migration and integration of Dynamics 365 with other platform. We will travel throw following points:
- What is SSIS?
- Migration data for Dynamics 365 with SSIS and KingswaySoft
- Migration data for Dynamics 365 with SSIS and SSIS PowerPack
- Conclusion
1. What is SSIS?
SQL Server Integration Services is a platform for building enterprise-level data integration and data transformations solutions. Use Integration Services to solve complex business problems by copying or downloading files, loading data warehouses, cleansing and mining data, and managing SQL Server objects and data.
- Install SQL Server Data Tools first. See detail here
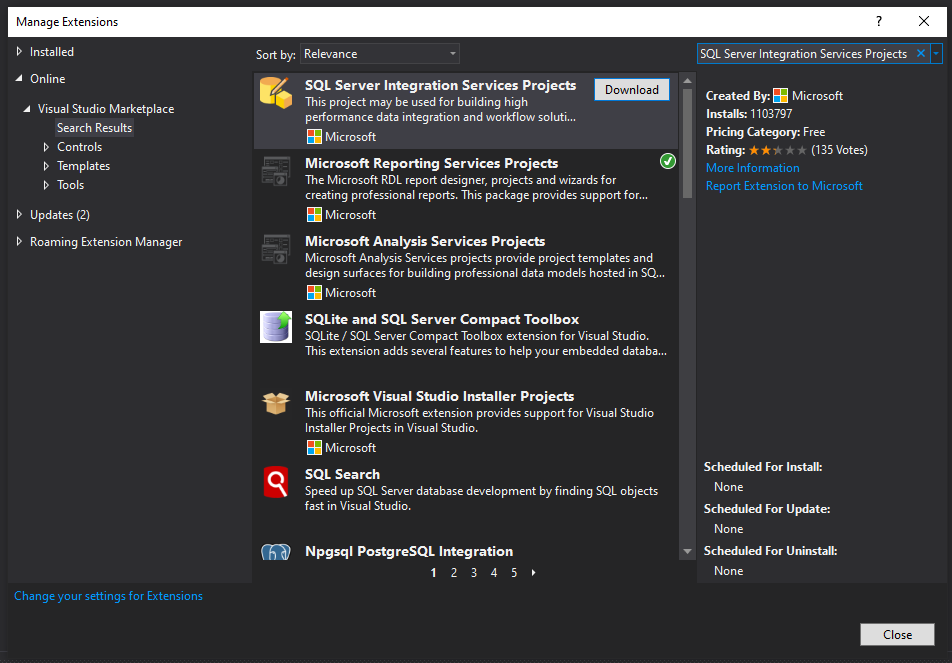
- Install Integration Services for Visual Studio
2. Migration data for Dynamics 365 with SSIS and KingswaySoft
KingswaySoft SSIS Integration Toolkit for Microsoft Dynamics 365 CE/CRM is equipped with the following four major components that help facilitate data integration and migration.
- Microsoft Dynamics CRM Connection Manager
- Facilitates the connection to Microsoft Dynamics 365 CE/CRM server.
- Microsoft Dynamics CRM Source Component
- Allows you to read data from Microsoft Dynamics 365 CE/CRM Server.
- Support to read data from the server through CRM entity, FetchXML query, EntityChanges, or AuditLogs options.
- Microsoft Dynamics CRM Destination Component
- Allows you to write data to Microsoft Dynamics 365 CE/CRM Server using its web service interfaces.
- Support for eight different actions: Create, Update, Delete, Upsert, Merge, Convert, Send, & ExecuteWorkflow
- Four matching options available when Update or Upsert action is used: Primary Key, CRM Duplicate Detection, Manually Specified Fields and Alternate Key.
- Text Lookup feature to perform a lookup to CRM records using either text or integer values as the input.
- Microsoft Dynamics CRM OptionSet Mapping Component
- Manage translation and mapping of CRM OptionSet (or picklist) field's option values
- Can be used to create new option when no match is found
Download and install SSIS Integration Toolkit for Microsoft Dynamics 365 from KingswaySoft here.
Note: This tool requires the license (free trial 30days for developers).
Integration Dynamics 365 with various platform becomes simpler since we are able to handle import/export data from various source like: Excel, SQL, JSON, Dynamics 365, Azure Blob Storage, ... by SSIS and KingswaySoft.
2.1 Import data from Excel file to Dynamics 365
In this section, I will present the steps to create a package that will import data from a Excel file to Dynamics 365
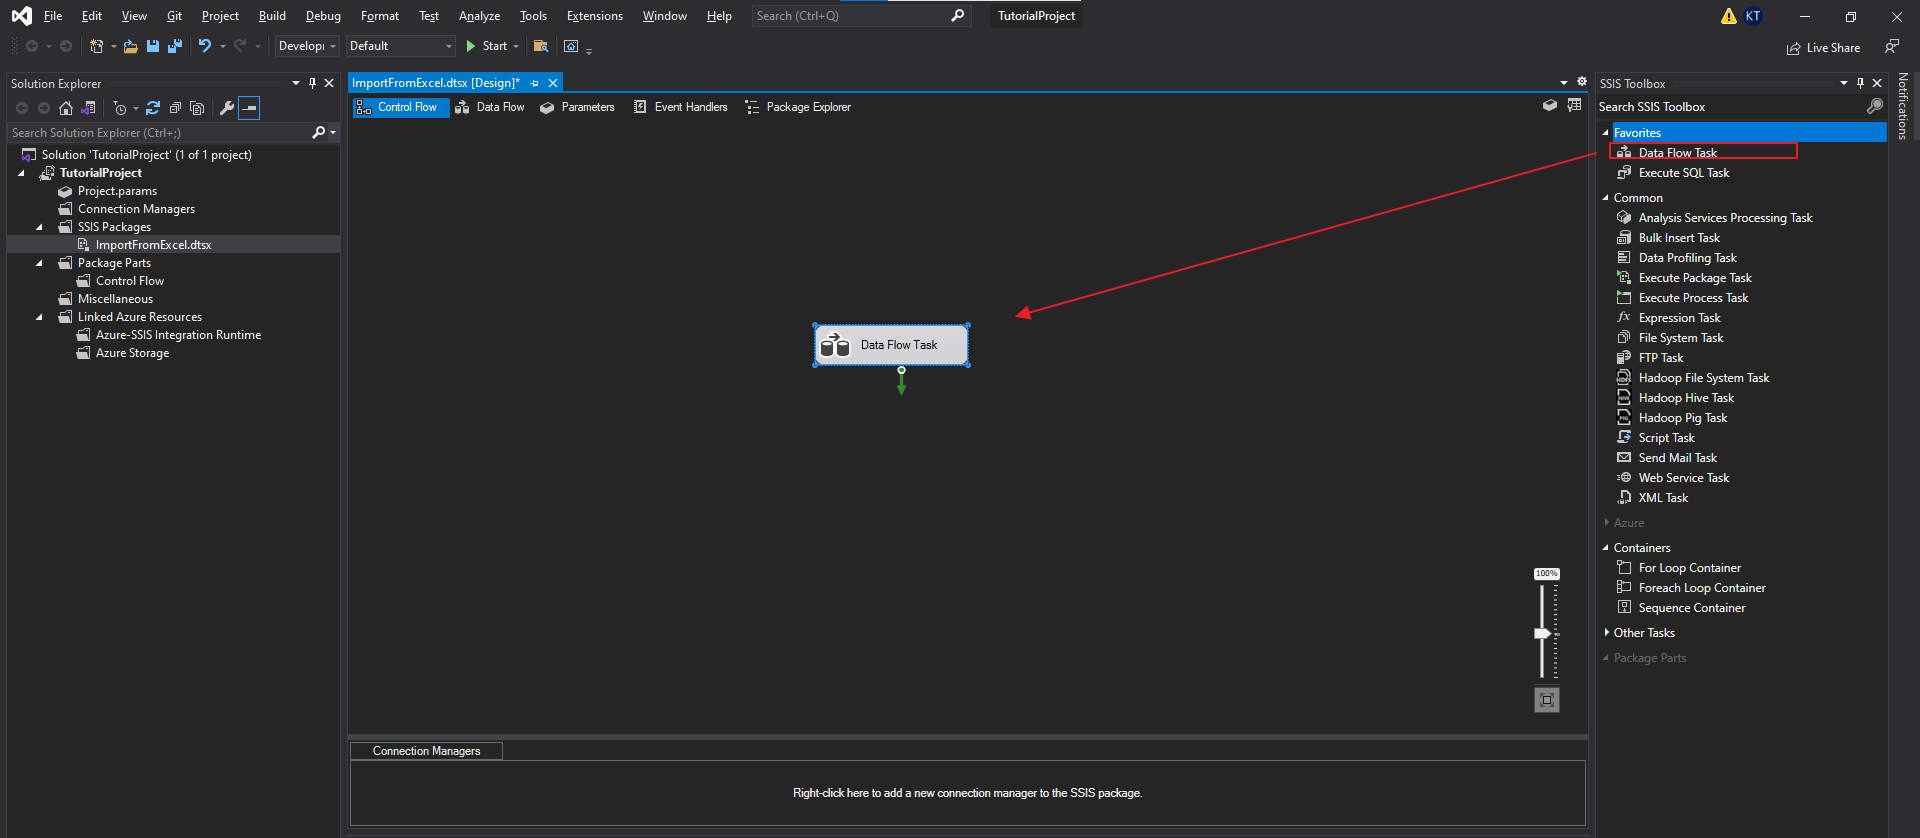
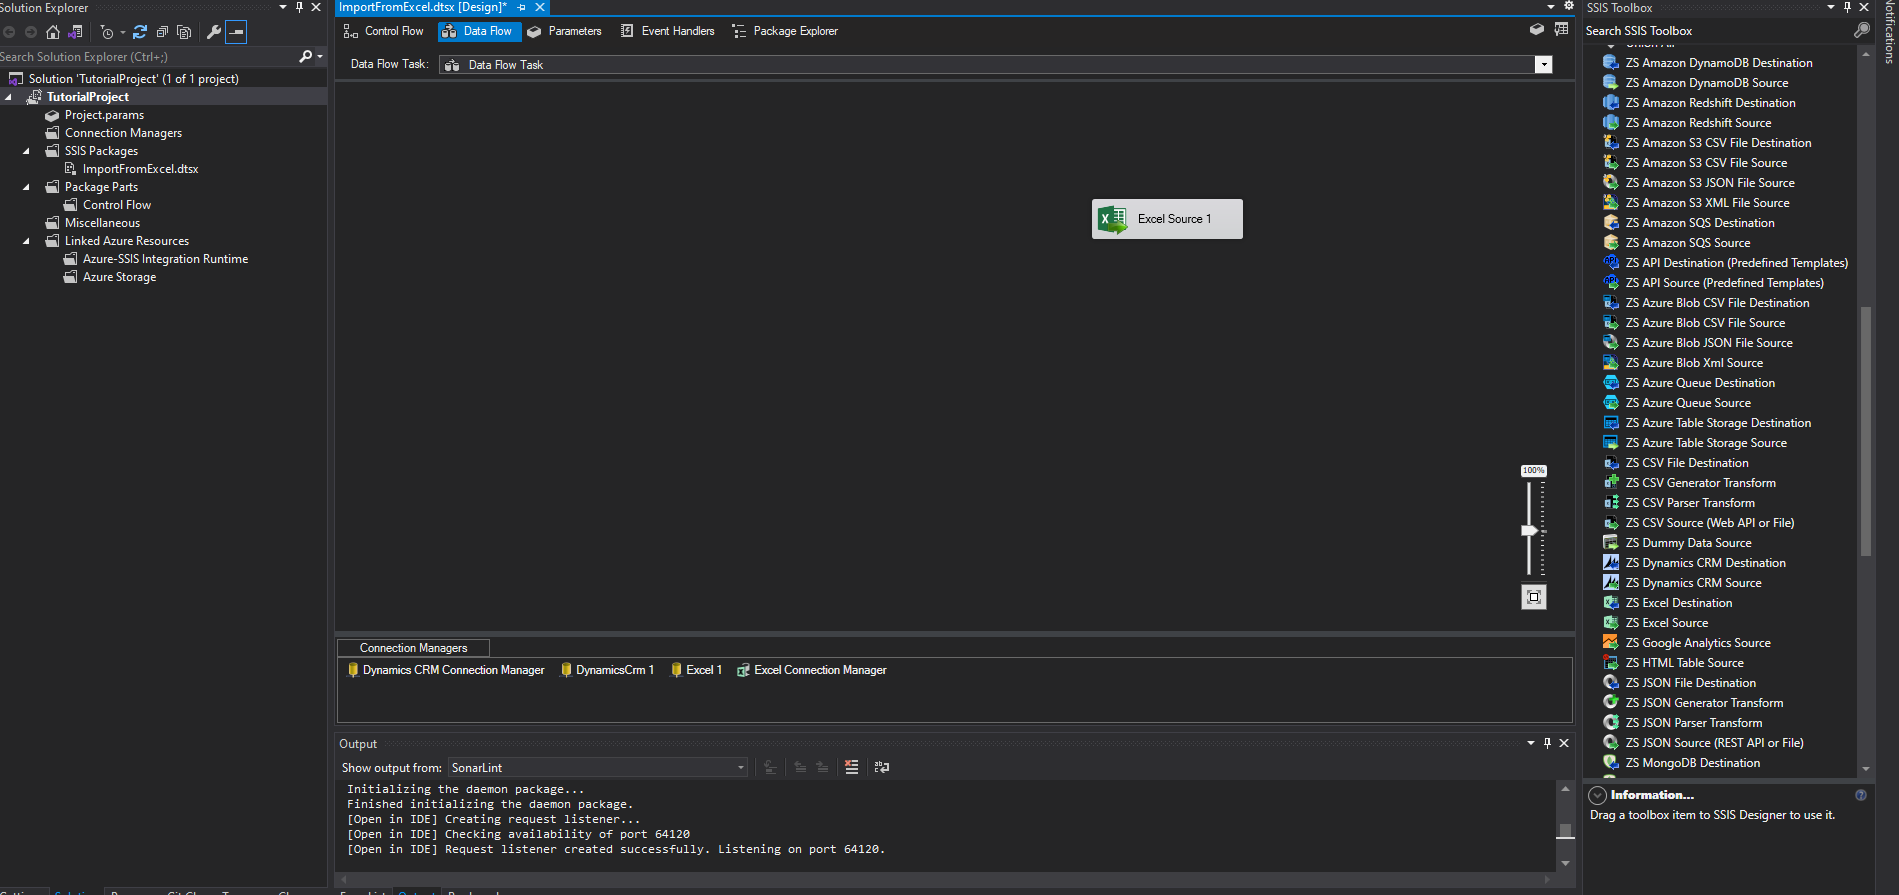
- Create a Data Flow Task: drag Data Flow Task from SSIS Toolbox to package
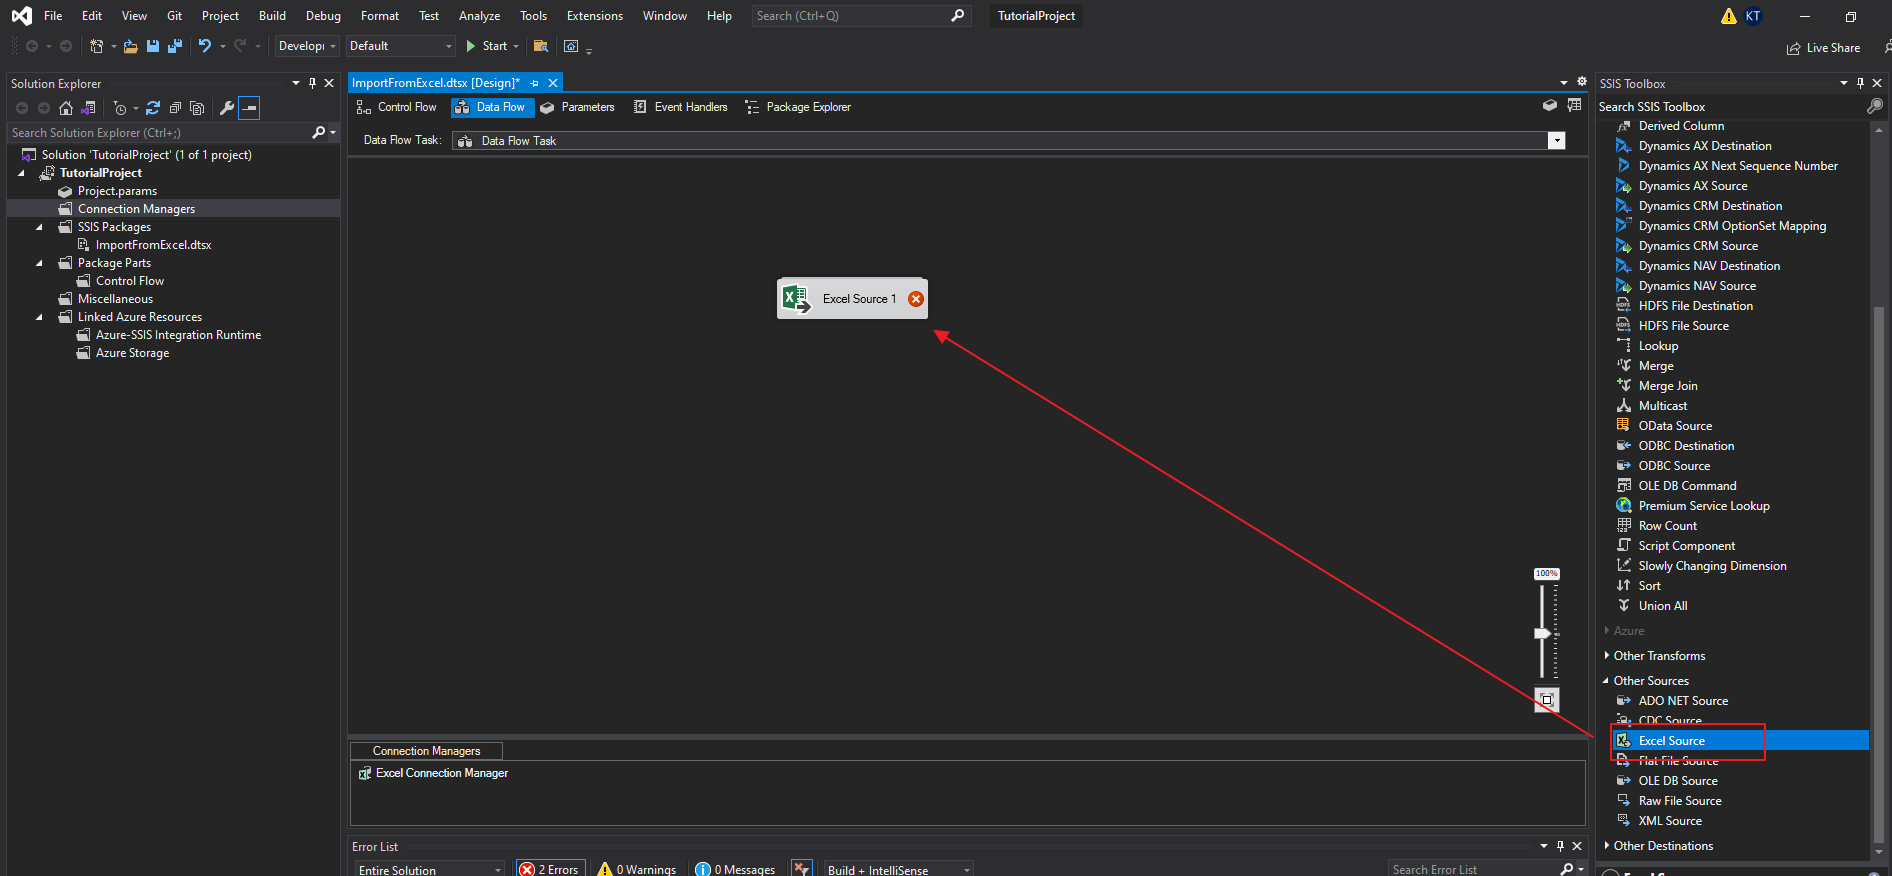
- Open Data Flow Task, add Excel Source
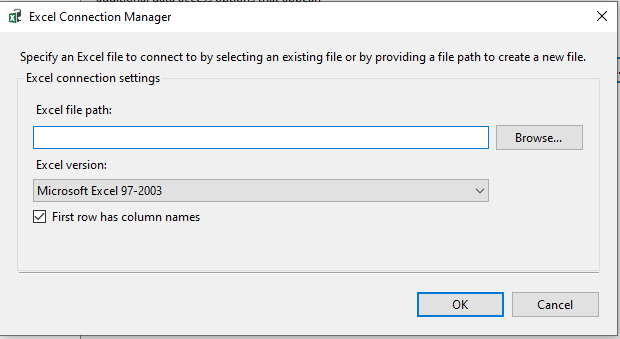
- Create Excel Connection: double click to open Excel Source connection
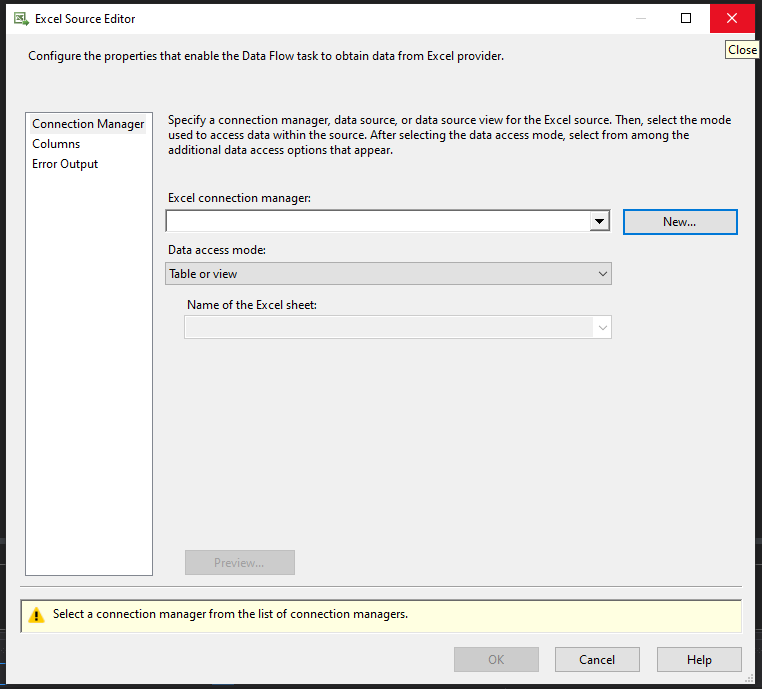
- Create new Excel Connection then choose file path to excel file
- Select sheet of excel
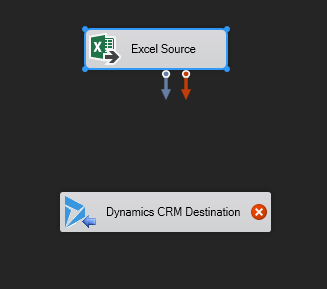
- Add Dynamics CRM Destination:
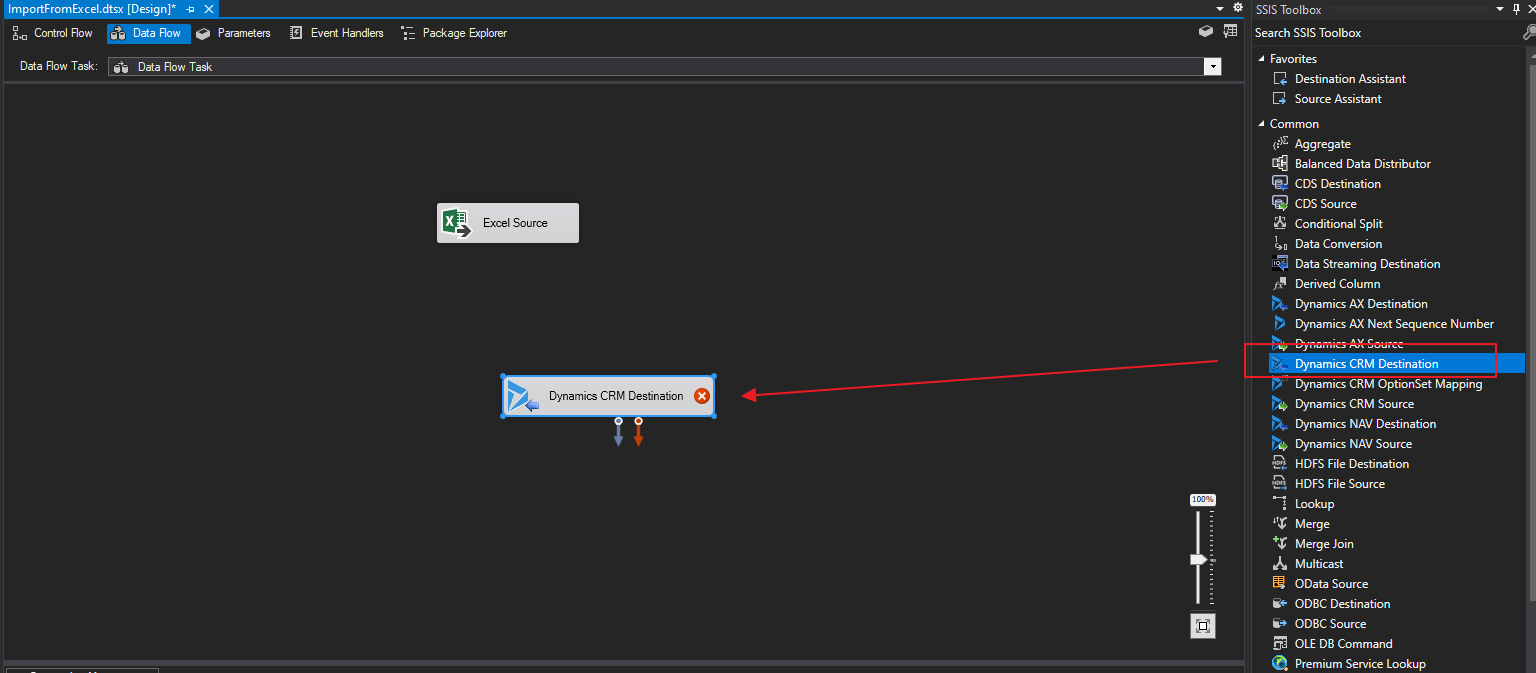
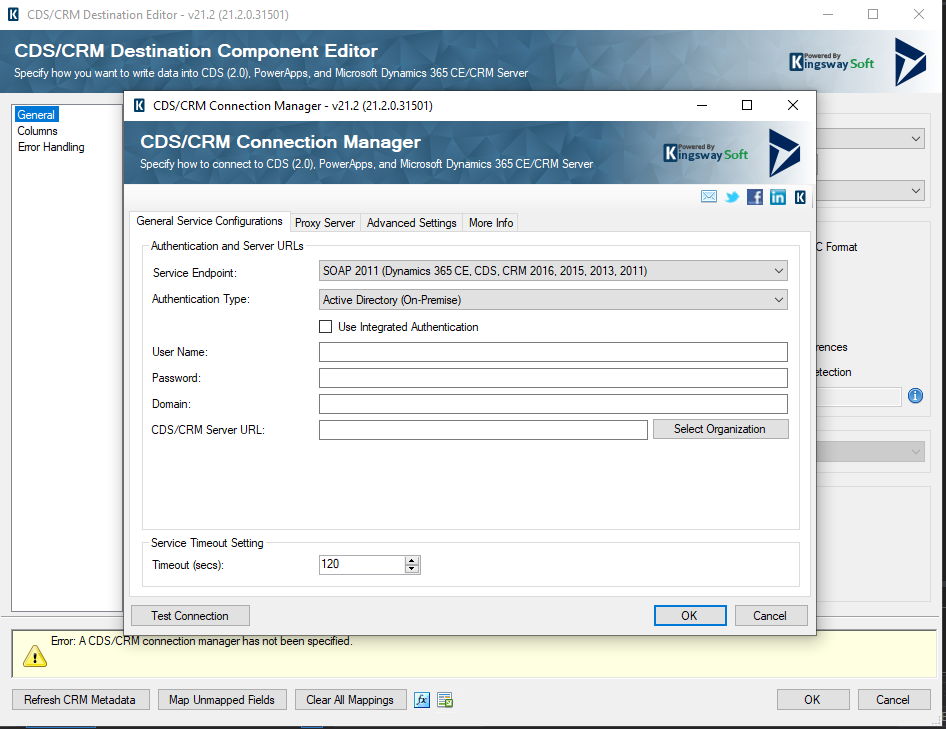
- Create connection for Dynamics CRM environment: double click to open Dynamics CRM Destination, then click New in dropdown of Connection Manager to create a connection to Dynamics 365 environments
- Link Excel Source component to Dynamics CRM Destination: drag and drop the stone arrow to Dynamics CRM Destination component
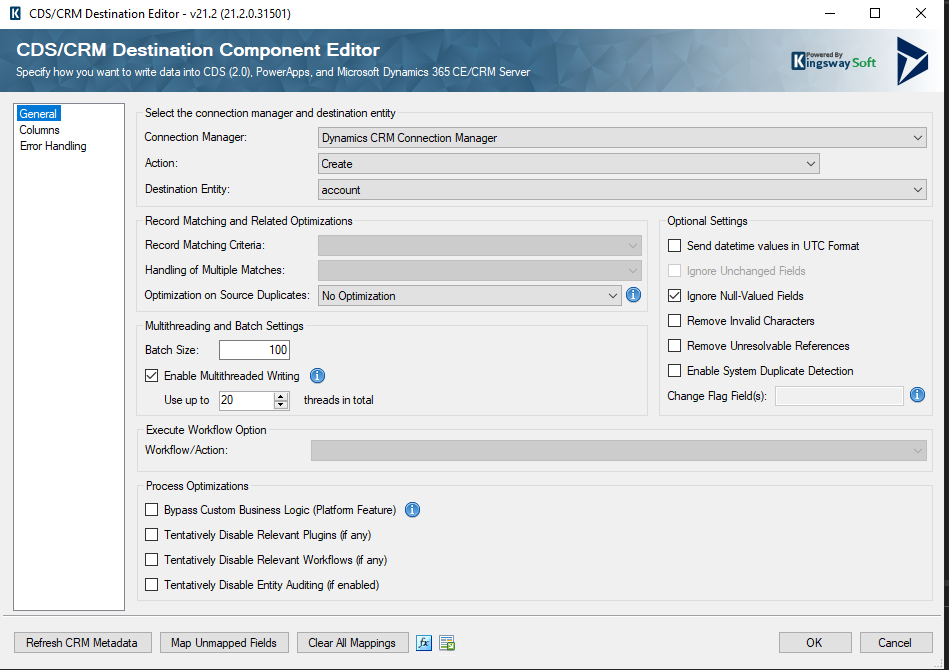
- Open Dynamics CRM Destination: Select action Create and entity Account
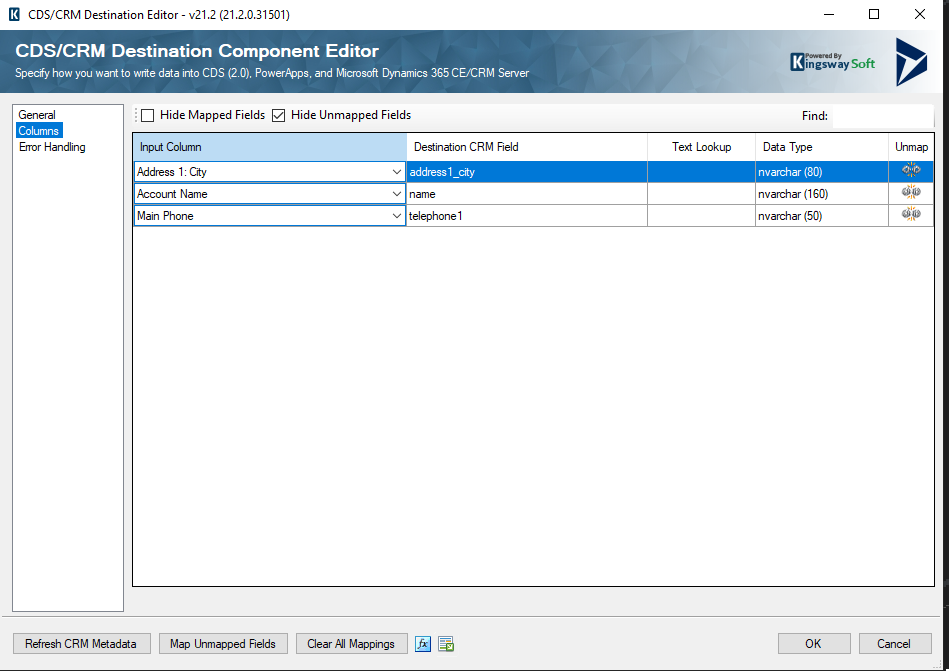
- Select tab Columns to map data between Excel file and CRM
- Execute package
- Result:
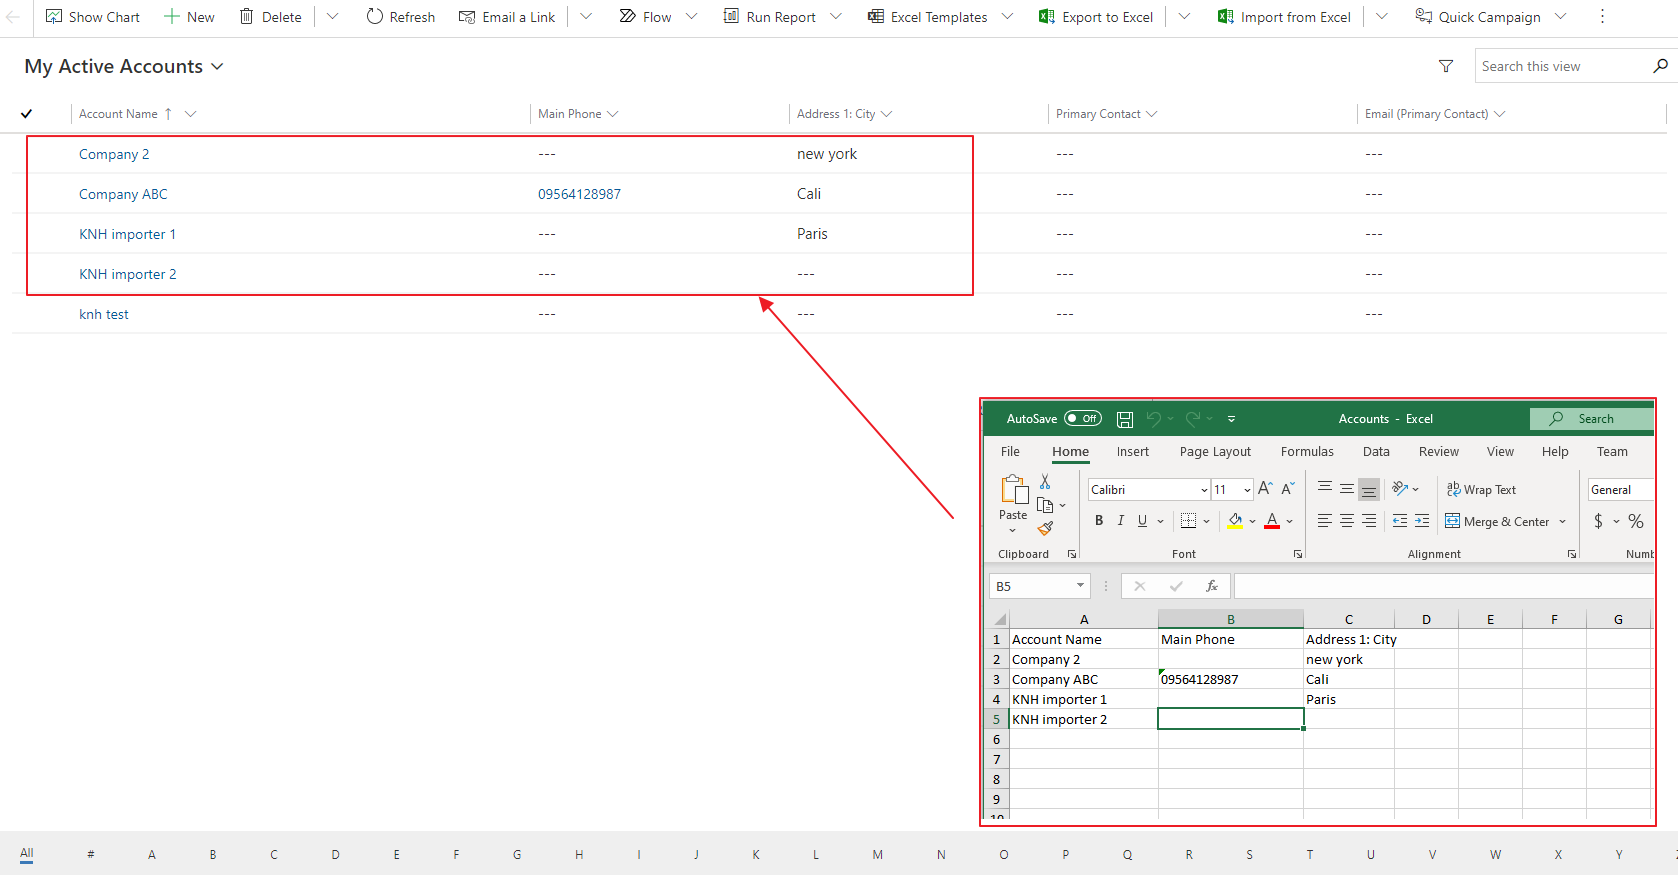
This is a simple example to show you how to work with SSIS and Dynamics 365. This tool is very powerful when work with integration among various platforms.
2.2. Handling complex fields
2.2.1 Migration with lookup field
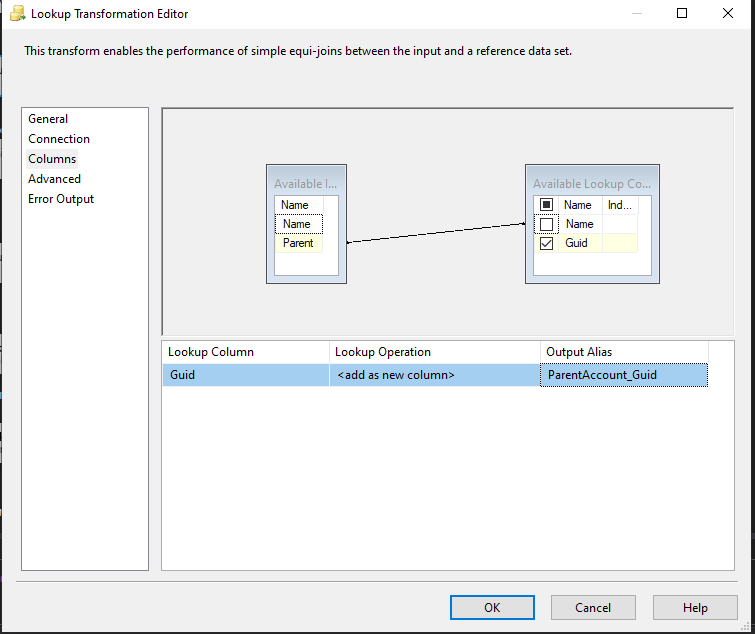
- Option 1: Using Lookup Component
Create a mapping SQL table then use Lookup component in SSIS to convert data to lookup field. In my example bellow: I convert the column Parent which contain a name of parent Account to a lookup field based on mapping field. Then in the Dynamics CRM Destination component we will have a new column named "ParentAccount_Guid"
- Option 2: Map directly in CRM Destination component
Select column that will map with a lookup field.
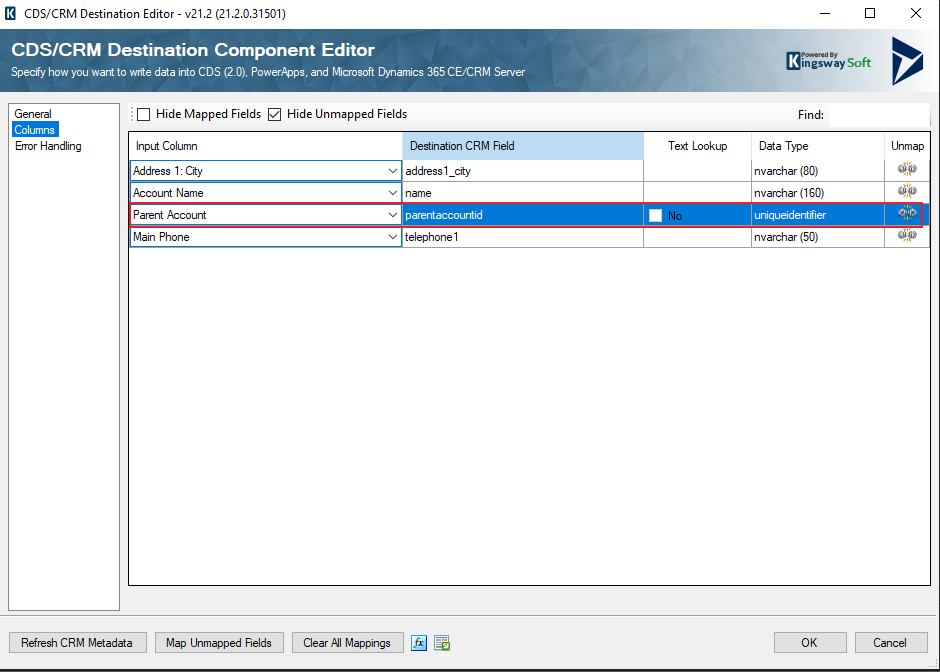
After select No in column Text Lookup, click ... to open a dialog
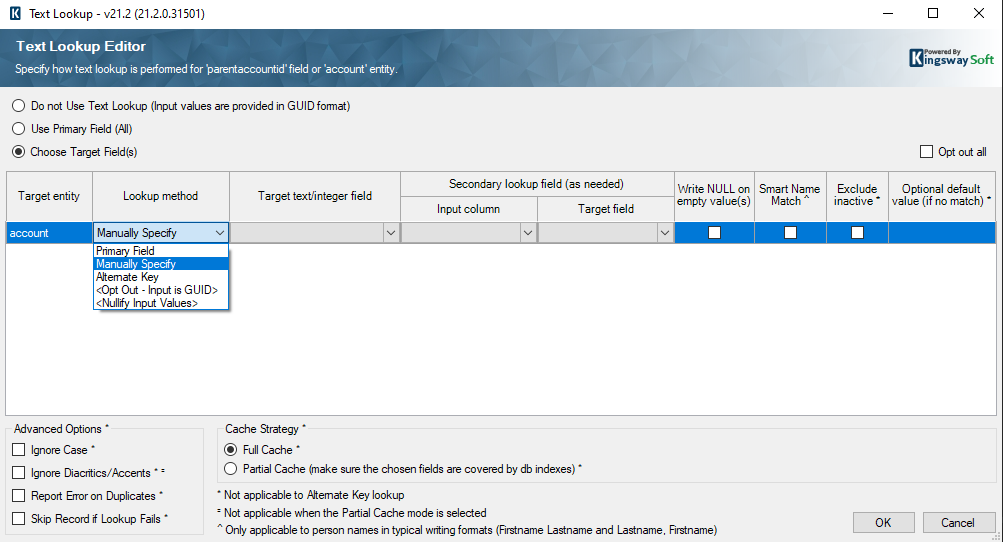
we have 3 options based on value of source data:
- If the source data contains GUID of record (example: value of column Parent Account in Excel file is GUID of account) -> Select option Do not Use Text Lookup (input values are provided in GUID format)
- If the source data contains Primary Field (example: primary of account is field name, and value of column Parent Account in Excel file is name of account) -> Select option Use Primary Field (All)
- The rest case -> Select option Choose Target Field(s) then configure the mapping. We could map the value in source data with a Alternate key or any field of Account then use this field to identify which record we want to link to
2.2.2 Migration for special case:
you could consider solution: use Script Component to write a custom code to adapt your transformation logic.
3.Migration data for Dynamics 365 with SSIS and SSIS PowerPack
ZappySys has release a product named SSIS PowerPack. They introduced SSIS PowerPack as SSIS component which is a collection of 70+ high performance, drag and drop connectors/tasks for SSIS (i.e. Microsoft SQL Server Integration Services). SSIS PowerPack is designed to boost your productivity using easy to use, coding-free components to connect many cloud as well as on-premises data sources such as REST API Services, Azure Cloud, Amazon AWS Cloud, MongoDB, JSON, XML, CSV, Excel, Salesforce, Redshift, DynamoDB, Google API (i.e. Analytics, AdWords), SOAP/Web API, Facebook, Twitter, Zendesk, eBay and many more.
This is a licensed tool and we could download a 30-days trial here
3.1. Import data from Excel file to Dynamics 365
We will do the same task as 2.2 but we will use SSIS PowerPack.
Basically, we will perform the same steps as we do in 2.2 except Import to CRM as following:
The next steps are:
- Add ZS Dynamics CRM Destination:
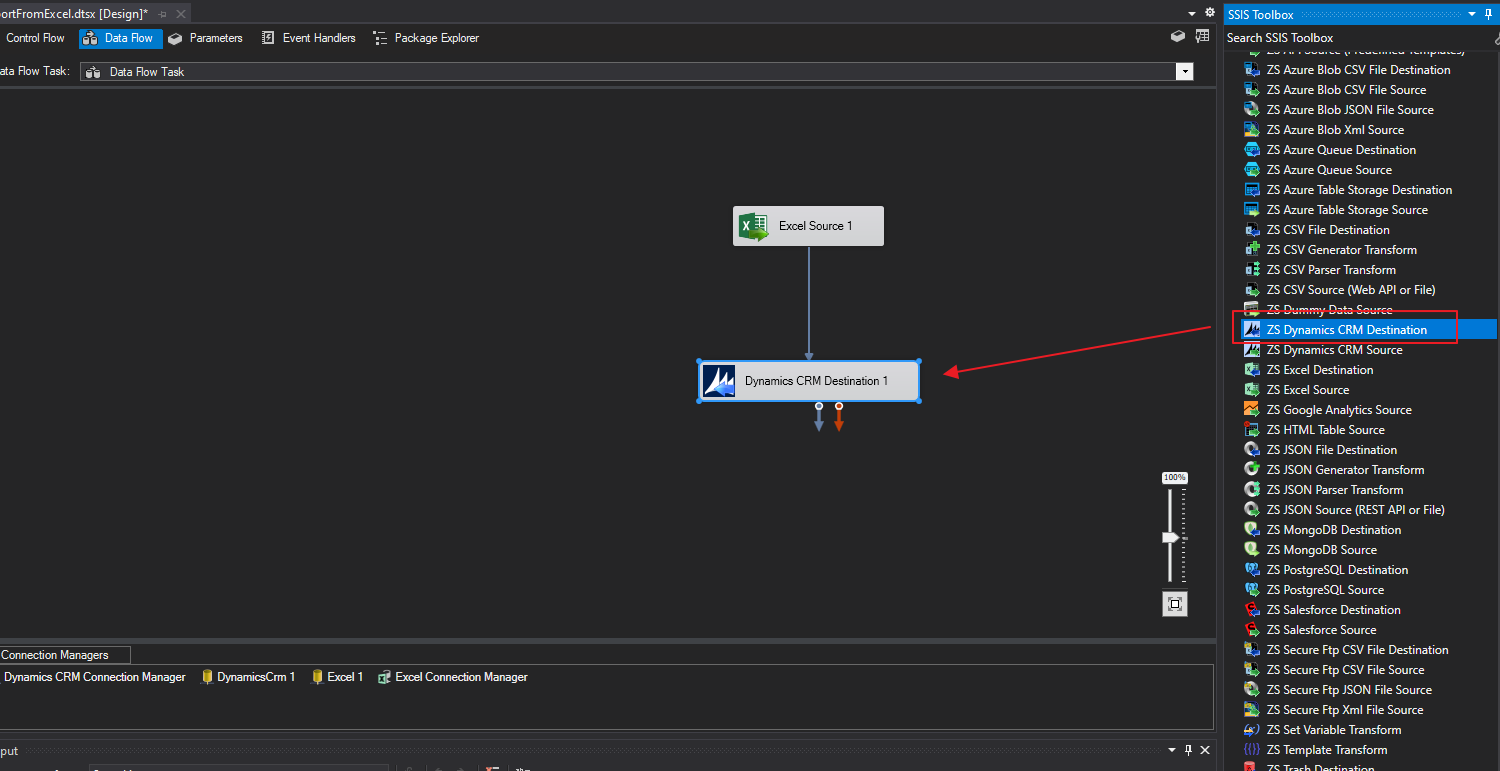
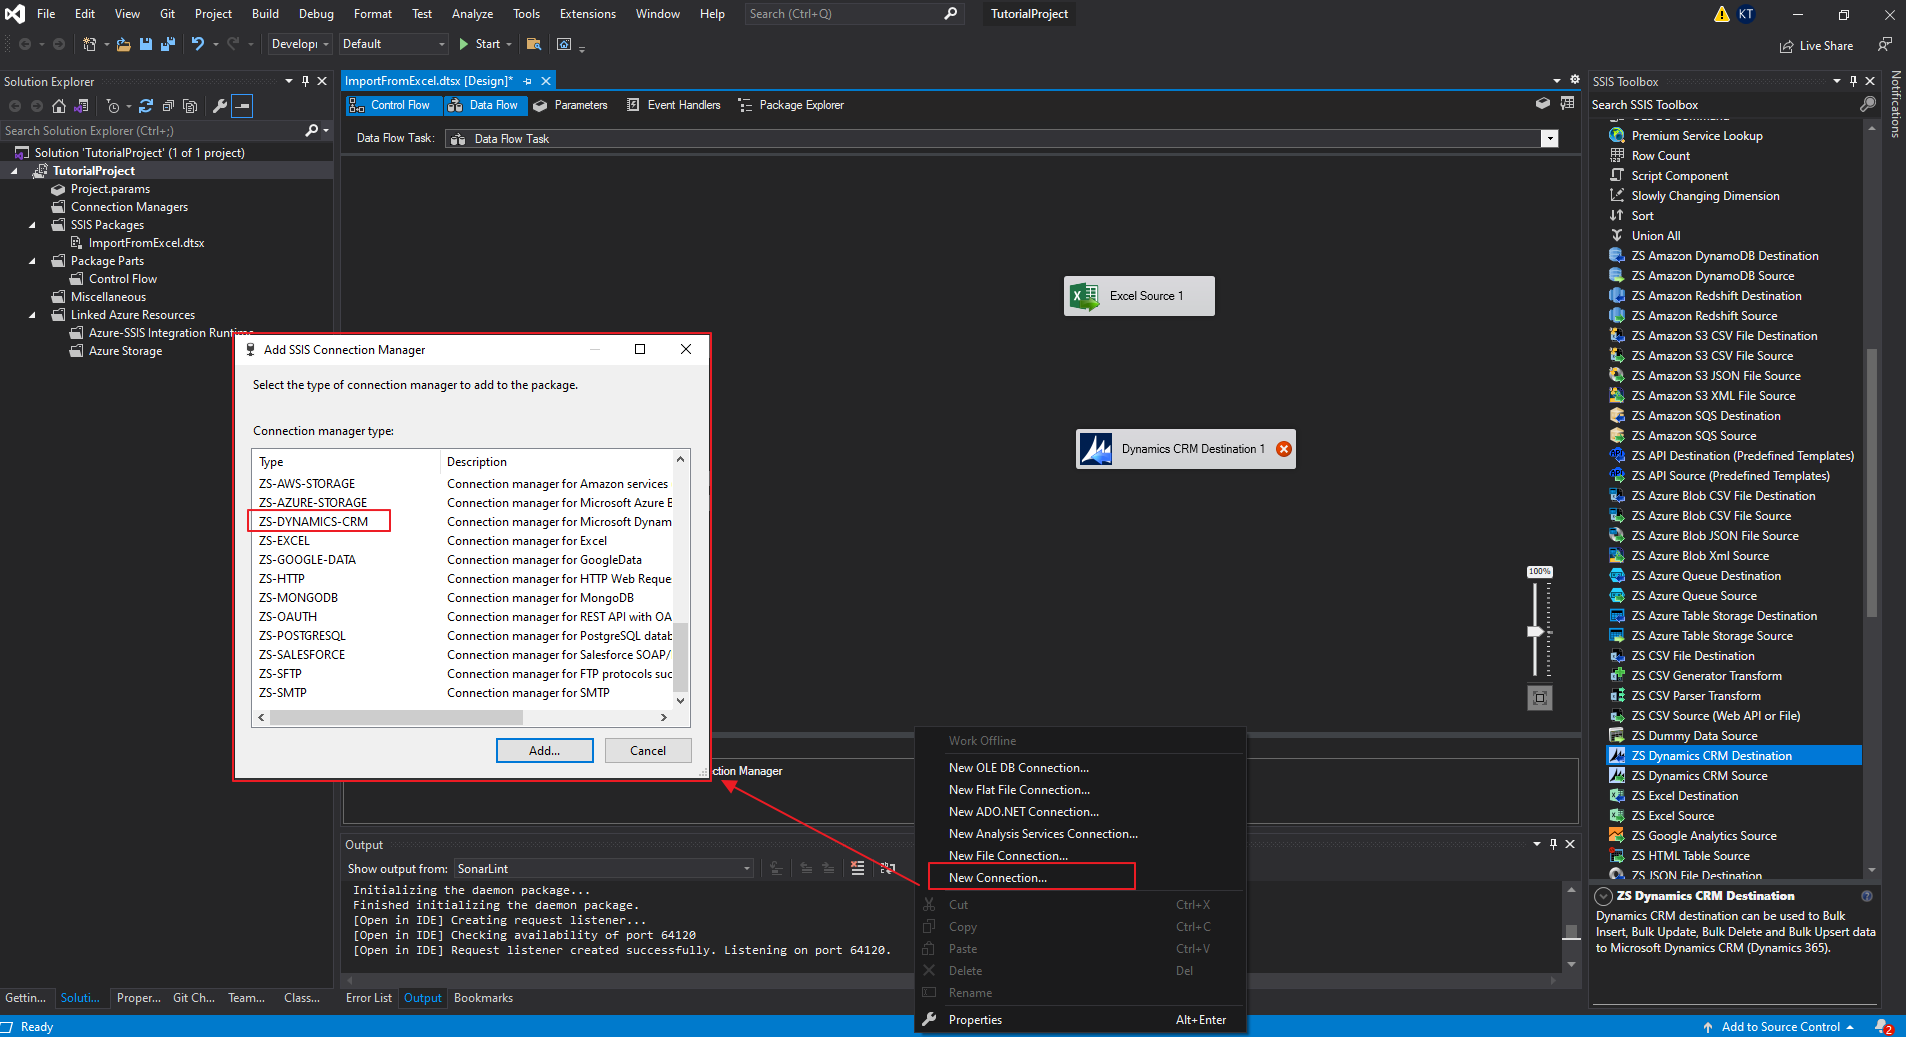
- Create ZS Dynamics CRM connection: Right click in Connection Managers -> select New Connection -> select ZS-DYNAMICS-CRM
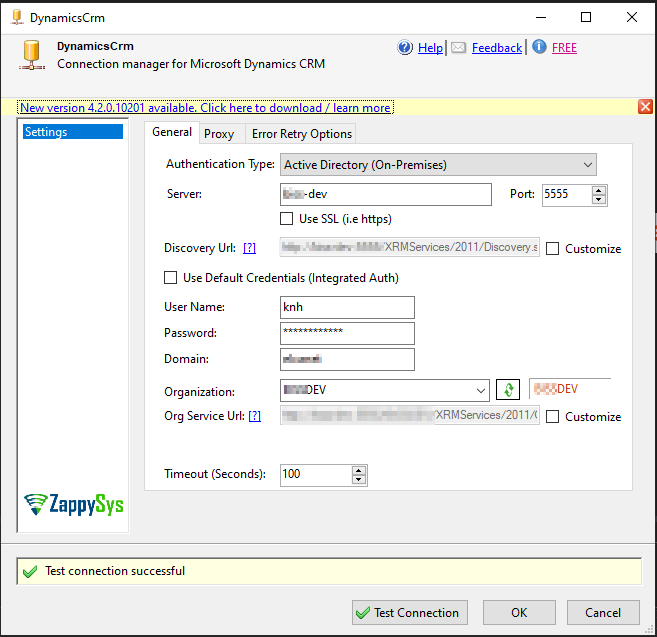
you need input connection parameter then click Test Connection to make sure that the package could connect to your environment. Here is my example:
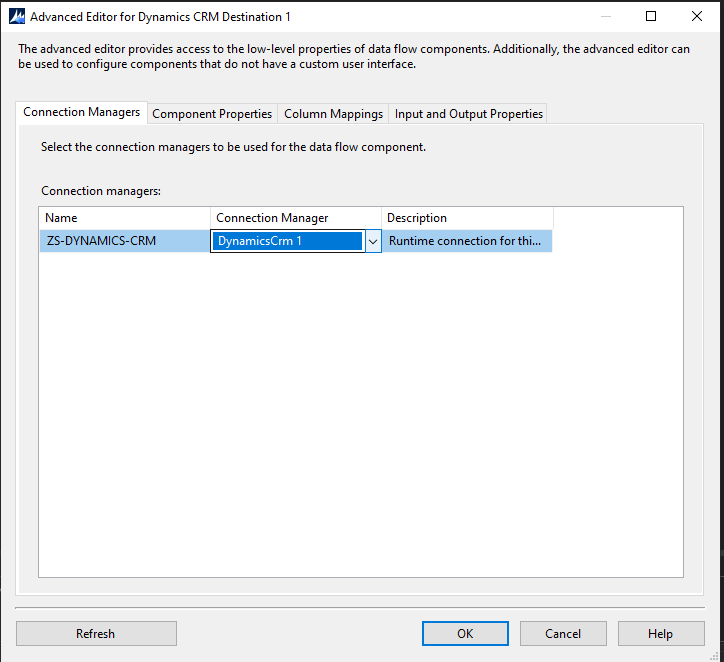
- Open ZS Dynamics Destination: choose Connection that you just created
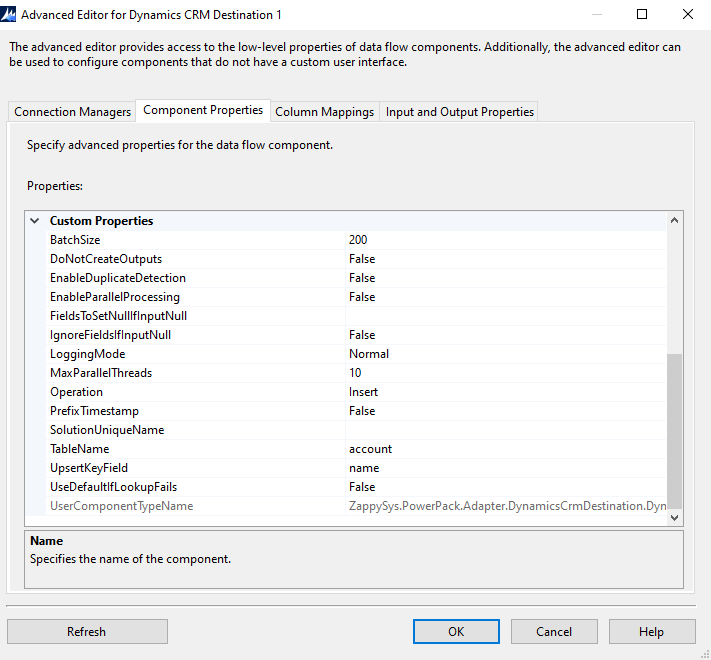
- Select Component Properties tab: we will configure the import in this tab. The options cover most of importing case such as: BatchSize, Operation mode (upsert, insert, update),...
- Select Column Mappings tab to map data from Excel and entity Account as following:
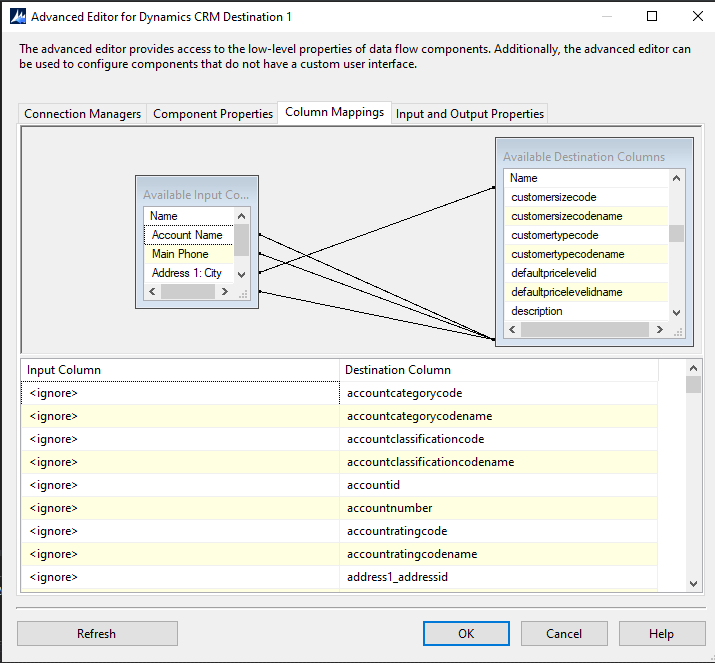
At this step, we could see that ZS Dynamics Destination component does not have feature only show mapped columns or only show unmapped columns as KingswaySoft which could help us save time to find fields.
- Run the package.
4. Conclusion
Now we could expand Dynamics 365 with other platform thanks to KingswaySoft and ZappySys. You should consider which tool you need depend on your business because these 2 tools have each pros and cons. For example: ZappySys is very powerful when you work with JSON while KingswaySoft not only provides component work deeply with Dynamics 365 such as script but also has strong community for you could discuss and research solutions.
Dynamics 365: Data Migration with SSIS KingswaySoft and PowerPack