
Power Apps Portal source code with Visual Studio Code and Power Platform CLI
When developing a Portal with Power Apps Portal, you'll reach a point, where you want to have your developments in a source control or where you want to deploy your portal to a production environment.
With the help of the Power Platform CLI, you can do all this tasks directly from within Visual Studio Code. You even have the possibility to adjust content (e.g. content snippets or web templates) directly in Visual Studio Code and to update them on your development environment.
You'll need the following tools to start:
- Visual Studio Code
- Power Platform Tools
- This is an extension of Visual Studio Code, which also installs the Power Platform CLI
Connect to Dataverse
Once you installed the tools, you must connect to a Dataverse Environment with the Power Platform CLI. You can either make a connection with app secrets or client credentials:
-
pac auth create --name "$ConnectionName" --url "$url" --applicationId "$appId" --clientSecret "$clientSecret" --tenant "$tenantId" -
pac auth create --name "$ConnectionName" --url "$url" --username "$username" --password "$password"
Open a terminal session in Visual Studio Code and execute the command. Remember the name of your connection, as you will need it later on.
To switch between different environments, you can execute the following command:
pac auth select --name "$ConnectionName"
Download Portal Content
To download existing content from a portal, execute the following command in the terminal session:
pac paportal download --webSiteId $WebsiteId --path "$DestinationFolder" --overwrite true
The $WebsiteId is the GUID of your portal website record. Within the $DestinationFolder a folder with the name of the website will be created.
You can limit the the entities to download by adding the following parameter:
--includeEntities "adx_entityform,adx_entityformmetadata" --excludeEntities "adx_weblink,adx_weblinkset"
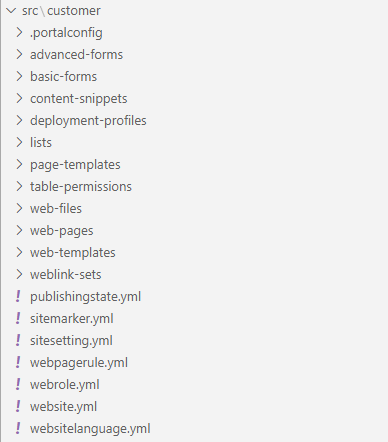
After executing the command, your destination folder will look like this:
Upload Portal Content
You can create different deployment profiles to have different values for each environment. Do to so, create a folder (if it does not exist) "deployment-profiles". In this folder, you can create a yml file for each environment, e.g. "production.deployment.yml". Within the yml files, you can define the values:

Each record can be updated like this. Just provide the entity name, the record id and the attributes to update.
To upload the content, execute the following command:
pac paportal upload --path "$SourcePath" --deploymentProfile $DeploymentProfile
$SourcePath contains the relative path to the website folder from your export. The $DeploymentProfile contains the first part of your yml file (e.g. "production").
You can modify content and upload it to the developer environment if needed.
Source Control
As all exported files are either yml, js, or html files, you can simply add the exported portal content to any source control system.
Power Apps Portal source code with Visual Studio Code and Power Platform CLI

Comments
Deploying to other environment
Hi Fabian, If I download the content from DEV , make changed and then upload to the UAT, it uploads everything not just the single file modified. As per documentation is the manifest file that gets generated every time you download. Is there any work around to that so that I have a single repo for my Portal code, and I can change and deploy to different environments e.g DEV, TEST, UAT or Prod?
Hi Hassan As far as I know,…
Hi Hassan
As far as I know, the manifest file is only used for uploading content to the same environment. When you want to deploy to different environments, you'll have to select different "pac auth". But I'm not aware of a way to only deploy changed items to a different environment.