PowerApps Portal : Tutorial How to create a portal
Power Apps Portals - Episode 1
This article aims to give you an overview of the Microsoft Power Apps Portals feature and to guide you through the creation of your first power apps portal.
What is a Microsoft Power Apps Portal ?
Power Apps Portals are external-facing websites that enable users outside an organization to access and manage the data in the Microsoft Dataverse (new name Microsoft gave to the old Common Data Service).
Power Apps Portal can be accessed by anonymous and/or authenticated users. Authenticated users have the possibility to sign in with a wide variety of identities. Power Apps Portals support several authentication/authorization protocols: Open Connect ID and OAuth are among the most important ones.
An important aspect of the Power Apps Portals is that they can be provisioned without requiring a specific license and the user access licensing can be chosen between a “per Login” model for external authenticated users or a “per Page View” model for external anonymous users.
To perform administrative actions on portals you can use:
- The Power Apps Admin Center: this can be accessed using the following link: https://admin.powerplatform.microsoft.com/. The admin center allow you to manage your environments, the containers where you store your business data, your flows and your apps (the Portal is an App of type “Portal” in an environment).
- The Power Apps Maker portal, under the following link: https://make.powerapps.com. The maker portal enables you to customize and extend your portal.
Build your first portal in Power Apps Portals
Let`s get started with the creation of a new Power Apps Portal.
When you need to create a new Power Apps Portal you start creating a trial portal. A trial portal expires after 30 days but you can convert it to a production portal using the Power Apps admin center.
You can create a portal either in a new environment or in your existing environment. We will assume to have no available environment in our tenant, and we will start creating a new environment for our new portal.
Open the Power Apps Portals admin center.
You will be prompted the following screen.
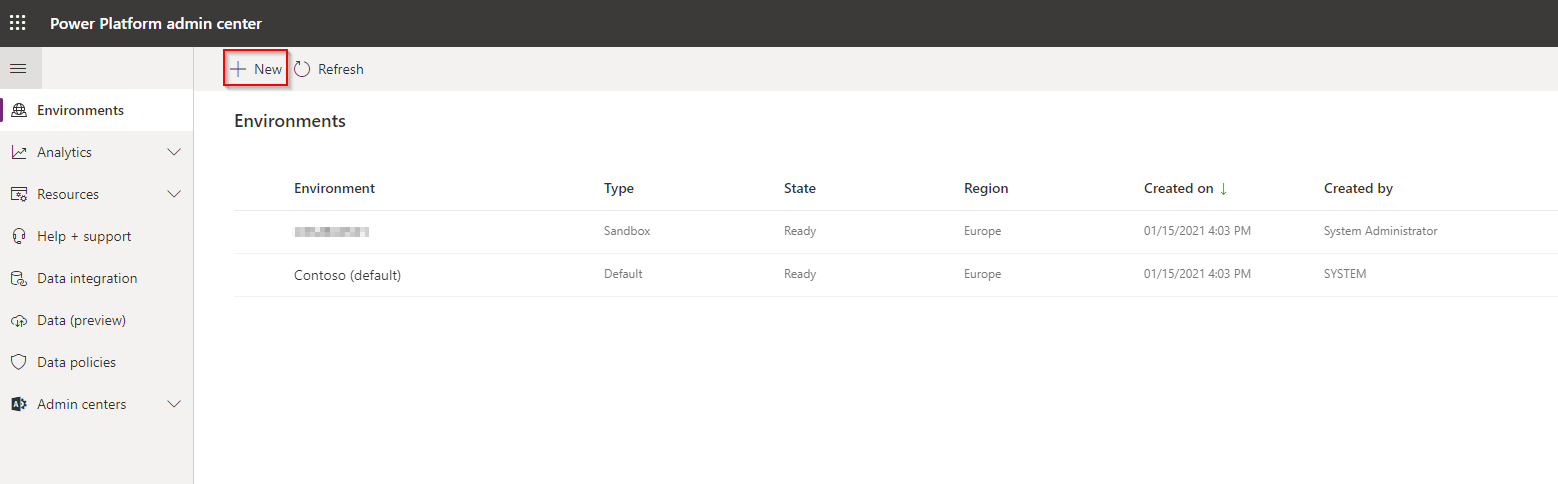
On the left side of the page you can select the “Environments” item and you will be presented a list of all the available environments in your tenant.
Selecting the “New” button you can create a new environment (we will create a sandbox environment) for hosting your new power apps portal.
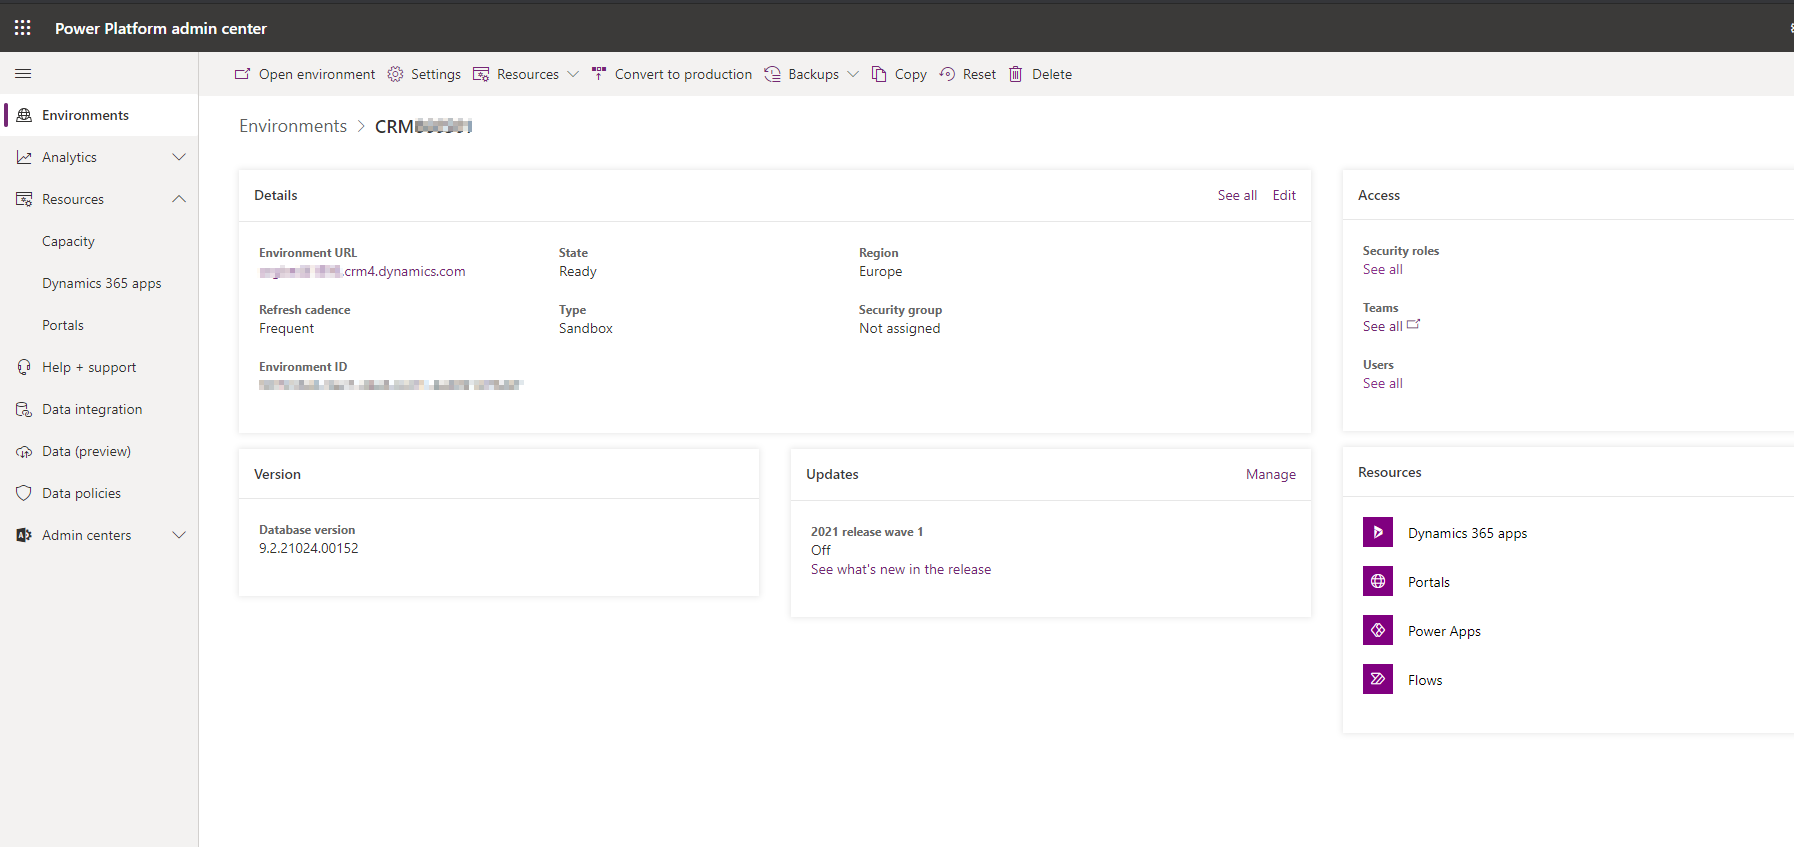
Before creating your new Portal let`s have a look at the available “Capacity” in your tenant.
Selecting the Capacity link as shown in the picture below you will be prompted the following screen, providing you with an overview of a tenant-level storage situation. In this view you can check where your organization is using storage capacity, whether in the database (Dataverse), in files or in logs.

Select the “Dataverse” Tab to have a break-down view of the storage for each of your environment: as you can see from the image below you get the used storage for each environment grouped by type of usage (Dataverse, File and Log).
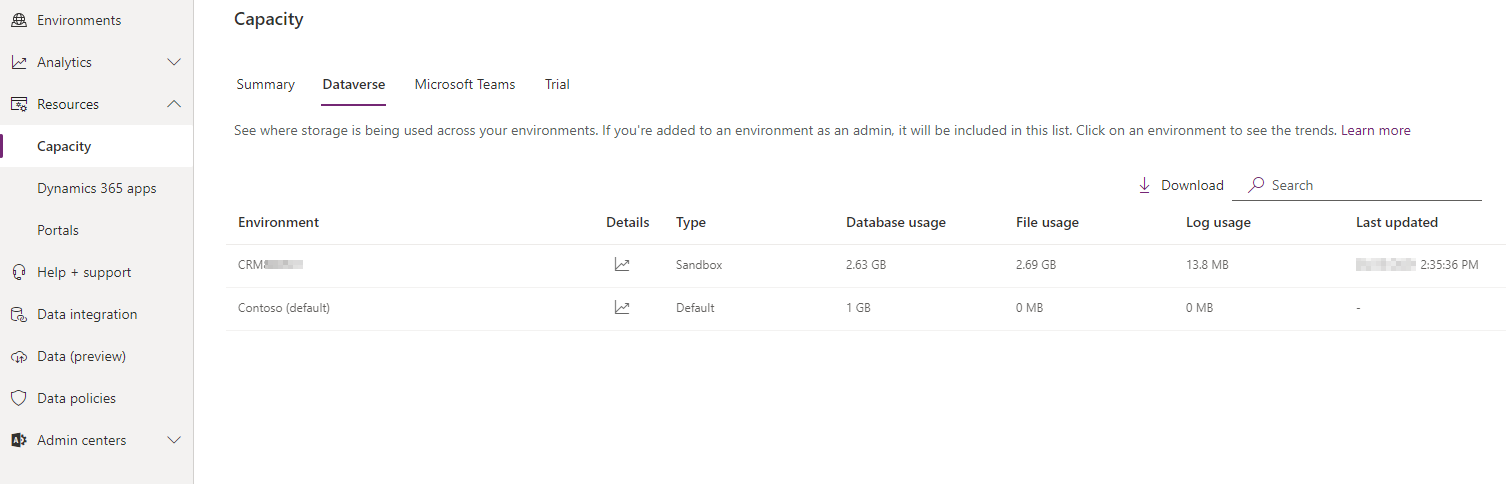
If the available capacity is not enough for your Portal, you can purchase new capacity through “Capacity Add-ons”. Add-on licenses can be added to your subscriptions and can be applied across your tenant.
To create a new portal in your environment you need to proceed as follows.
Open the Power Apps maker portal and select “Apps” (please refer to the picture below). Then click on “New app” and select the “Portal” app type. Make sure you are working in the correct environment. You can check it on the right side of the page as shown by the two arrows in the picture below.
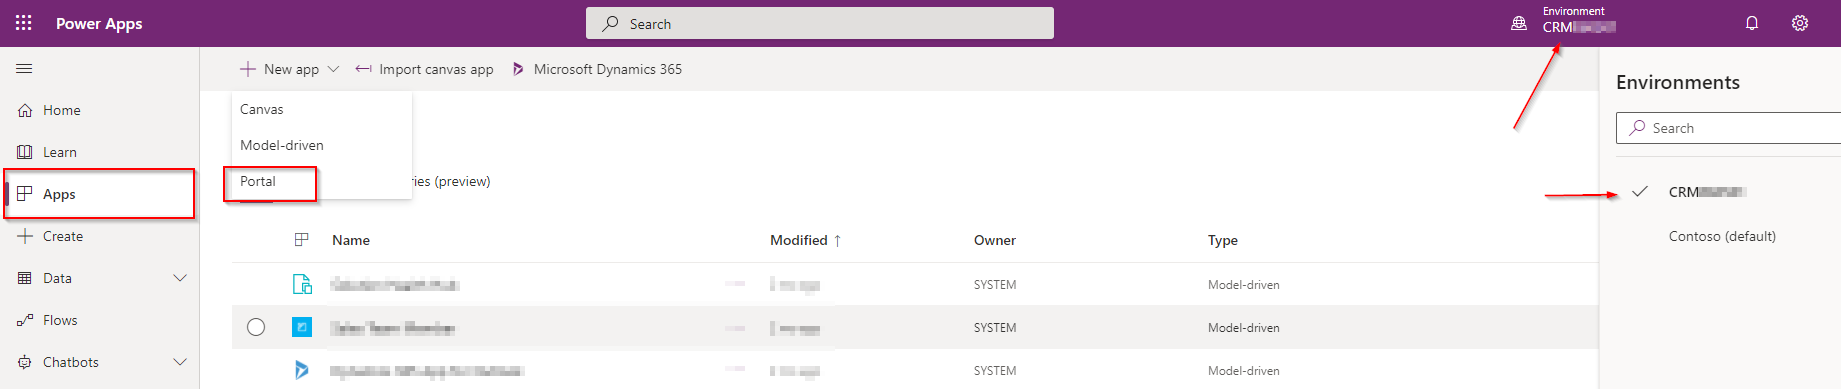
Please note that there can be only one portal of each type and for a language in an environment.
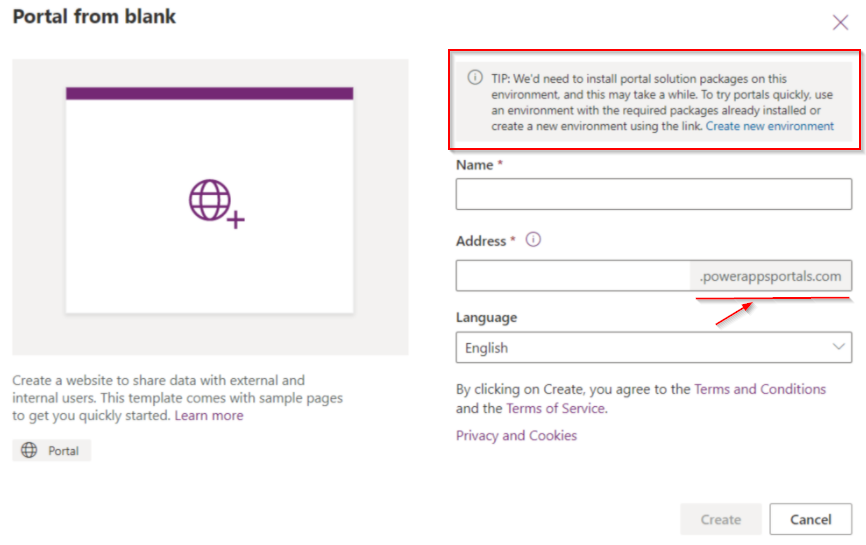
After clicking on Portal you will be asked to provide the following information:
- A portal name
- The portal address (the format would be your_portal_name.powerappsportals.com)
- The language of the portal
You also have the possibility to create a new environment in this step in case you did not create/have one already.
If you create a portal in a new environment (that does not contain any customer engagement apps as in our case), the only portal template you can choose is the portal from blank.
Power Apps Portal Templates
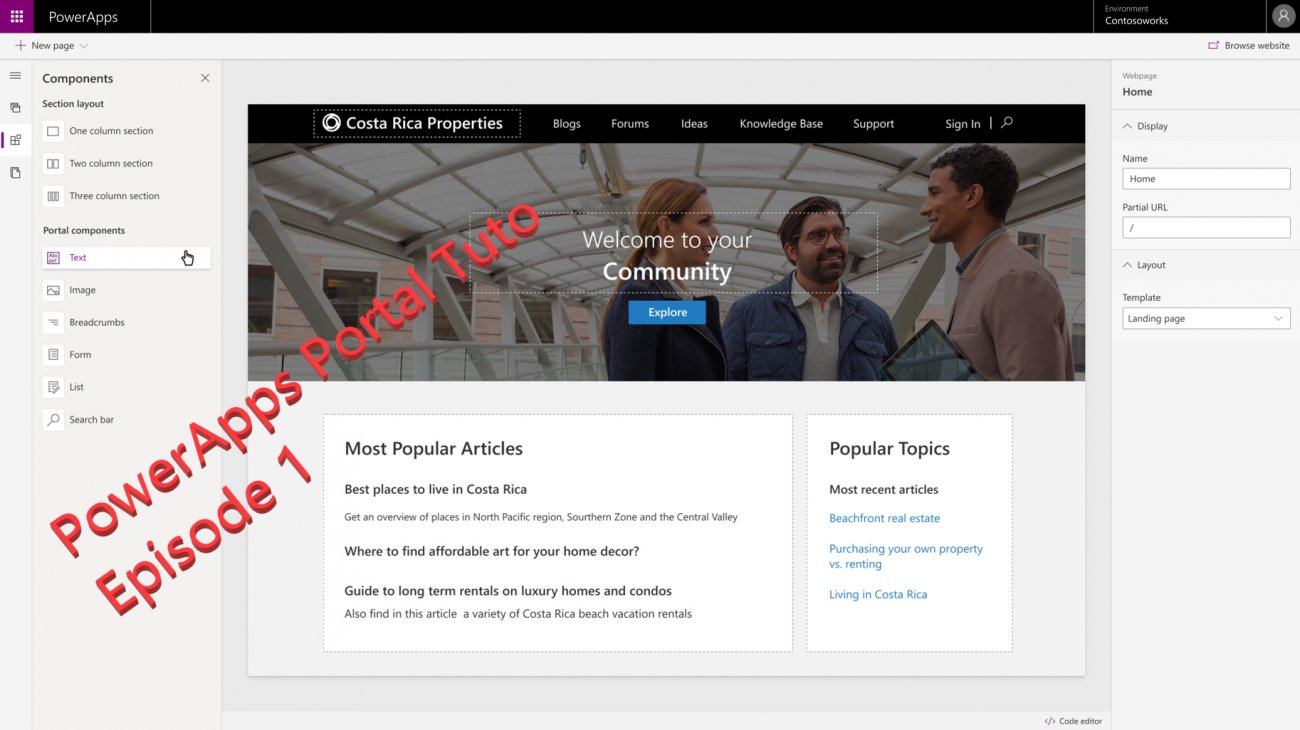
When you create a portal in a new environment (that does not contain any customer engagement apps as in our case), the only portal you can create is the so called “starter” portal. There are different types of portal templates that could be chosen when creating a new portal. The availability of portal templates depends on the installed apps in the environment where you create your portal. A brand new environment would offer you just the “starter” portal template while an environment containing customer engagement apps (as Dynamics 365 Sales, Dynamics 365 Customer Service, Dynamics 365 Field Service, Dynamics 365 Marketing, or Dynamics 365 Project Service Automation) offers several portal templates. I will not dig into the details of the different types of portal templates but I will show you how to create a portal using one of the most popular portal template.
The procedure is quite straightforward: open the Power Apps maker portal and click on the “Create” button on the navigation menu on the left. You will get a list of all the available Portal templates as in the picture below. You just need to select the template you need to create and that is it ! The provisioning of the portal will take some minutes to complete.
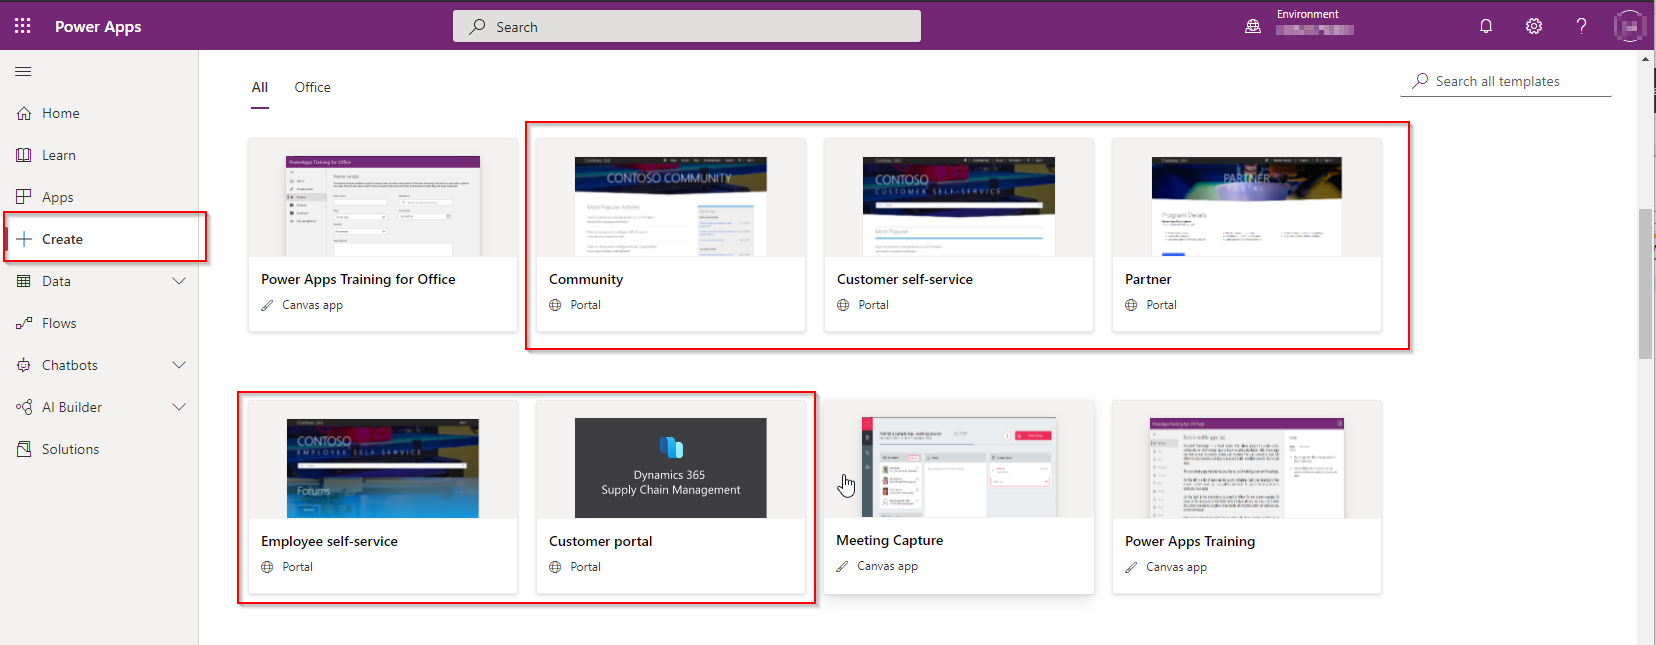
Below is a short list of the most popular portal templates available. For a complete overview of the portal templates and their features please refer to the following official Microsoft link
- Customer self-service portal: A customer self-service portal enables customers to access self-service knowledge, support resources, view the progress of their cases, and provide feedback.
- Partner portal: A partner portal allows every organization with resellers, distributors, suppliers, or partners to have real-time access to every stage of shared activities.
- Employee self-service portal: An employee self-service portal creates an efficient and well-informed workforce by streamlining common tasks and empowering every employee with a definitive source of knowledge.
- Community portal: A community portal leverages peer-to-peer interactions between customers and experts to organically grow the catalog of available knowledge from knowledge base articles, forums, and blogs as well as providing feedback through comments and ratings.
- Portal from blank: Create a website to share data with external and internal users. This template comes with sample pages to get you quickly started.
- Customer Portal (Preview): A Supply Chain Management Customer Portal template provisions an externally facing B2B order placing website. This template allows external users to create and view orders to the associated Dynamics 365 for Supply Chain Management environment. Please note that currently the Customer Portal template is still in Preview.
Enabling external access with Power Apps portals
In order to let your external users access your portal, you need to license your Power Apps portal.
The licenses can be of two different types: a “per login” or a “per page view” capacity add-ons. After purchasing the add-ons, the administrator needs to allocate this capacity to a Microsoft Power Platform environment.
Login capacity add-on: this add-on is intended for external users who need to be authenticated in the Portal. A login capacity add-on includes a certain number of logins per month. Each login provides a user with access to single portal for up to 24 hours. Multiple logins during this period will be counted as a single login.
Page view capacity add-on: this add-on is recommended for letting external users access your portal without being authenticated. In this case your external users will be able to view pages of your portal without logging into the portal.
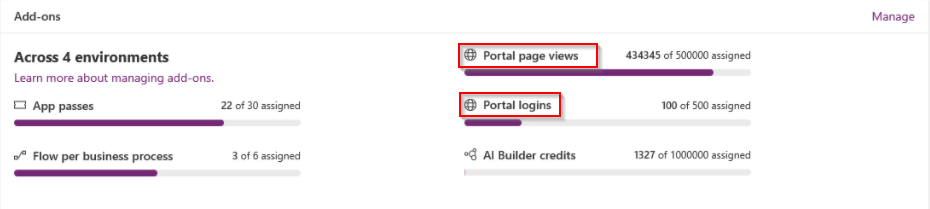
When you purchase capacity add-ons, an Add-ons tile appears on the Capacity screen in the Microsoft Power Platform admin center to enable you to check how many Portal page views / how many Portal logins are available:
Conclusion
In this first article we saw how to create a portal and the different types and licenses. I will soon offer you a new article on the subject to go further with PowerApps Portal.
PowerApps Portal : Tutorial How to create a portal