
xrm-ci-framework
Xrm-ci-framework is an open source framework and can be found here: https://github.com/WaelHamze/xrm-ci-framework
The framework provides a wide range of powershell cmdlets, which you can use for your D365 deployment. Currently, there are 64 different cmdlets available. Some cmdlets are build as wrapper components around the official deployment tools coming from Microsoft. In this blog post I want to elaborate on how a build pipeline using xrm-ci-framework may look like. The mentioned scripts are published on my GitHub Repo and open for reuse in any D365 project. To get you started, just copy the PowerShell folder from GitHub and follow these instructions.
https://github.com/liloia/CI.Sample
Run InstallTools.ps1
This will install all the nessessary tools to get your deployment going. It downloads the Microsoft official tools along with xrm-ci-framework from NuGet and Powershell Gallery.
- Solution Packager
- Package Deployer
- Solution Checker
- Configuration Migration Tool
- Xrm-ci-framework
Ouput: Tools folder will be created and can be ignored by adding this line to .gitignore.
PowerShell/Tools
Run Build.ps1
Export customizations from DEV environment. Use Solution Packager to merge customizations together with the code artifacts from your Visual Studio solution. Make sure to adjust mapping.xml according to your Visual Studio solution structure. Mapping.xml tells Solution Packager how to replace solution files by code artifacts from your Visual Studio solution. Usually there are one file mapping per each binary file (e.g. plugin and workflow dll) and folder mappings for all the web resources. For more details regarding the mapping file check out this documentation: https://docs.microsoft.com/en-us/power-platform/alm/solution-packager-tool. After the script has completed, a new solution package is created and ready to be deployed by Package Deployer.
At this stage it's very important to commit all Customizations to Git. This will create a checkpoint of your solution and allows to reassemble your solution package at any point in time (managed or unmanaged).
Output: Customizations and Package folder. Only ignore Package folder by adding this line to .gitignore.
PowerShell/Package
Parameters:
- Solution (mandatory): Name of your solution.
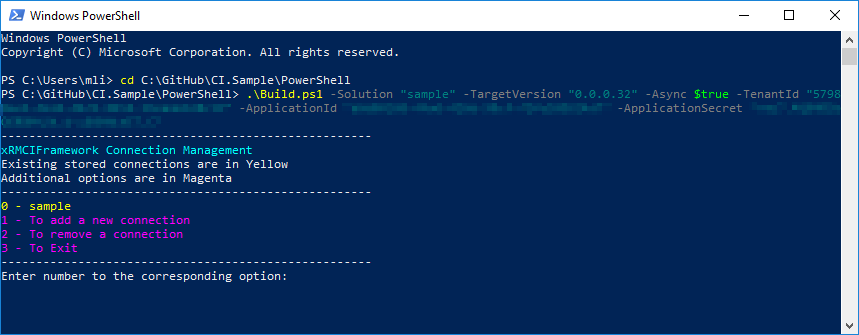
- CrmConnectionString (mandatory): Pass the connection string as per Microsoft definition https://docs.microsoft.com/en-us/powerapps/developer/common-data-service/xrm-tooling/use-connection-strings-xrm-tooling-connect. E.g. for a cloud environment this would look like this: AuthType=OAuth;Username=user@<company>.onmicrosoft.com;Password=<Password>;Url=https://<tenant>.crm4.dynamics.com;AppId=51f81489-12ee-4a9e-aaae-a2591f45987d;RedirectUri=app://58145B91-0C36-4500-8554-080854F2AC97;LoginPrompt=Auto. If you are running the script locally, xrm-ci-framework provides a nice way to store multiple connections to disk (encrypted).
- TargetVersion (optional): Its recommended to increment the version number, because Package Deployer won't deploy any solutions having lower or equal version number as in target environment. If you run the script on a build server, use the build number provided by the build server and set the last digit of a four digit version number (e.g. x.x.x.<build number>).
- Unmanaged (optional): Turn this switch on if you want to create unmanged solution package.
- Async (optional): Set this parameter to true, if you want to export customization in asynchronous mode. This is recommended, but only available in newer instances.
Run Release.ps1
This will deploy the solution package to a given environment defined in the connection string. If you are deploying managed solutions, Package Deployer will always include a stage for upgrade step. This will take significant longer to execute, but has the benefit of allowing deletions of solution components. As a sidenote, solution patches are not recommended in conjunction with source control and automated deployment.
Package Deployer can also be run from an UI. The executable for the UI can be found here: Tools\PackageDeployment.

Build Option 1: Include Solution Checker
Its recommended to run Solution Checker on top of the build procedure. This will check your solution against a predefined ruleset and report any violated best practices. This is the console output given by xrm-ci-framework, which gives you a first indication regarding the quality of your solution.
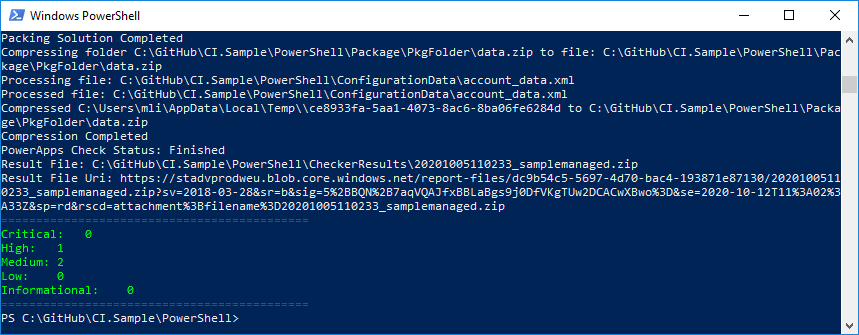
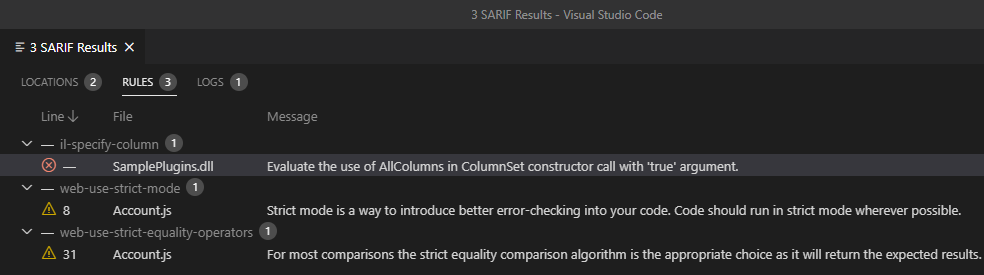
The full report is available as a SARIF file and saved to the CheckerResults folder. There is a Visual Studio Code plugin available, which lets you open and see all the details in the SARIF file.
To include Solution Checker as a quality gate in your build pipeline add these parameters to the Build.ps1 script:
Parameters:
- TentantId, ApplicationId, ApplicationSecret: Follow these steps to create the application registration in your Azure tenant: https://docs.microsoft.com/en-us/powershell/powerapps/get-started-powerapps-checker.
Output: CheckerResults folder will be created and can be ignored by adding this line to .gitignore.
PowerShell/CheckerResults
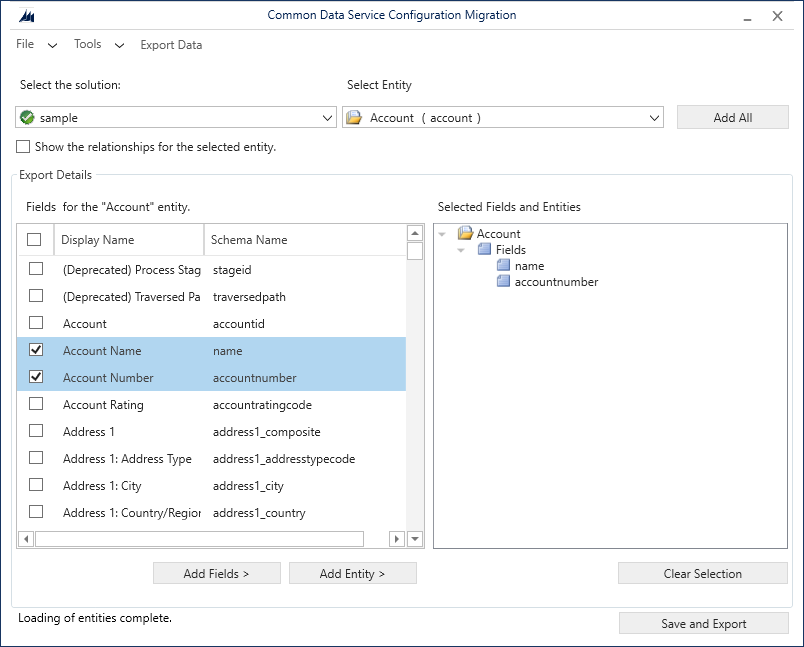
Build Option 2: Include Configuration Migration Tool
Deployment package allows you to import configuration data along with the D365 solution. The build script is looking for a schema file inside the PowerShell folder named schema.xml, which defines the configuration data to export. There is an UI, which helps you define the configuration data and save the definition to the schema.xml file. The UI can be found here: Tools\ConfigurationMigration
Output: ConfigurationData folder will be created and should be commited Git.
Build Server Setup
Finally, if you start setting up a dedicated build server, a complete pipeline would contain these activities:
- Checkout repository from Git
- Build Visual Studio solution
- Run unit tests
- Run InstallTools.ps1
- Run Build.ps1
- Commit customizations to Git
- Run Deploy.ps1
Conclusion
What are the benefits of using xrm-ci-framework cmdlets for your deployment:
- Great extensibility: Create project specific pipelines by composing powershell cmdlets.
- Easy to debug: Run your deployments locally by stepping through powershell scripts.
- Run on every platform: Powershell scripts can be run on any CI/CD platform (like Azure DevOps, Jenkins, GitLab etc.).
- Mapping.xml: Map your code from Visual Studio to your D365 solution.
- On-Premise: On-Premise is fully supported by powershell cmdlets.
- Older versions: Some older D365 are supported by powershell cmdlets.

Comments
Checking the Environment variable values are not populated
Hi
I had an issue with our pipleline in that solution hosted in Artifactory but originally sourced from our dev environment had the env variables with default or current values. is there a way to clear those out then rezip the solution as part of the pipeline?
Hi Daniel I think, this is…
Hi Daniel
I think, this is what you are looking for.
WaelHamze/dyn365-ce-devops-sample@253c566