
Dynamics 365 TypeScript Web Resource
Presentation
What is Typescript?
Typescript is an open-source language developed and maintained by Microsoft. It is a strict syntactical superset of JavaScript (that means that every piece of Javascript code can be used in Typescript). The typescript is transcompiled in Javascript and so can be used by any browser. The file extension is .ts.
In dynamics CRM, Typescript is used to develop component such as PCF or to create web-resources.
For PCF, you can go to read this article to learn how to create your first PCF.
In this article, we will develop a very simple web resource that can be used in dynamics 365.
When it is done, you can use Fiddler to easily debug your new control. Everything is explained in this other chronicle.
Your first Typescript Web-resource
In the following tutorial, we will create a simple web-resource using typescript that will display a field into a simple notification on a form.
Prerequisites
First you will need to install the following:
- npm using node.js -> https://nodejs.org/en/
- Visual Studio 2017 or .Net Core 2.2 with Visual Studio Code
Initialize the project
First, create a folder where you want that will contain the project.
Then after installing npm, open a command prompt and navigate to your newly created folder (using the command cd)
One little tips on Windows to open a command prompt directly in your folder:
- Navigate to your folder
- type cmd in the search and type enter

Once the command prompt is opened, execute the following command:
npm init
You will be asked some information about your project such as the package name, version, etc....
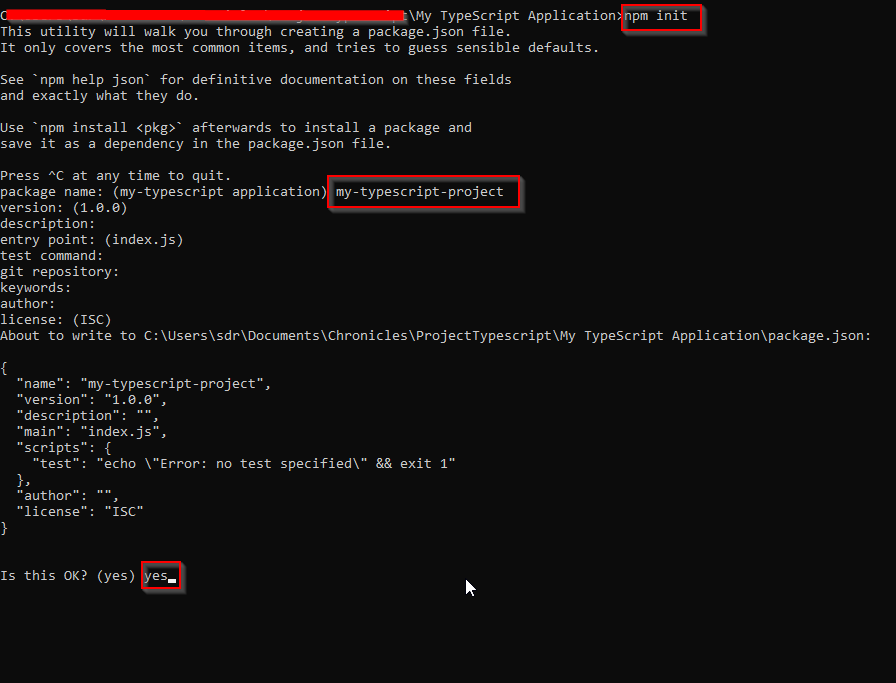
By typing Yes, a file package.json will be created on your folder.
Now we have to install typescript in the project:
npm install -g typescript

Then, we need two folders
- src: that will contain every source files
- dist: that will received the transcompiled file
You can create them directly from Visual studio or by using the following command:
md src
md dist

At this point, your folder should contain these files:

We can start using Visual Studio. Open it and open a local folder.
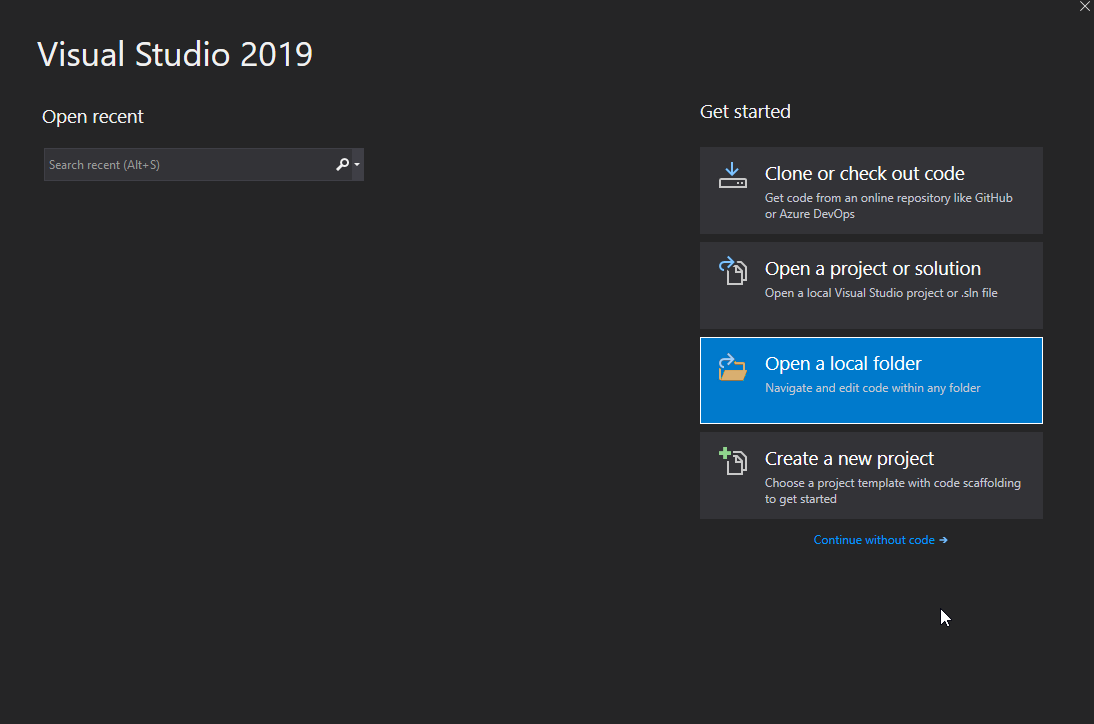
Then create the tsconfig.json at the root of the project that will contain the configuration to well transcompiled the typescript:
{
	"compilerOptions": {
		"module": "ES6",
		"noImplicitAny": true,
		"removeComments": true,
		"preserveConstEnums": true,
		"outDir": "dist",
		"sourceMap": true,
		"moduleResolution": "node"
	},
	"include": [
		"src/**/*"
	],
	"exclude": [
		"node_modules",
		"**/*.spec.ts",
		"dist"
	]
}

As you can read, when compiling, it will take every files from the src folder, and save the transcompiled files into the folder dist.
Now your environment is set up and we can start developing our web-resource.
Develop your web-resource
As explained, every code must be created into the src folder.
Let's create a typescript file containing the following code:
class MyForm {
    static OnLoad(executionContext: any) {
        const formContext = executionContext.getFormContext();

        let attrContactName: Xrm.Attributes.StringAttribute;
        attrContactName = formContext.getAttribute('firstname').getValue();

        formContext.ui.setFormNotification("My Typescript is now loaded!: this is the firstname:" + attrContactName, "INFO", "ts-msg");
    }
}
The code is quite simple:
We have a class named MyForm containing one function: OnLoad. These names are important as we will use them to call the right function in the CRM.
The OnLoad function will do several actions:
- First, he will get the form context. We will use the formContext variable to access the different part of the form.
- The two next line will get the value of the text field named "firstname"
- The last line will display a notification at the top of the form
Once you code is ready, we will have to transcompile the typescript files. To do so, go back to your command prompt and execute the following:
tsc

Your dist folder should now contain the generated javascript file that will be imported in dynamics 365.

The next stage will be to deploy your web-resource on dynamics 365.
Deploy your web-resource through the Dynamics 365 interface
Now we have a proper javascript file to import, let's open your dynamics 365 environment.
Navigate to your customization screen, and select the form where you want to apply your web-resource.
In the below example, I chose the out-of-the-box contact form. Go on the Form Properties:

On the form properties popup, click on Add
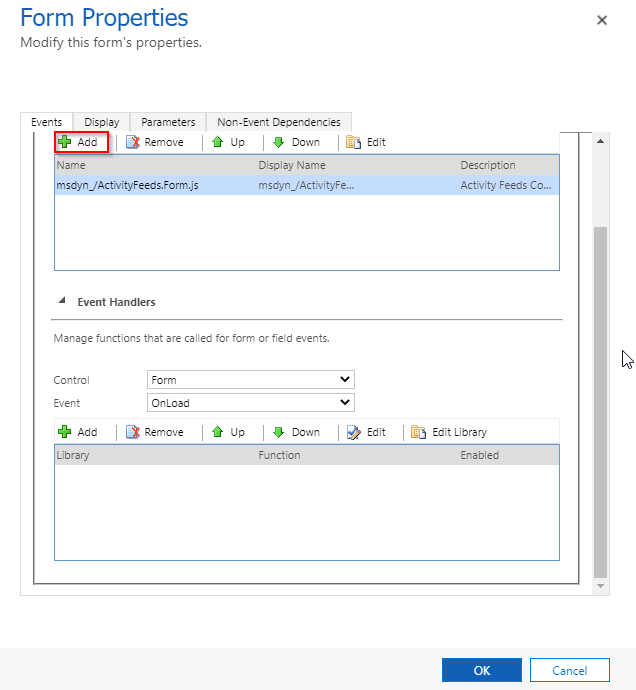
Now you can search for an existing resource or, in our case, create a new one by clicking on New:
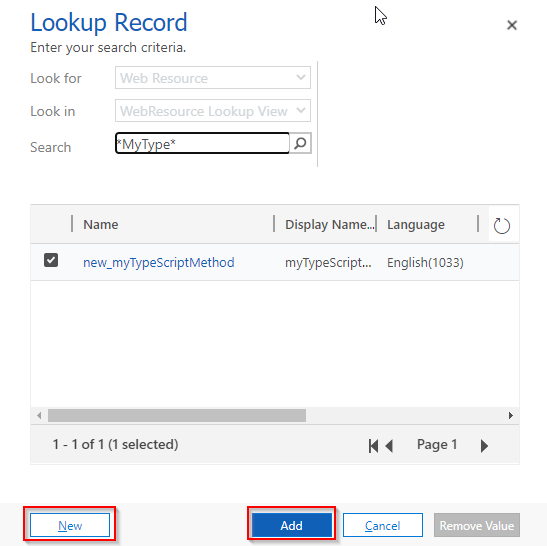
Fill in the resource form like below and upload your myForm.js file:

After saving and publishing, close this window. In the previous screen, you can now select your newly created resource and click on Add

Now we will add the event handler:
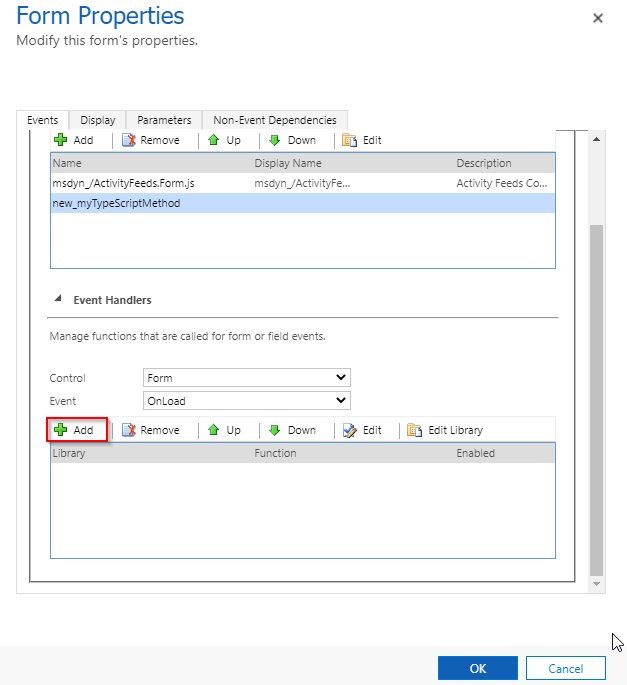
On the next popup, we will have to give some information about our new function:
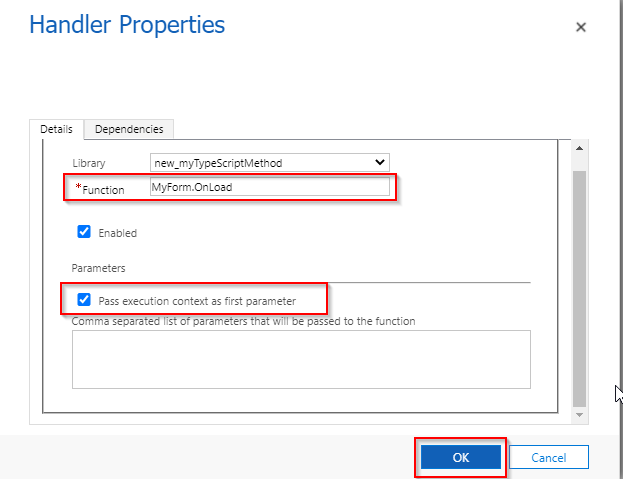
The Function must be the concatenation of the class and the name of your function separated by a dot -> MyForm.OnLoad
We have to tick the checkbox Pass execution context at first parameter because we need it to get the firstname value
If you wish, you can also send a list of parameter (like fields) to your function. In this case, add the name of the desired fields separated by comma into the last textbox. For example, "firstname", "lastname". In our example, let it blank.
Click on Ok.
your final windows should be like below:
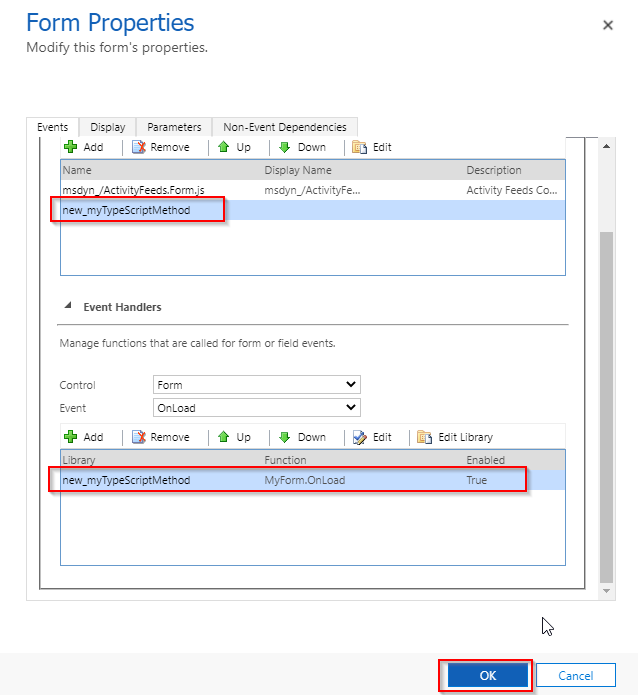
Now you have to save the form, and publish all customization.
Once done, go on a contact record, and normally, your notification should be display at the top of your form:
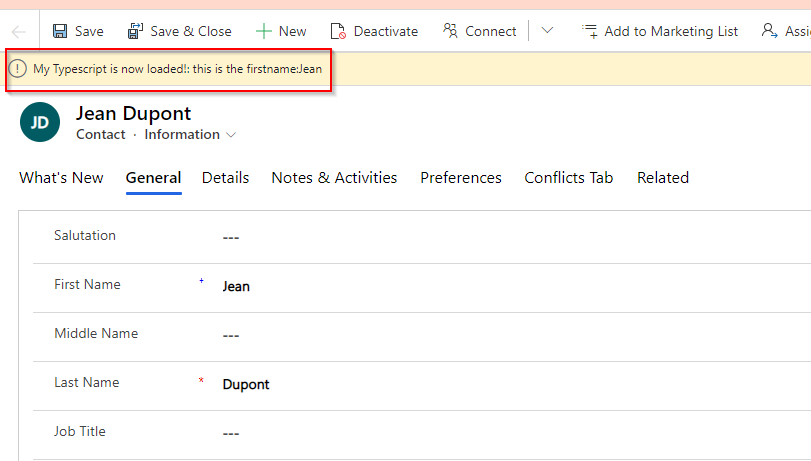
You know now how to develop a typescript web-resource and how to deploy it on your dynamics 365 instance.
If you need to do some notifications, just change your code, re-transcompile and modify your current web-resource.
If the web-resource already exists, you will have to only copy the content of your generated javascript file.

If you want to avoid deploying your control every time you want to test it, you can use Fiddler.
If you want to know more about it, just click here to access another Chronicle about that!
Simplify the way to code using Intellisense with XrmDefinitelyTyped
The main slowdown when developing a webcontrol is that you don't know your CRM model by heart.
That's why a tool like the XrmDefinitelyTyped exist! It will allow you to use an Intellisense to easily find attributes names of your entites.
First we need to install it.
Open your Visual Studio and right click on your project -> Manage Nugets packages...
And Search for the Delegate.XrmDefinitelyTyped, and install it.
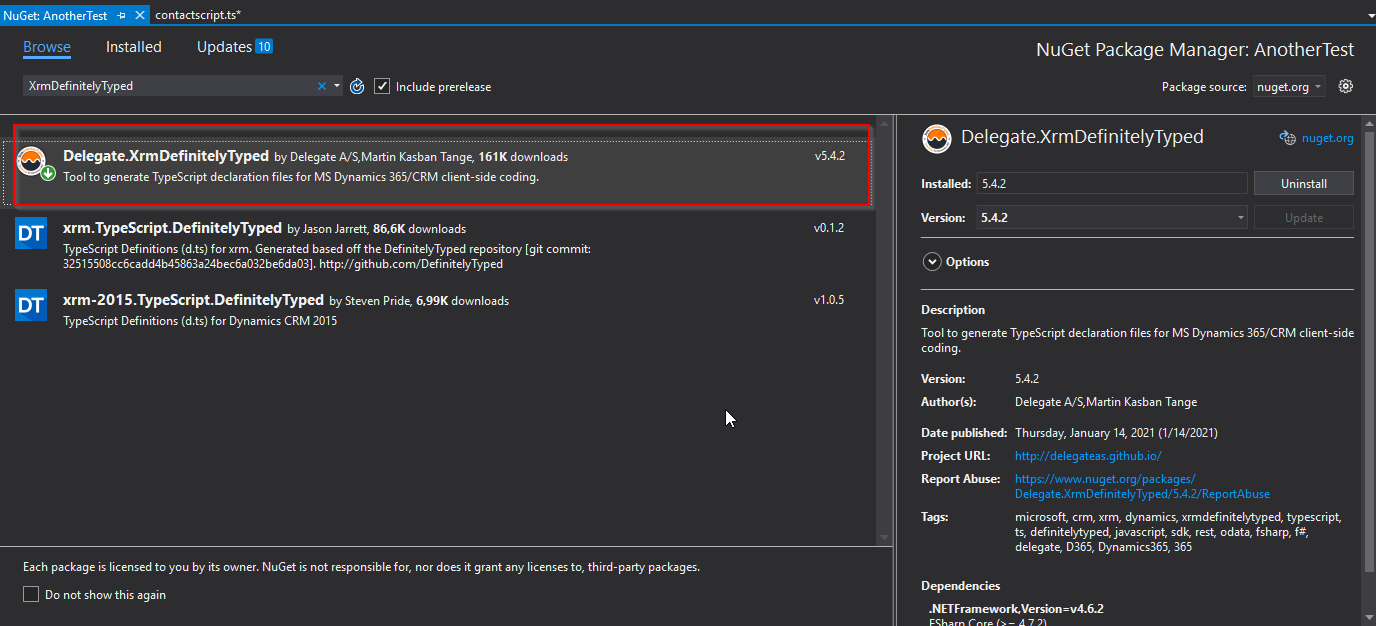
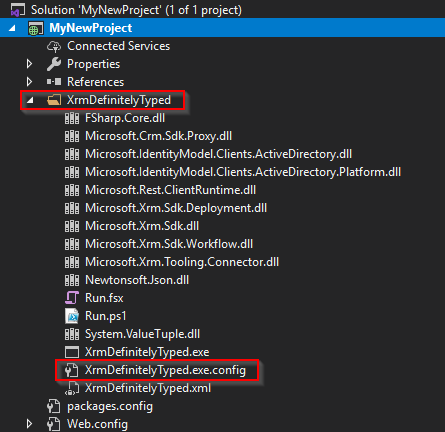
When the installation has finished, a new folder is created in your project -> XrmDefinitelyTyped.
In this new folder, you will first have to set the config file.
In my case, I have to use the method OAuth to connect my CRM. For that, I had to create a new App in my Azure Portal. You can read the first step of this tutorial to do it.
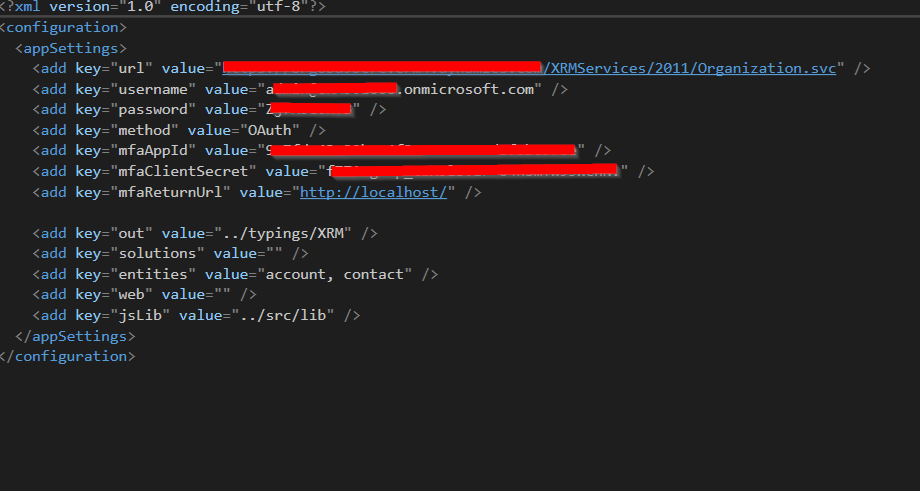
The entities setting must contain all the entity you're going to use in your scripts.
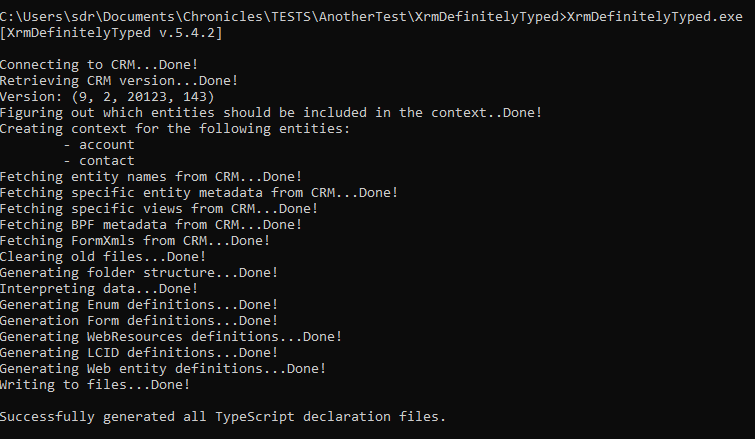
When you have filled in your configuration, launch the XrmDefinitelyTyped.exe to generate the TypeScript declaration if you're using Windows. You can also execute the PowerShell script Run.ps1.
If it works, you should have the below result:
BEWARE: On my case, after created the new App in Azure Portal, I had this error after running the script:
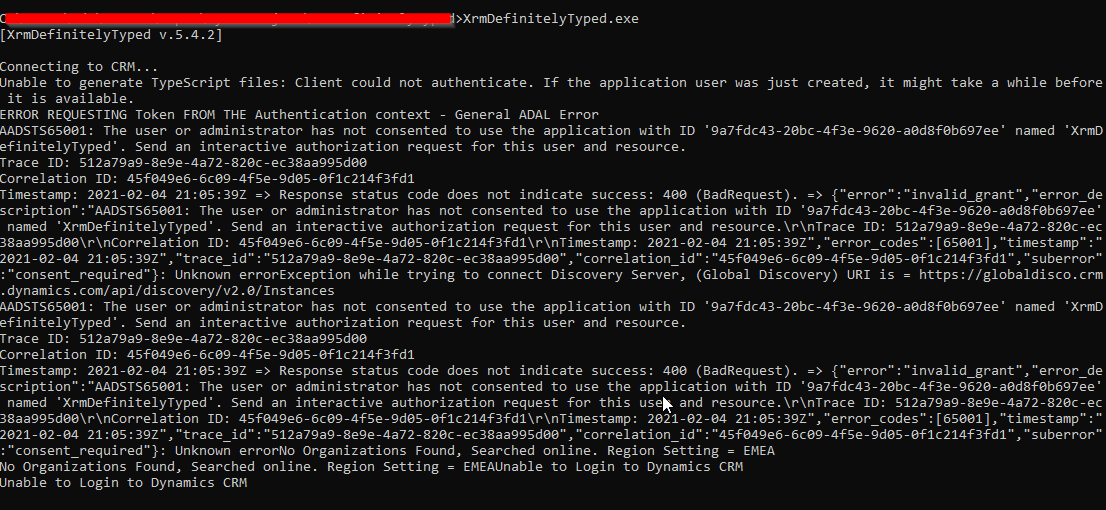
In this case, I had to Grant admin consent in your Persmission API in Azure Portal.
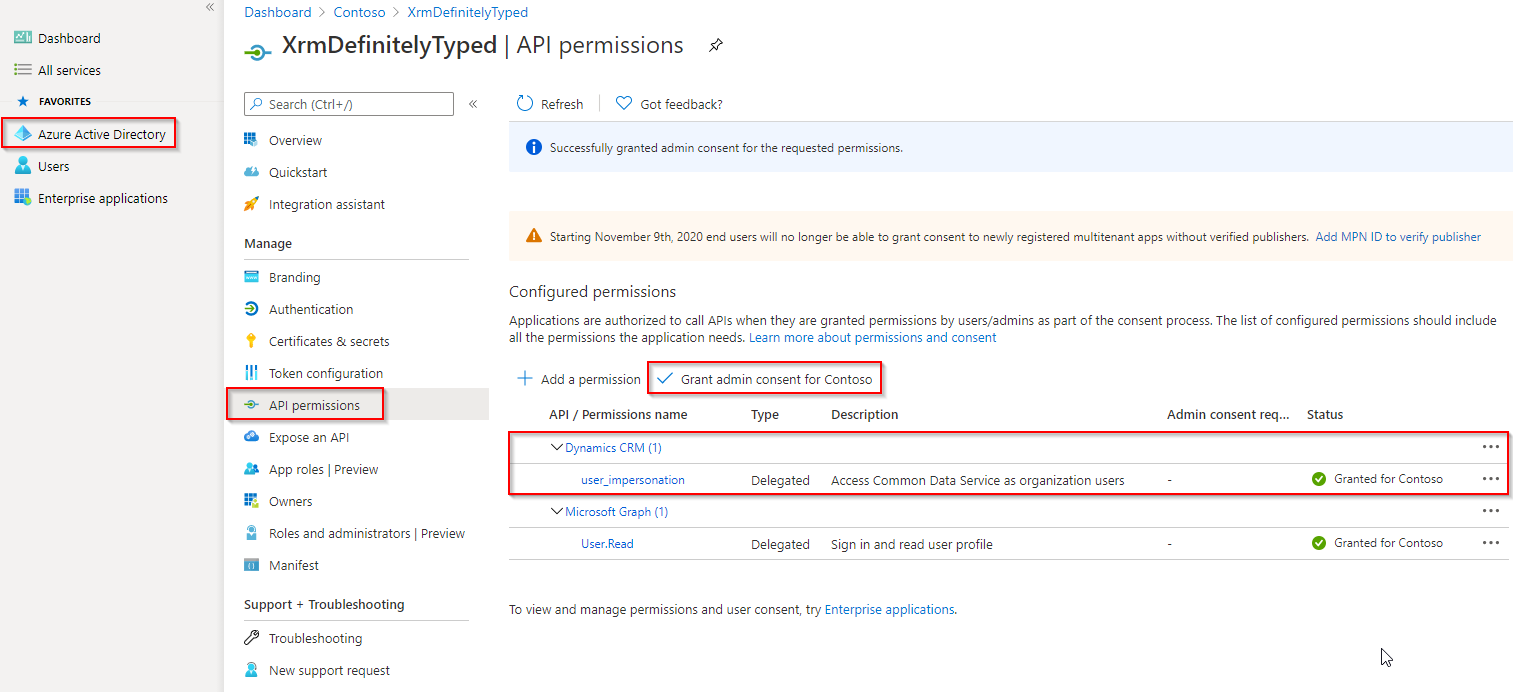
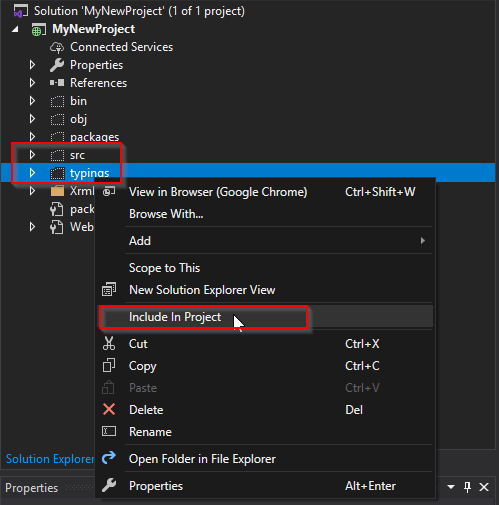
After this consent, you should be able to run your script properly. It will create two folders:
- typings: contains every definition of your entities: attributes and controls
- src: contains the js script used for the intellisense
Include this two folders to your project
You're now ready to use the intellisense. Let's create a new Typescript script into your project.
As my script is supposed to be used on the Main form of the contact entity, I create a new variable Form pointing on the generated class. Then, you could use the intellisense.
 This intellisense will make your dev's life much easier !!!
Now that's your turn ! Enjoy !

