
Introduction
Microsoft invests a lot in low-code solutions in order to empower teams to build and deploy custom, end-to-end business solutions across their organisation.
One of the "big" low-code solutions of Microsoft is Power Automate. It is an intelligent automation tool made for an audience as large as possible. The goal being to give everyone the ability to automate organisational processes. To learn more about this technology, don't hesitate to take a look at this Chronicle: Power Automate with Dynamics 365.
Why Microsoft chooses to invest in that technology? Well, a statistics from a McKinsey study of February 2019 estimates that 60% of all occupations have at least 30% of activities that could be automated!
Power Automate uses hundreds of connectors to give the user a friendly access to APIs of other services.
But what if you want to automate a process on a software that doesn't provide an API? Microsoft answers this question with the recent release of UI Flows.
UI Flows are automation flows that reproduce the actions of an user directly on the User Interface of its computer! Think it like this: anything that a user does on his computer can be reproduced with UI Flows!!
To give a wider perspective, UI Flows is part of RPA family.
RPA stands for Robotic Process Automation. This concept refers to workflows that automate processes and exchange of data with legacy, on-premises softwares. This is an UI-based approach: it turns manual tasks into automated workflows by recording and playing back human driven interaction with software systems that don’t support API-based automation.
RPA is opposed to DPA: Digital Process Automation. This concept refers to workflows operating across modern cloud services, based on the use of their APIs. DPA relates to the usual utilisation of the connectors of Power Automate.
So, with RPA and DPA, Power Automate is an automation tool that can operate on api-based applications as well as legacy applications without API.
This extends the power of automation to a new level !
As you understood, this Chronicle will present the UI Flows. It will show how to use them, what are the strengths and limits of the tool. In particular, we will study how it could be used in the Dynamics 365 world.
Quick overview of the UI Flows
The UI Flows of Power Automate work both for Web Applications and for Desktop applications.
But two different technologies are used:
For Web applications:
UI Flows are based on the Selenium framework. Selenium is a framework developed for the web. It allows to create flows that reproduce the actions made by a user in a browser. At any time in a Flow, you can add commands to check that the web applications behaves as expected.
When you create the UI Flow for a web app, the Selenium IDE automatically opens. The IDE allows to create a Selenium Flow without writing code.
The principle of the UI Flow for web applications is that it allows to call a Selenium flow inside a Power Automate Flow!
You can pass inputs from the Power automate Flow to the Selenium Flow. And you can get outputs from the Selenium Flow to the Power Automate Flow
For Desktop applications:
UI Flows are based on a Chrome extension developed by Microsoft.
When you create the UI Flow for a desktop application, this extension activates and it allows to record all the actions made the user on the Windows User Interface.
Each action made (for instance, click on a button, select a control, change the size of the window, etc.) is automatically converted into a step in a Power Automate UI Flow!
When you have finished the recording, you can integrate the Power Automate UI Flow into a classical Power Automate Flow.
This might be confusing so far, but we will detail all this in the following and it will make more sense.
For now, remember that UI Flows for web applications are based on Selenium. And they are fully integrated in Power Automate for desktop applications. In both cases, you can integrate the UI Flow in an usual Power Automate Flow
Set up for UI Flows
As UI Flows make a connection between a web application and the UI of your computer, you need to set up a few things on your computer before using them. For all the details on the installations, you can look the official documentation of Microsoft here.
Here are the main prerequisites to be able to use UI Flows:
- Either a paid or trial license for Power Automate Attended RPA.
- A device that runs Windows 10 Pro, Windows 10 Entreprise, Windows Server 2016, or Windows Server 2019.
- The Microsoft Edge (version 80 or later) or Google Chrome browser.
- An environment with a Common Data Service database.
And a quick overview before of the installation steps:
- Install UI Flows on your device (for desktop app recording)
You need to download a program that will install the required tools
- Activate the UI Flows browser extension
In the previous step, a browser extension (for Chrome or for Microsoft Edge) was installed. You just need to activate it.
- Install Selenium IDE to automate Web applications with UI flows
You need to install the Selenium IDE. It is in the core of the Power Automate UI Flows for web applications
- Install the on-premises data gateway
You need to install a gateway on the machine which you use to record the steps to be performed by the UI Flows. It creates a secured communication canal between your machine and your Power Automate Flows.
The documentation provides the executable file to easily install it.
- Setup UI flows connections and machine credential
The last step is to create a connection and provide the gateway information and your device credentials.
Note: If you don't create the connection directly, you will be able to do it when you create your Flow.
Personal estimation: You can count between one and two hours to set up the UI Flows.
Execution type: attended vs unattended
Last information before we get into the core of the subject. The UI Flows can execute in to different manners: either as attended RPA or unattended RPAs.
Attended RPA: The UI Flow runs on a worker’s PC to automate cumbersome or repetitive processes, allowing the worker to correct any errors as needed. This approach achieves many benefits of automation while allowing for human intervention when human intelligence or business experience is required. When running attended, UI flows will use an existing Windows user session.
Unattended RPA: The UI Flow runs with no user logged in. Workflows trigger in the background based on events that happen, and then run at any time in the cloud. It is used to accelerate automation of high-volume, repetitive tasks. They are best for applications that do not need human supervision.
When running unattended, UI flows automatically signs into the target devices that run Windows 10, Windows Server 2016, or Windows Server 2019. Once the automation completes, UI flows signs out from the device and reports its activity in Power Automate. To run unattended UI flows, the target machine needs to be available with all users signed out.
The attended RPAs and unattended RPAs are quite different concepts. So be careful, their licensing options are really different.
UI Flows for desktop applications
This part will focus on the UI Flow for Desktop Applications. We will expose it as a tutorial.
The use case I chose is based on the Desktop app Microsoft Access, which is a Database Management System.
To show the power of UI Flows with Power Automate, our automation task will also involve Dynamics 365 via its web API.
Use case
I have created a sample database in Microsoft Access containing information for 500 contacts (like name, email, address, phone number, etc). Let's supposed that it is used by an organisation called Organisation AAA.
Let's say that Organisation AAA is deprecating the Access Database and uses Dynamics 365 instead as a new software.
Then, the useful information of this database has been migrated to Dynamics 365.
After an evolution in the business of the company, a new information about the Contacts is needed in Dynamics 365 (the address in this tutorial). It is contained in the Access Database but it had not been migrated to Dynamics 365.
The information must now be transferred from the Desktop application to Dynamics 365. It should be done by a non-technical user with no coding knowledge.
Of course, we will do it using... a Power Automate UI Flow!
Tutorial
Now how to do it ?
There will be two steps: first, create the UI Flow, then integrate the UI Flow into an usual Power Automate Flow.
Create the UI Flow
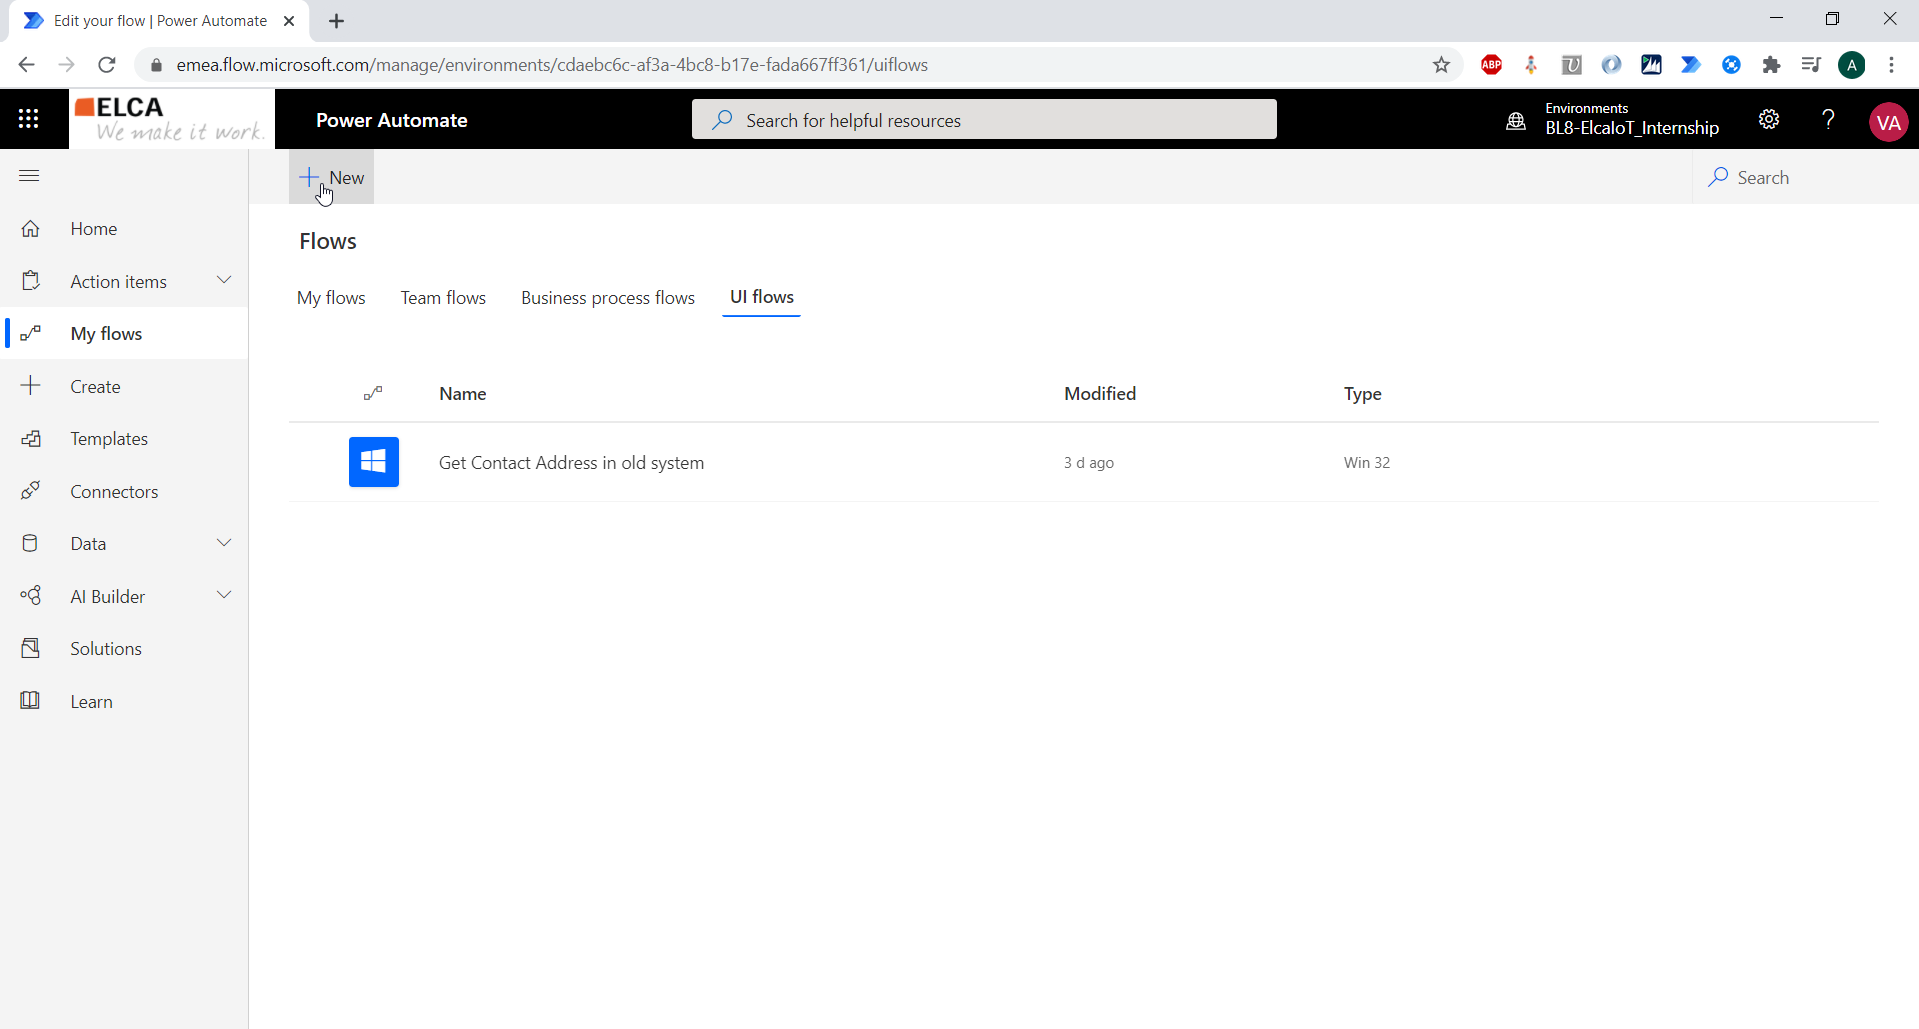
First, go to the Power Automate portal at: flow.microsoft.com
You could also create a Power Automate Flow from the Power Apps portal (at make.powerapps.com). You could that way create the Flow directly in a solution. It will automatically redirect to the Power Automate portal.
Select New UI Flow.
A pop-up Window opens with one option to choose between three:

- Power Automate Desktop: See part "Note on Power Automate Desktop" in this Chronicle
- Windows recorder: to use a UI Flow for a desktop application
- Selenium IDE: to use a UI Flow for a web application
For this use case, we need Windows recorder. Click Next.
Then, another menu opens with 4 steps: "Set up inputs", "Record and edit steps", "Review outputs" and "Test". This menu is where the UI Flow is edited.
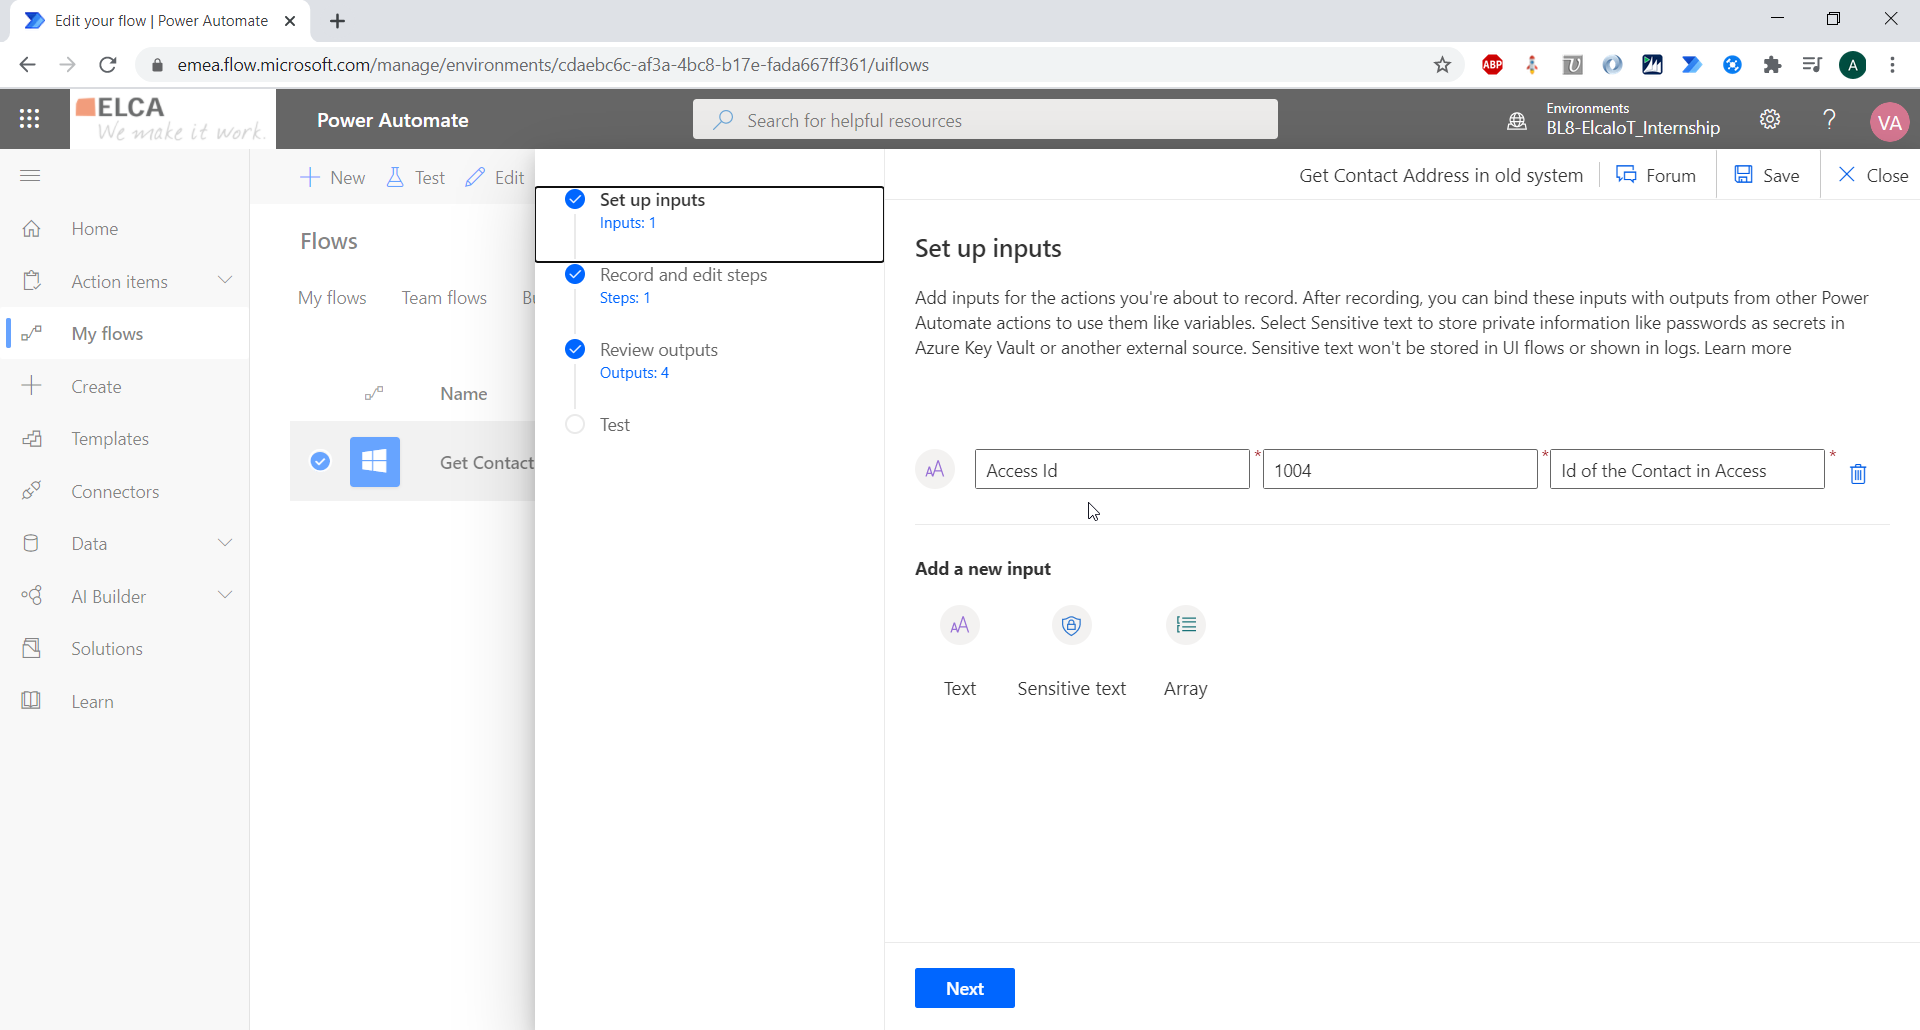
In the first step, you define the potential inputs for your UI Flow. To create the UI Flow, you need to provide a sample value for each input. Later, when using the UI Flow in a Power Automate Flow, you will be able to pass any values as the inputs. For each input, you must specify a type, a name, a sample value and a description.
For this tutorial, I define one input:
- Type: Text
- Name: Access Id
- Sample value: 1004
- Description: Id of the Contact in Access
In the final flow, this input will be the "Access Id" coming from a Dynamics 365 record. It will be used to retrieve the address information for this record in the Access Database.
Click next when your inputs are configured. You can go back at any time.
As the name indicates, the step "Record and edit steps" allows to record the UI Flow and to edit it afterward.
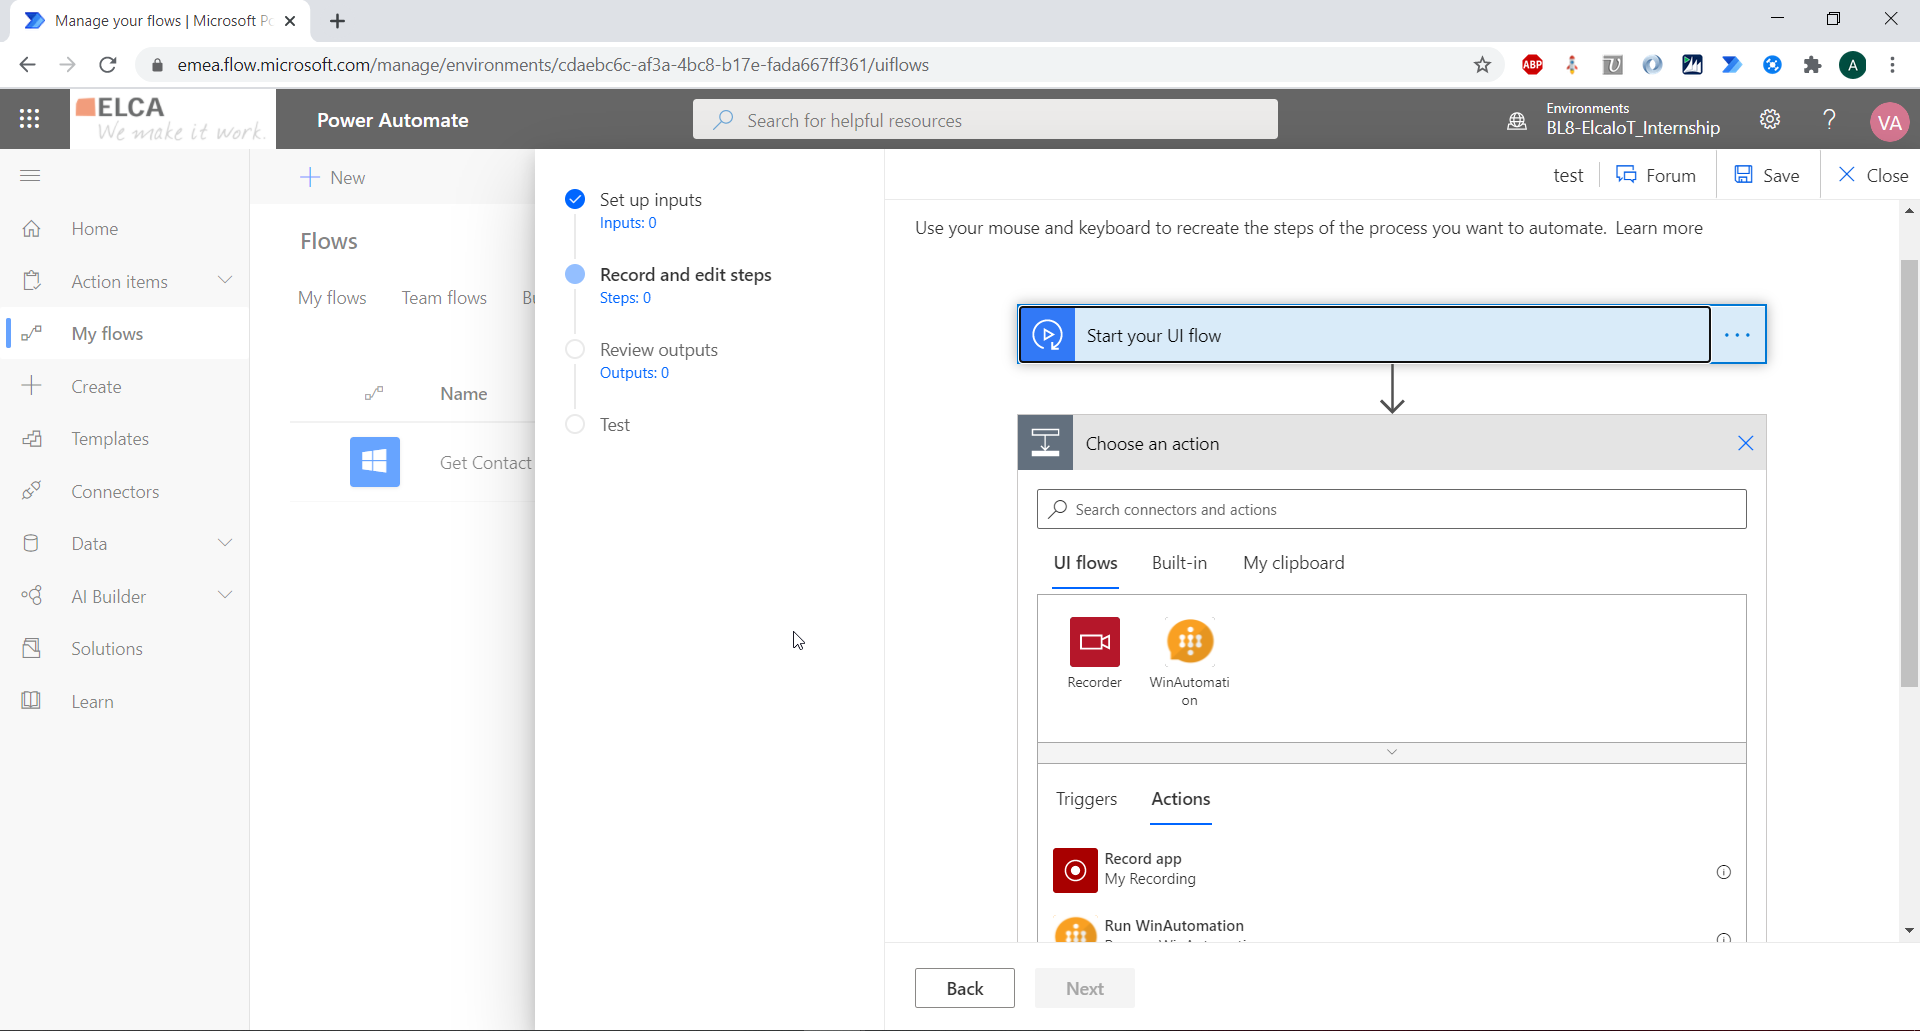
As you can see in the above printscreen, the UI Flow stands in the usual Power Automate interface, it is presented as a Flow. As said before, this UI Flow will later be added to a Power Automate Flow (as an action).
Here, there is a trigger called "Start your UI Flow". It can't be changed. Actually, this UI Flow is triggered either manually when it is being tested, or in a Power Automate Flow.
There are two possible actions: "Record App" and "Run WinAutomation". Both allow to record UI steps. WinAutomation is a software developed by Softomotive. The other action uses a software developed by Microsoft.
If you have no system using WinAutomation yet, I advise to use the "Record App" action.
So, here we choose "Record App". Then, click "Launch recorder".
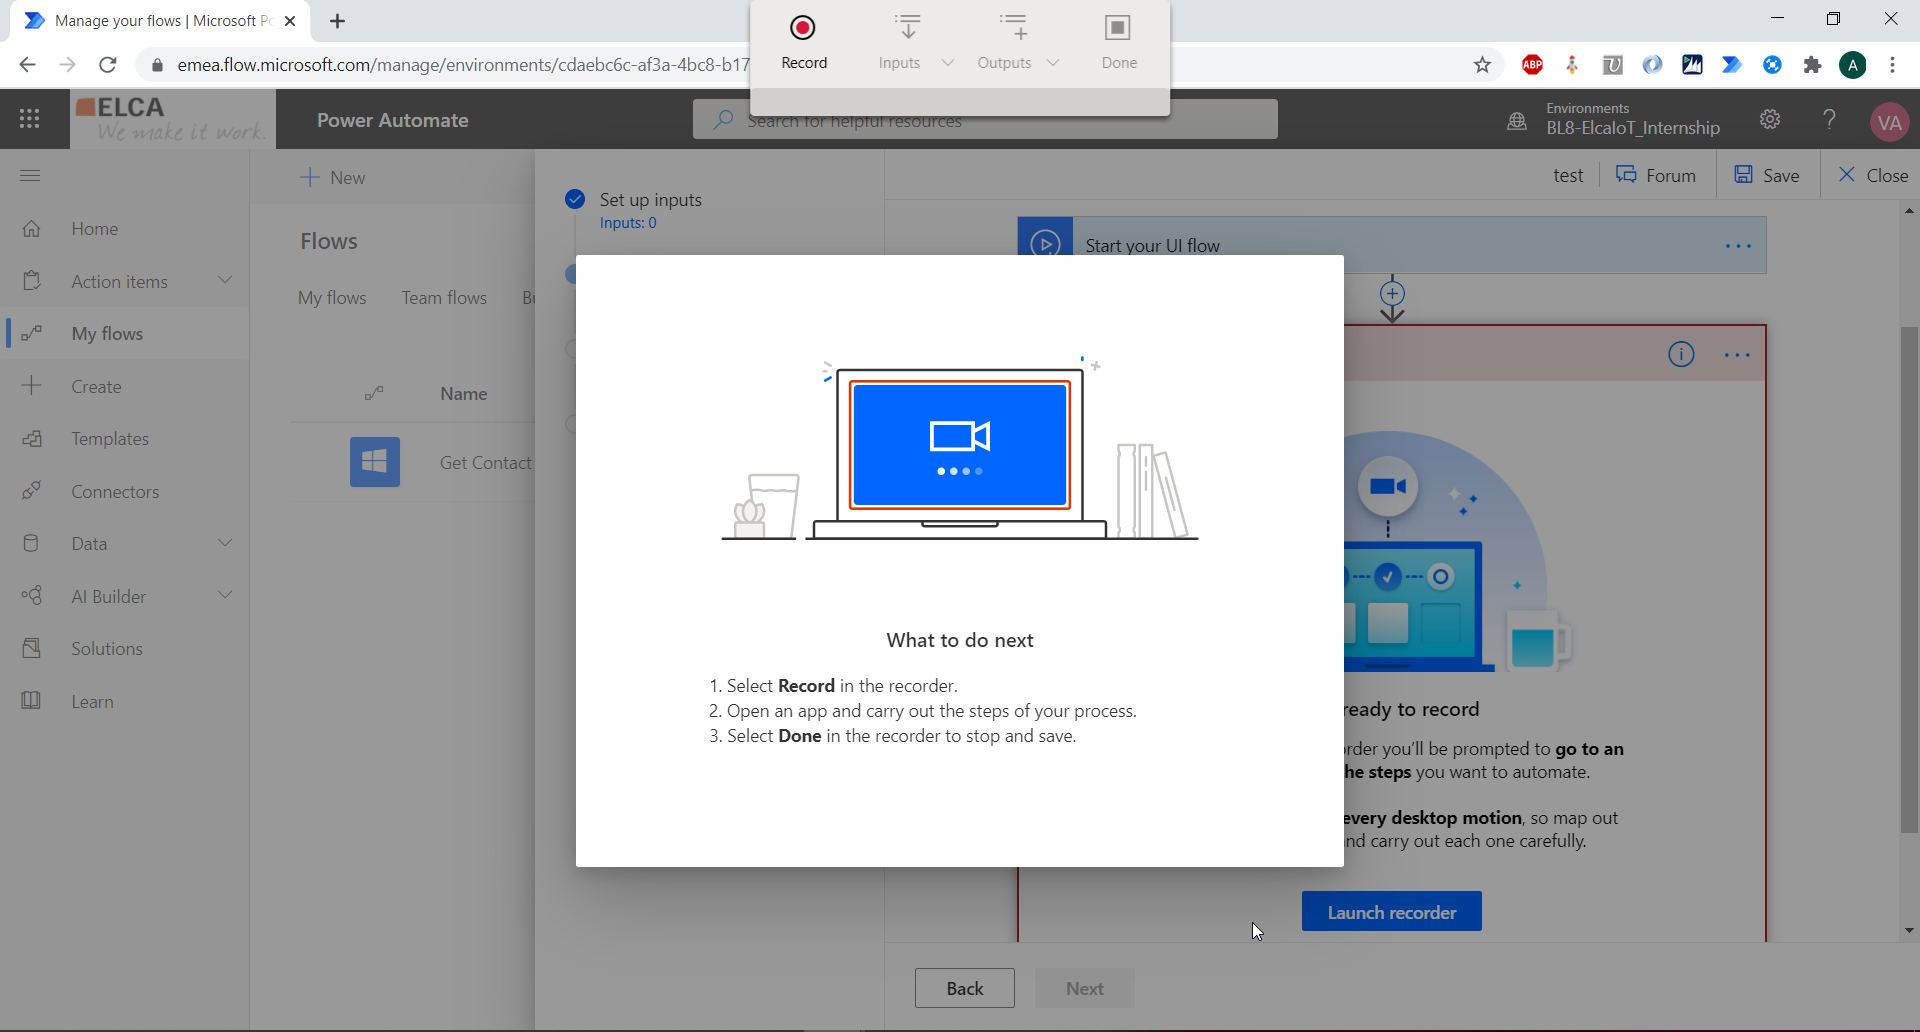
A small menu appears at the top of your screen (see above printscreen). It contains 4 buttons:
- "Record": click it to start recording steps
- "Inputs": select an input you have defined earlier and use it in the recording
- "Outputs": select an element in the recording and define it as an output of the UI Flow
- "Done": exit the recording
I didn't take printscreens during the recording as printscreens would be recorded as well and it would skew the UI Flow!
But here is what was basically recorded: First, I select the Form tab in the Access database. In the search box, I indicate to enter my input "Access Id" of my UI Flow. It automatically opens the record having this "Access Id". Then, I select the content of the field "Address" and I indicate to store it in an output variable called "Address". I do the same for the content of the fields "City", Country" and "Postal".
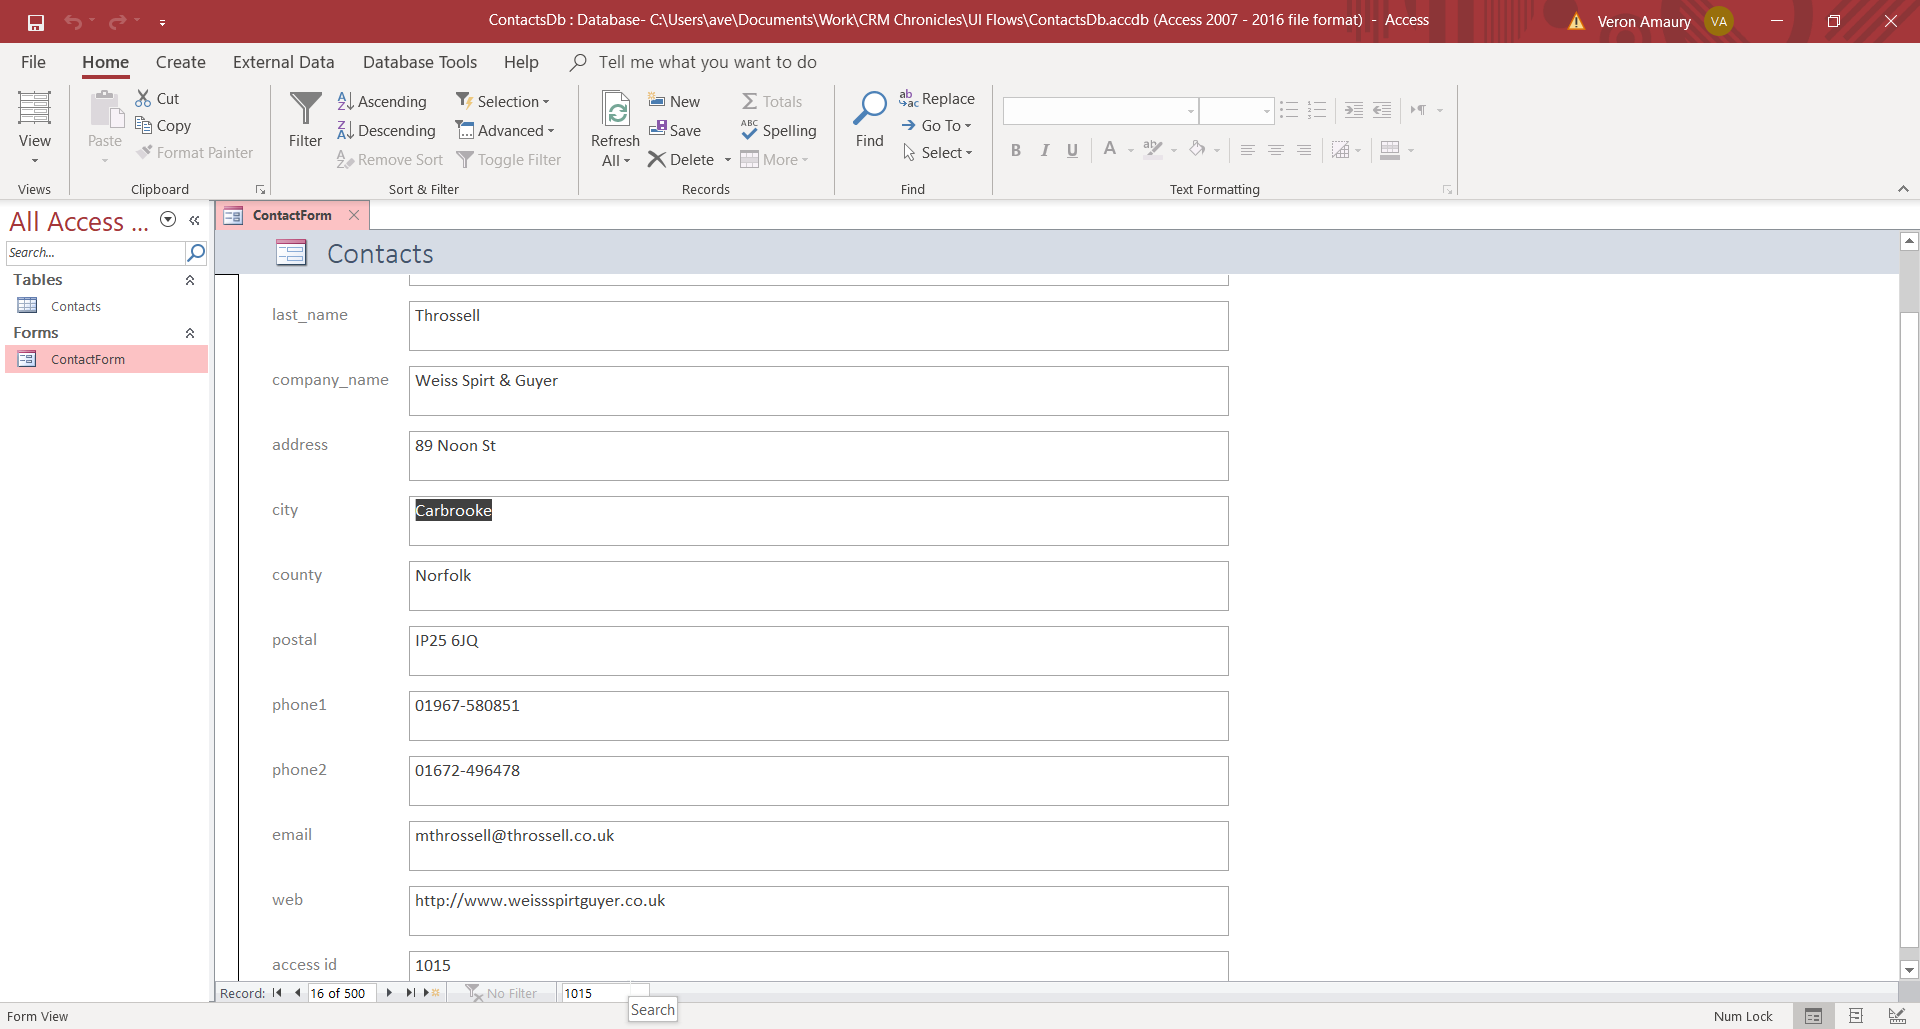
When I first created the UI Flow, my first step was to open the Access file. When testing the UI Flow, I observed that this step had only been registered as "Open Access Application", landing the process to this window:
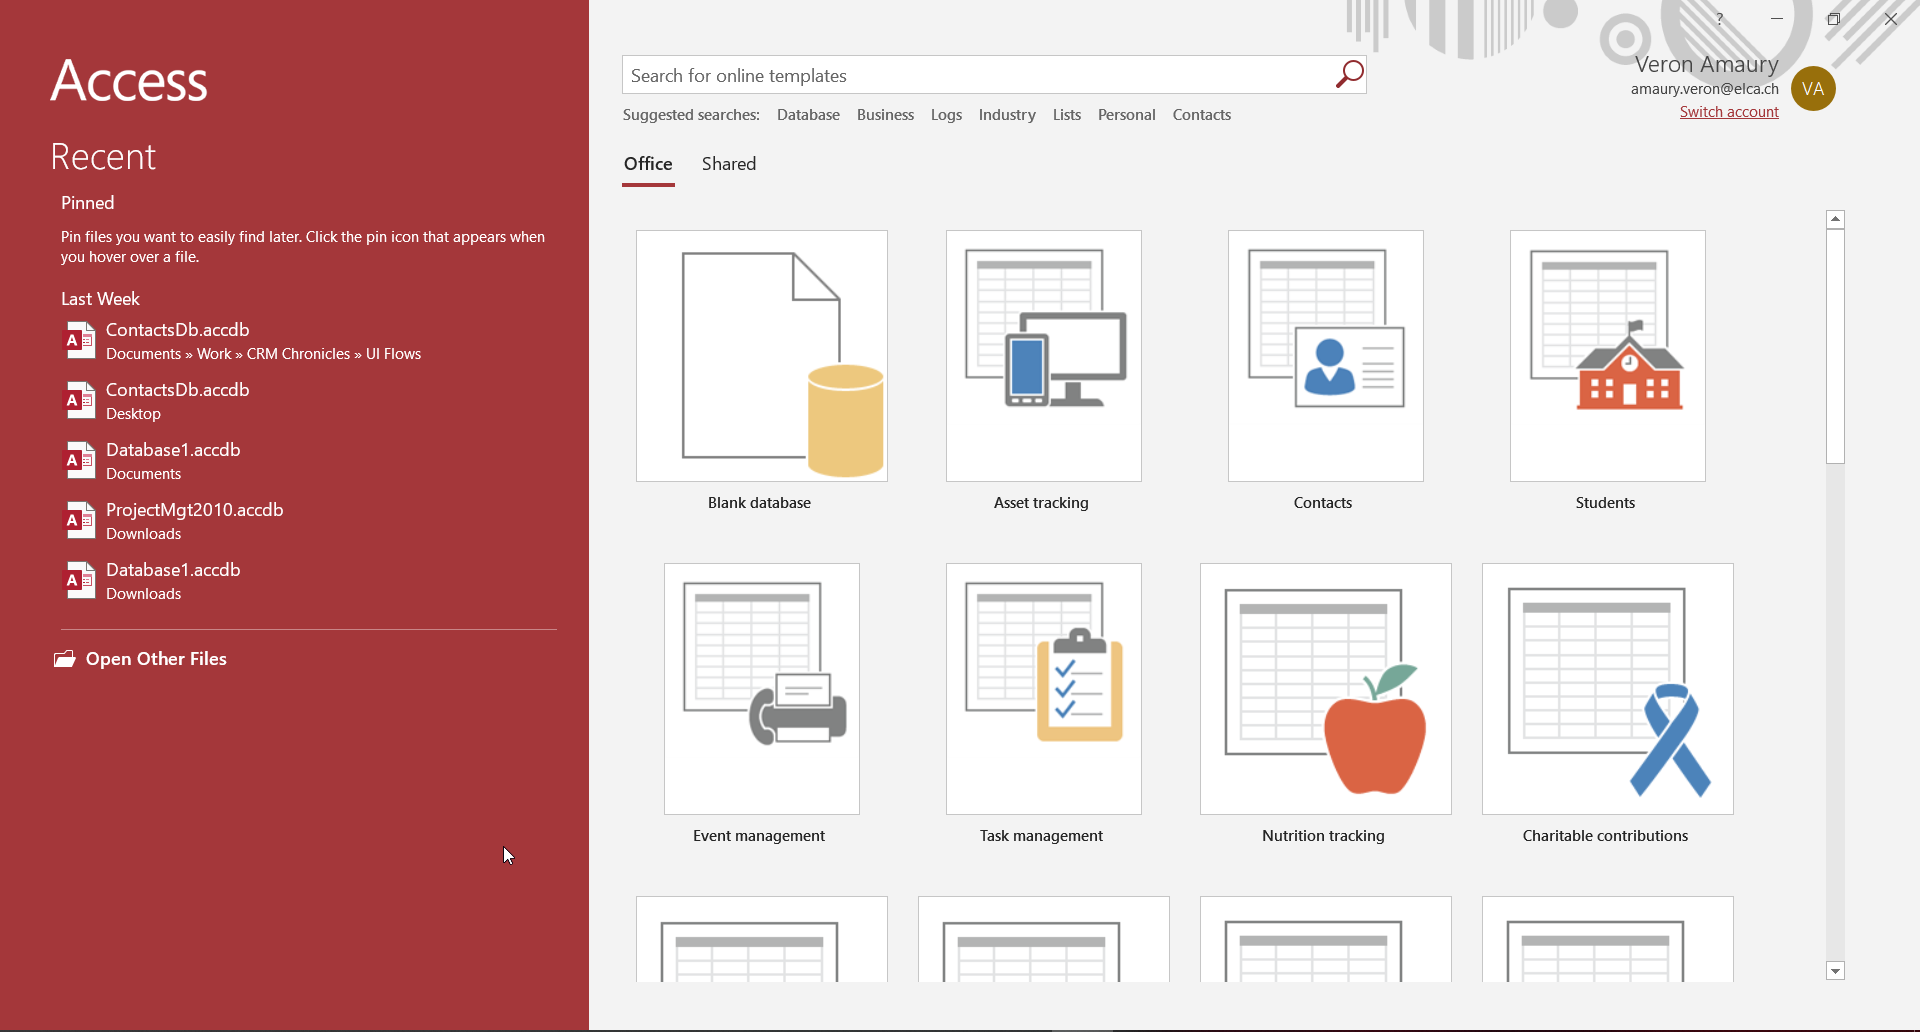
Instead of opening my Access file :(.
So I decided to consider that the Access file would be already opened and to remove this step in the UI Flow. There would probably have been a way to open the Access file if really necessary.
The main thing to remember with this example is that the UI Flow might not behave exactly as you expected when recording it.
When you click "Done", the recorder stops and the menu automatically refreshes to show you something like... this!
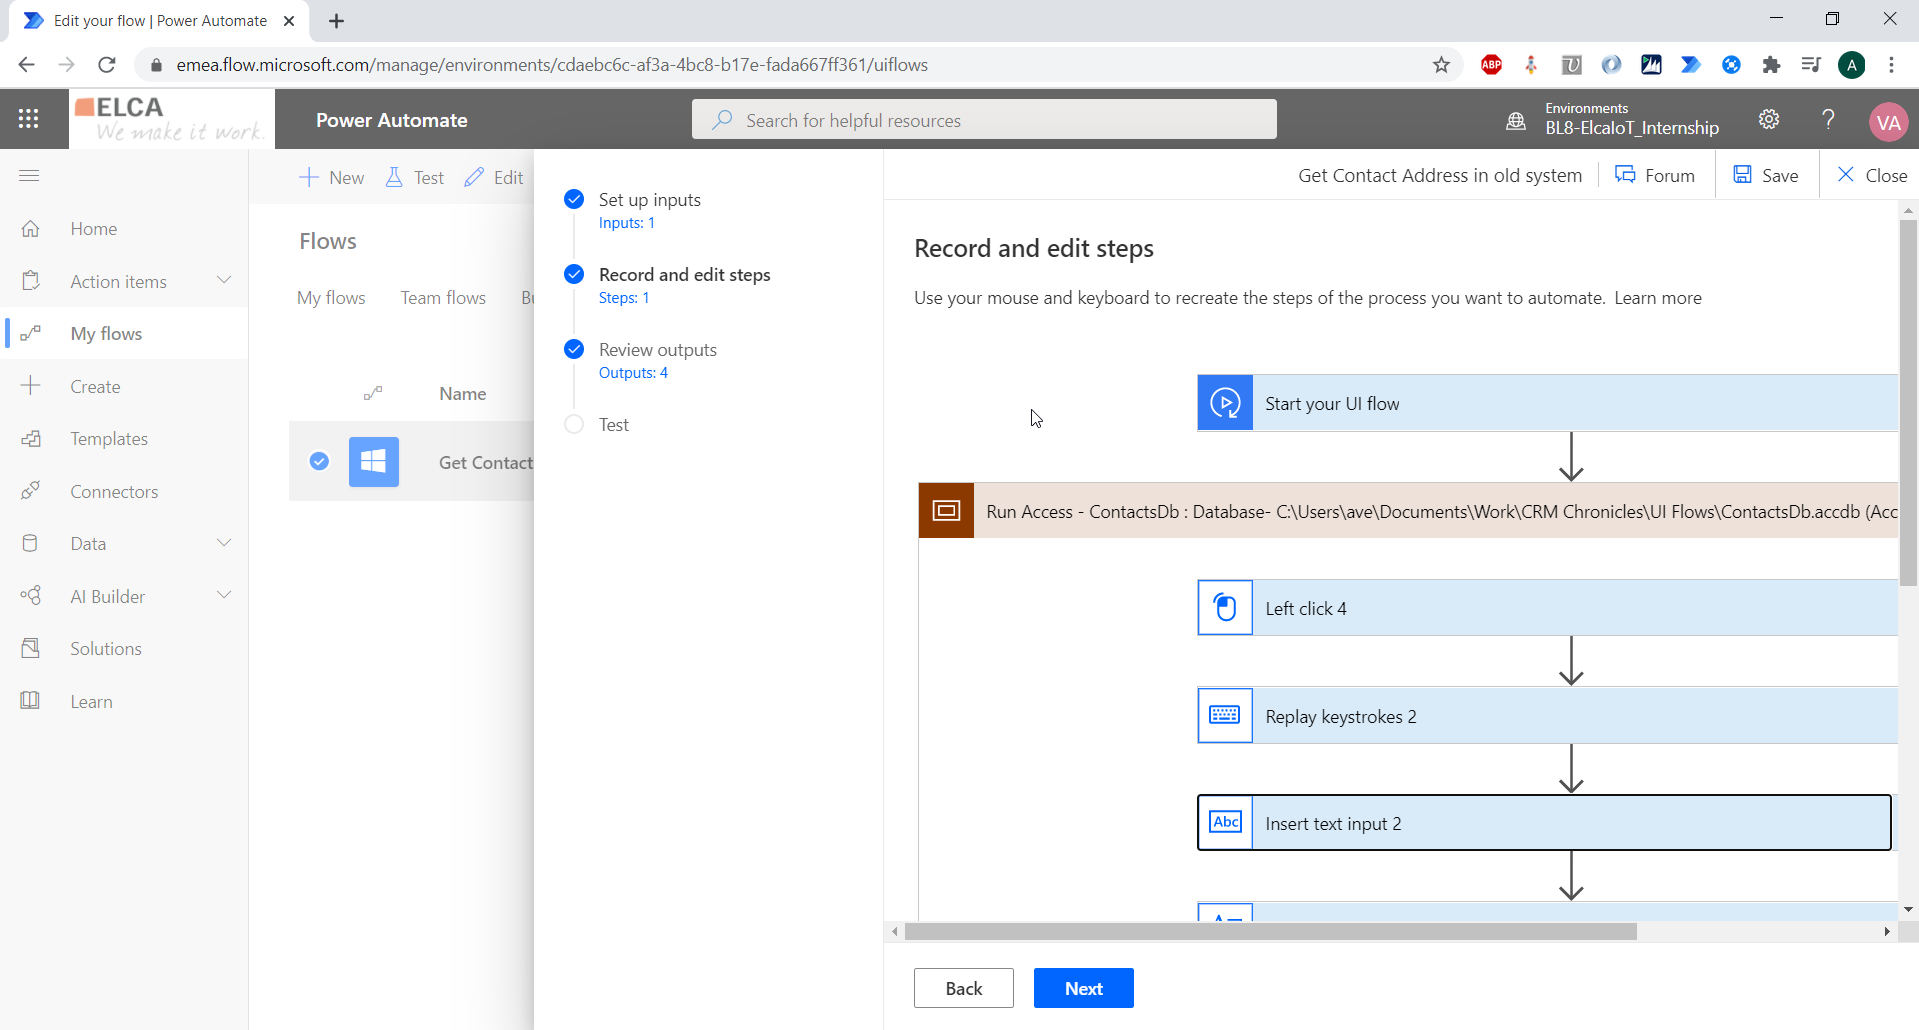
You can see here that each action you have performed on your computer has been translated into a Power Automate action!!!!

For instance, the "Insert text input 2" action corresponds to the action where I inserted the value of my variable "Access Id" into the Search Box of the Access Database.
You can edit each step of the UI Flow manually. To do this, click on "Show advanced options" in the step you want to edit. A field contains the JSON describing the UI aciton to perform. The edition of the UI Flow can only be done through the editing of this JSON. The JSON for a single step is quite complex. Here is an example of JSON for a step that selects a text control:
{
  "type": "WinUIA",
  "parameters": {
    "elementStack": [
      {
        "automationId": "",
        "boundingRectangle": "498,1003,70,16",
        "className": "NetUIRecNavSearchTextbox",
        "controlType": "50004",
        "frameworkId": "Win32",
        "name": "Search",
        "localizedControlType": "Edit",
        "xOffset": 11,
        "yOffset": 8
      },
      {
        "automationId": "",
        "boundingRectangle": "215,1001,1705,19",
        "className": "NetUINetUI",
        "controlType": "50025",
        "frameworkId": "",
        "name": "Record Navigator",
        "localizedControlType": "Custom",
        "xOffset": 294,
        "yOffset": 10
      },
      {
        "automationId": "",
        "boundingRectangle": "215,1001,1705,17",
        "className": "NetUIHWNDElement",
        "controlType": "50033",
        "frameworkId": "Win32",
        "name": "",
        "localizedControlType": "Pane",
        "xOffset": 294,
        "yOffset": 10
      },
      {
        "automationId": "",
        "boundingRectangle": "215,1001,1705,17",
        "className": "NetUINativeHWNDHost",
        "controlType": "50033",
        "frameworkId": "Win32",
        "name": "RecNavHost",
        "localizedControlType": "Pane",
        "xOffset": 294,
        "yOffset": 10
      },
      {
        "automationId": "",
        "boundingRectangle": "215,1001,1705,17",
        "className": "OSUI",
        "controlType": "50033",
        "frameworkId": "Win32",
        "name": "SUI",
        "localizedControlType": "Pane",
        "xOffset": 294,
        "yOffset": 10
      },
      {
        "automationId": "",
        "boundingRectangle": "215,214,1705,804",
        "className": "OForm",
        "controlType": "50033",
        "frameworkId": "Win32",
        "name": "ContactForm",
        "localizedControlType": "Pane",
        "xOffset": 294,
        "yOffset": 797
      },
      {
        "automationId": "",
        "boundingRectangle": "215,214,1705,804",
        "className": "MDIClient",
        "controlType": "50033",
        "frameworkId": "Win32",
        "name": "Workspace",
        "localizedControlType": "Pane",
        "xOffset": 294,
        "yOffset": 797
      },
      {
        "automationId": "",
        "boundingRectangle": "-8,-8,1936,1056",
        "className": "OMain",
        "controlType": "50032",
        "frameworkId": "Win32",
        "name": "Access - ContactsDb : Database- C:\\Users\\ave\\Documents\\Work\\CRM Chronicles\\UI Flows\\ContactsDb.accdb (Access 2007 - 2016 file format)",
        "localizedControlType": "Window",
        "xOffset": 517,
        "yOffset": 1019
      }
    ],
    "elementXPath": "/Window[@ClassName=\"OMain\"][@Name=\"Access - ContactsDb : Database- C:\\Users\\ave\\Documents\\Work\\CRM Chronicles\\UI Flows\\ContactsDb.accdb (Access 2007 - 2016 file format)\"]/Pane[@ClassName=\"MDIClient\"][@Name=\"Workspace\"]/Pane[@ClassName=\"OForm\"][@Name=\"ContactForm\"]/Pane[@ClassName=\"OSUI\"][@Name=\"SUI\"]/Pane[@ClassName=\"NetUINativeHWNDHost\"][@Name=\"RecNavHost\"]/Pane[@ClassName=\"NetUIHWNDElement\"]/Custom[@ClassName=\"NetUINetUI\"][@Name=\"Record Navigator\"]/Edit[@ClassName=\"NetUIRecNavSearchTextbox\"][@Name=\"Search\"]",
    "desktopNodeXPath": "/Pane[@ClassName=\"#32769\"][@Name=\"Desktop 1\"]",
    "applicationInfo": {
      "applicationId": "xTP+VVS5zky+s5ahUH/ZDw=="
    }
  }
}
So unfortunately, the UI Flow is actually painful to edit. If you are unhappy with the UI Flow, the easiest way to correct it might be to start it again from scratch :(. Which can obviously be annoying for long UI Flows.
When you are satisfied with your UI Flow, you can click Next. It lands you to the fourth step, testing the UI Flow.

Here you can enter values for your inputs and click Test now. It will run the UI Flow, show the execution status for each step and return the outputs. So you can check that you get the expected outputs.
The UI flows reproduces exactly the steps you configured in the previous step. So you will see your mouse reach a certain button, see some text inputs get filled, etc. So to let the UI flow work properly, do not interact with your computer while it is executing.
Insert the UI Flow in a Power Automate Flow
When you validate that the UI Flow performs the steps you wanted it to, the next stage is to add your UI Flow to a Power Automate Flow. That's where the magic will happen with the combination of DPA and RPA. So, create a new Power Automate Flow. To add your UI Flow, add a new step and search for the UI Flow connector.
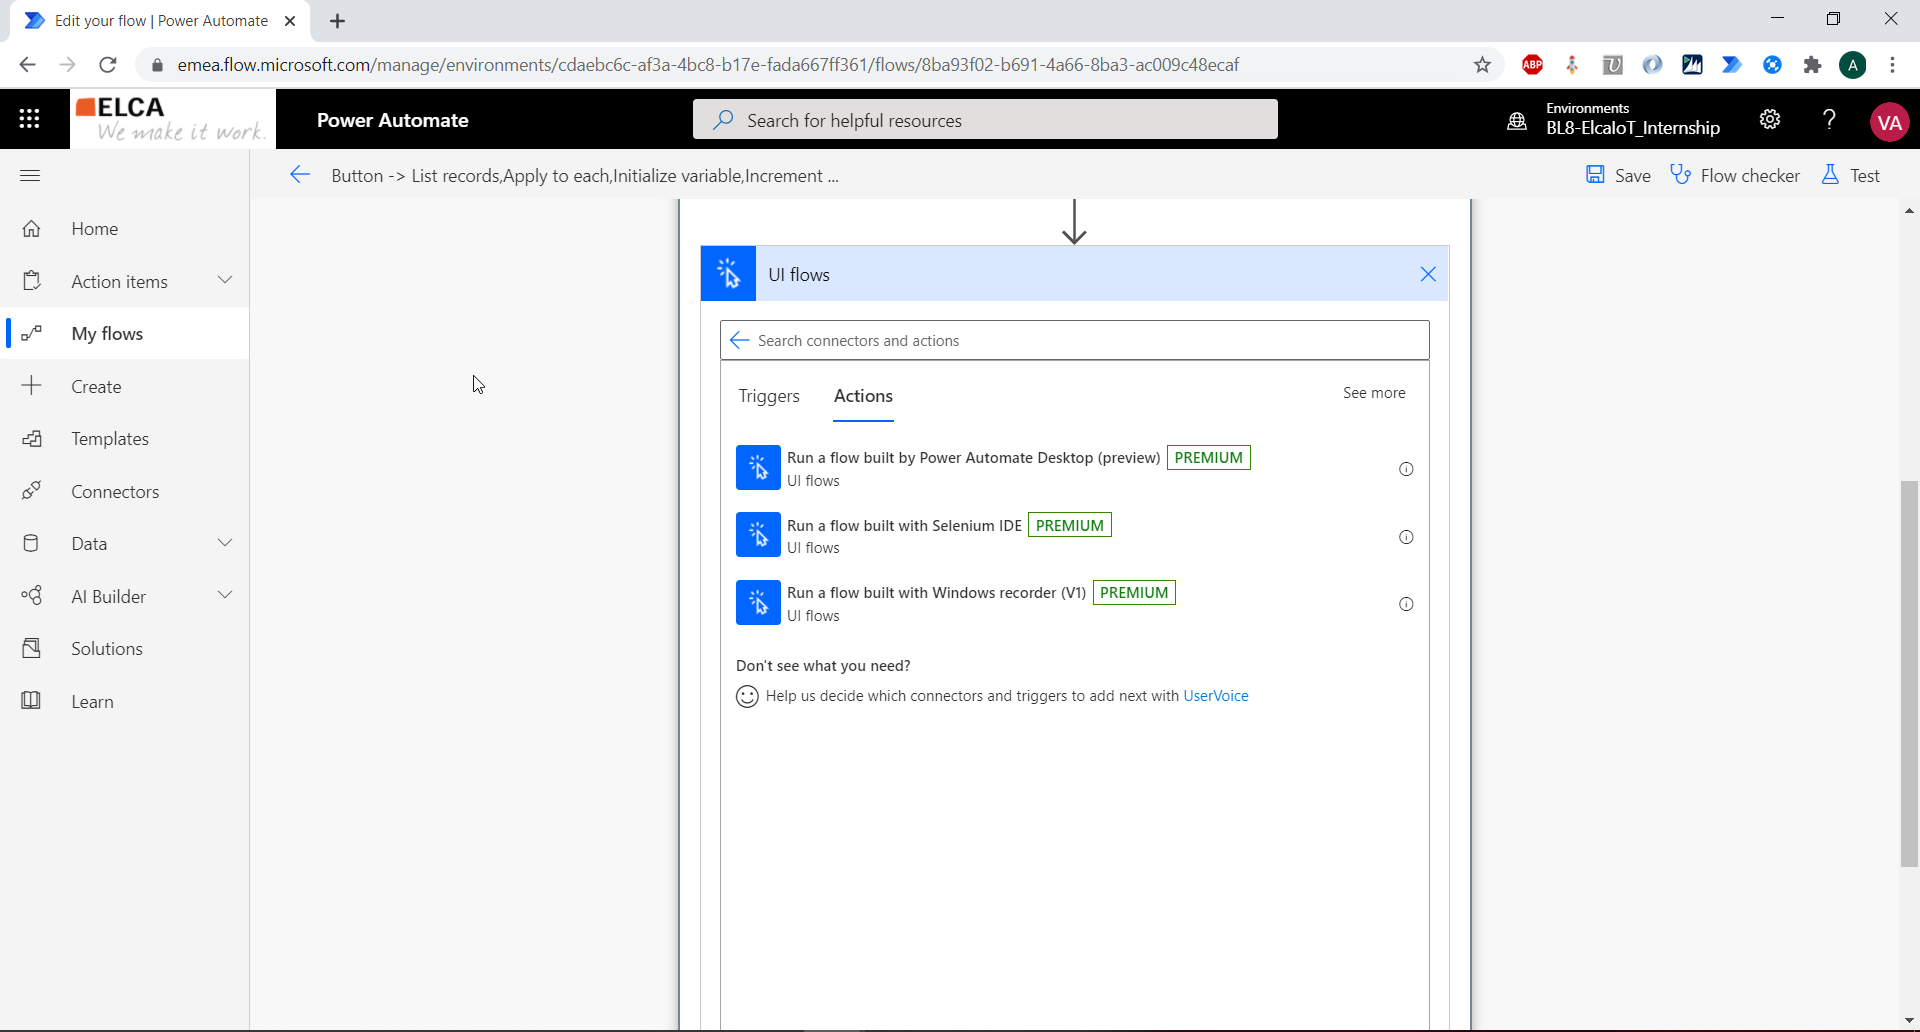
It has no trigger. But it has three actions:
- Run a flow built by Power Automate Desktop (preview)
- Run a flow built with Selenium IDE
- Run a flow built with Windows recorder (V1)
These three actions correspond to the three types of UI Flow that can be created, as we saw before. Here, select "Run a flow built with Windows recorder (V1)".
Then, the action first asks you to select the gateway you created during the set up of the UI Flows. It creates a connection to an on-premises data gateway and securely connects your locally stored data to Power Automate.
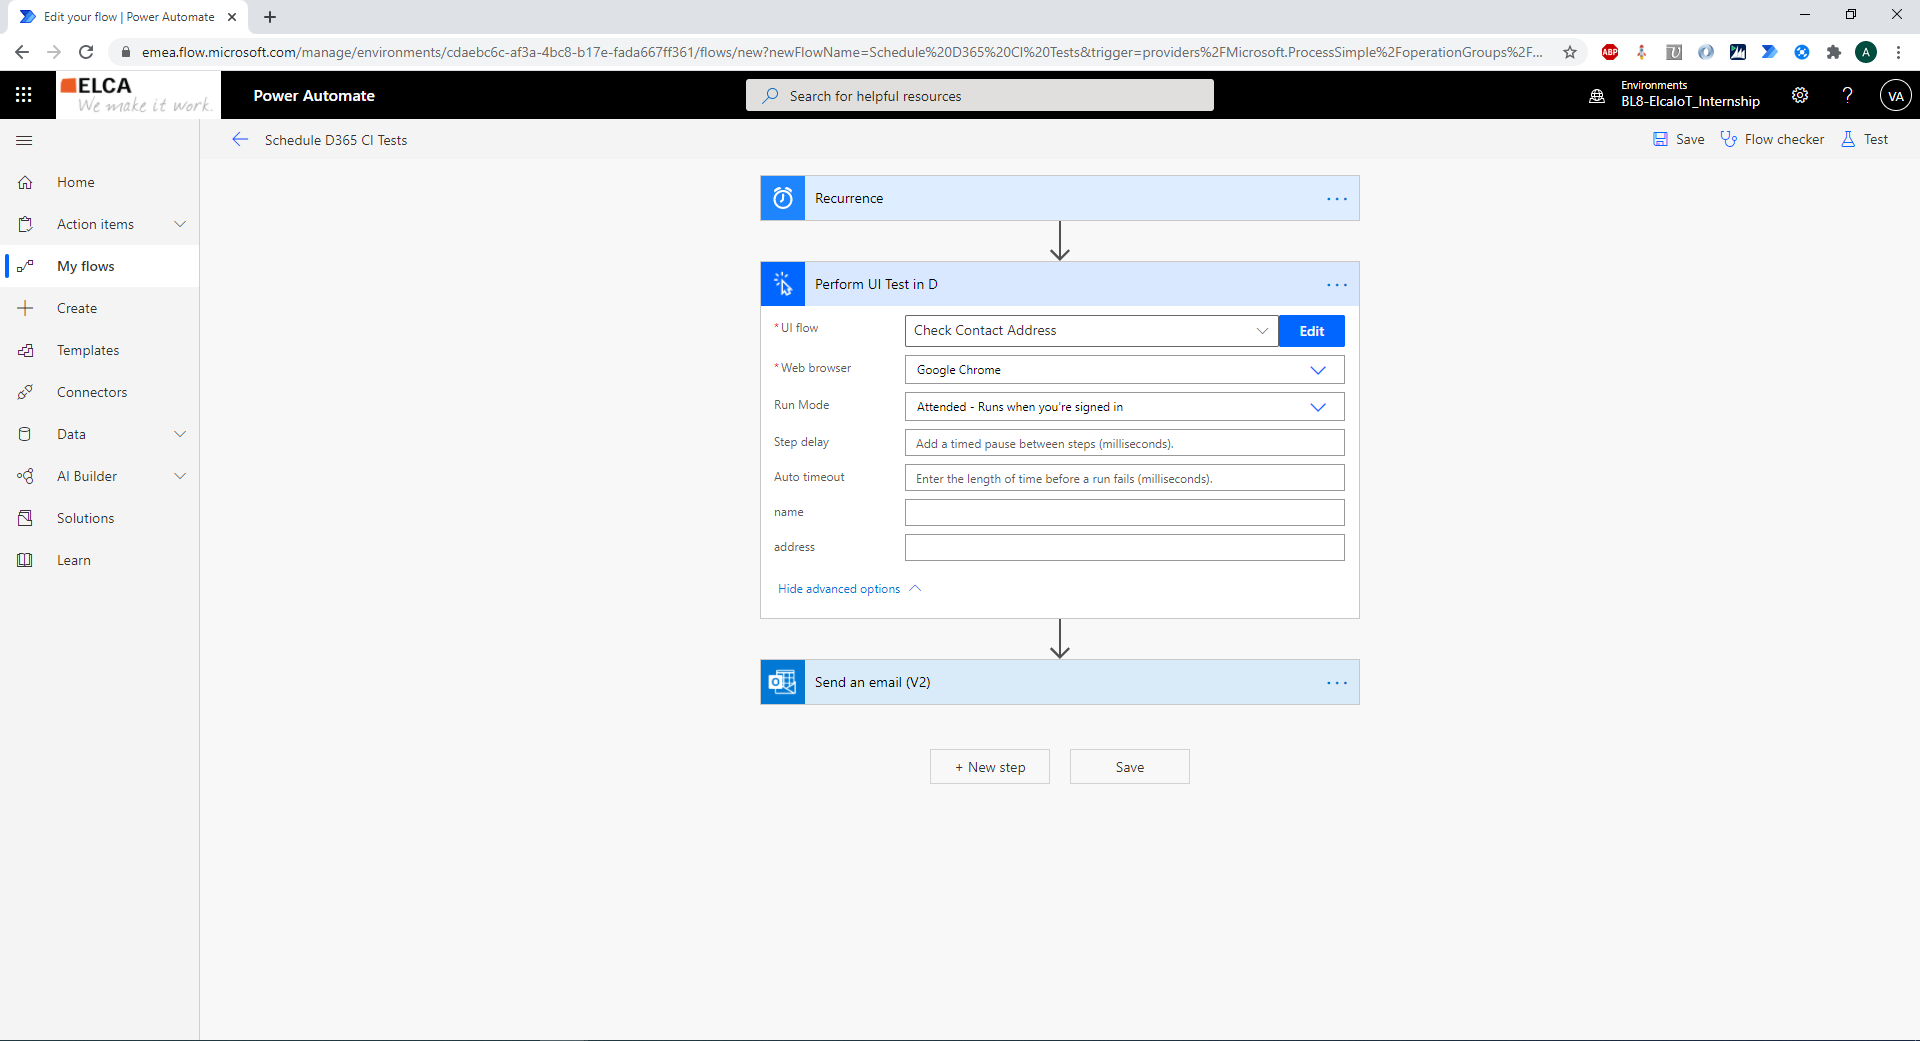
You select the mode for the UI Flow: attended or unattended. And you enter the inputs to pass to the UI Flow.
Here is the Power Automate Flow for this use case:
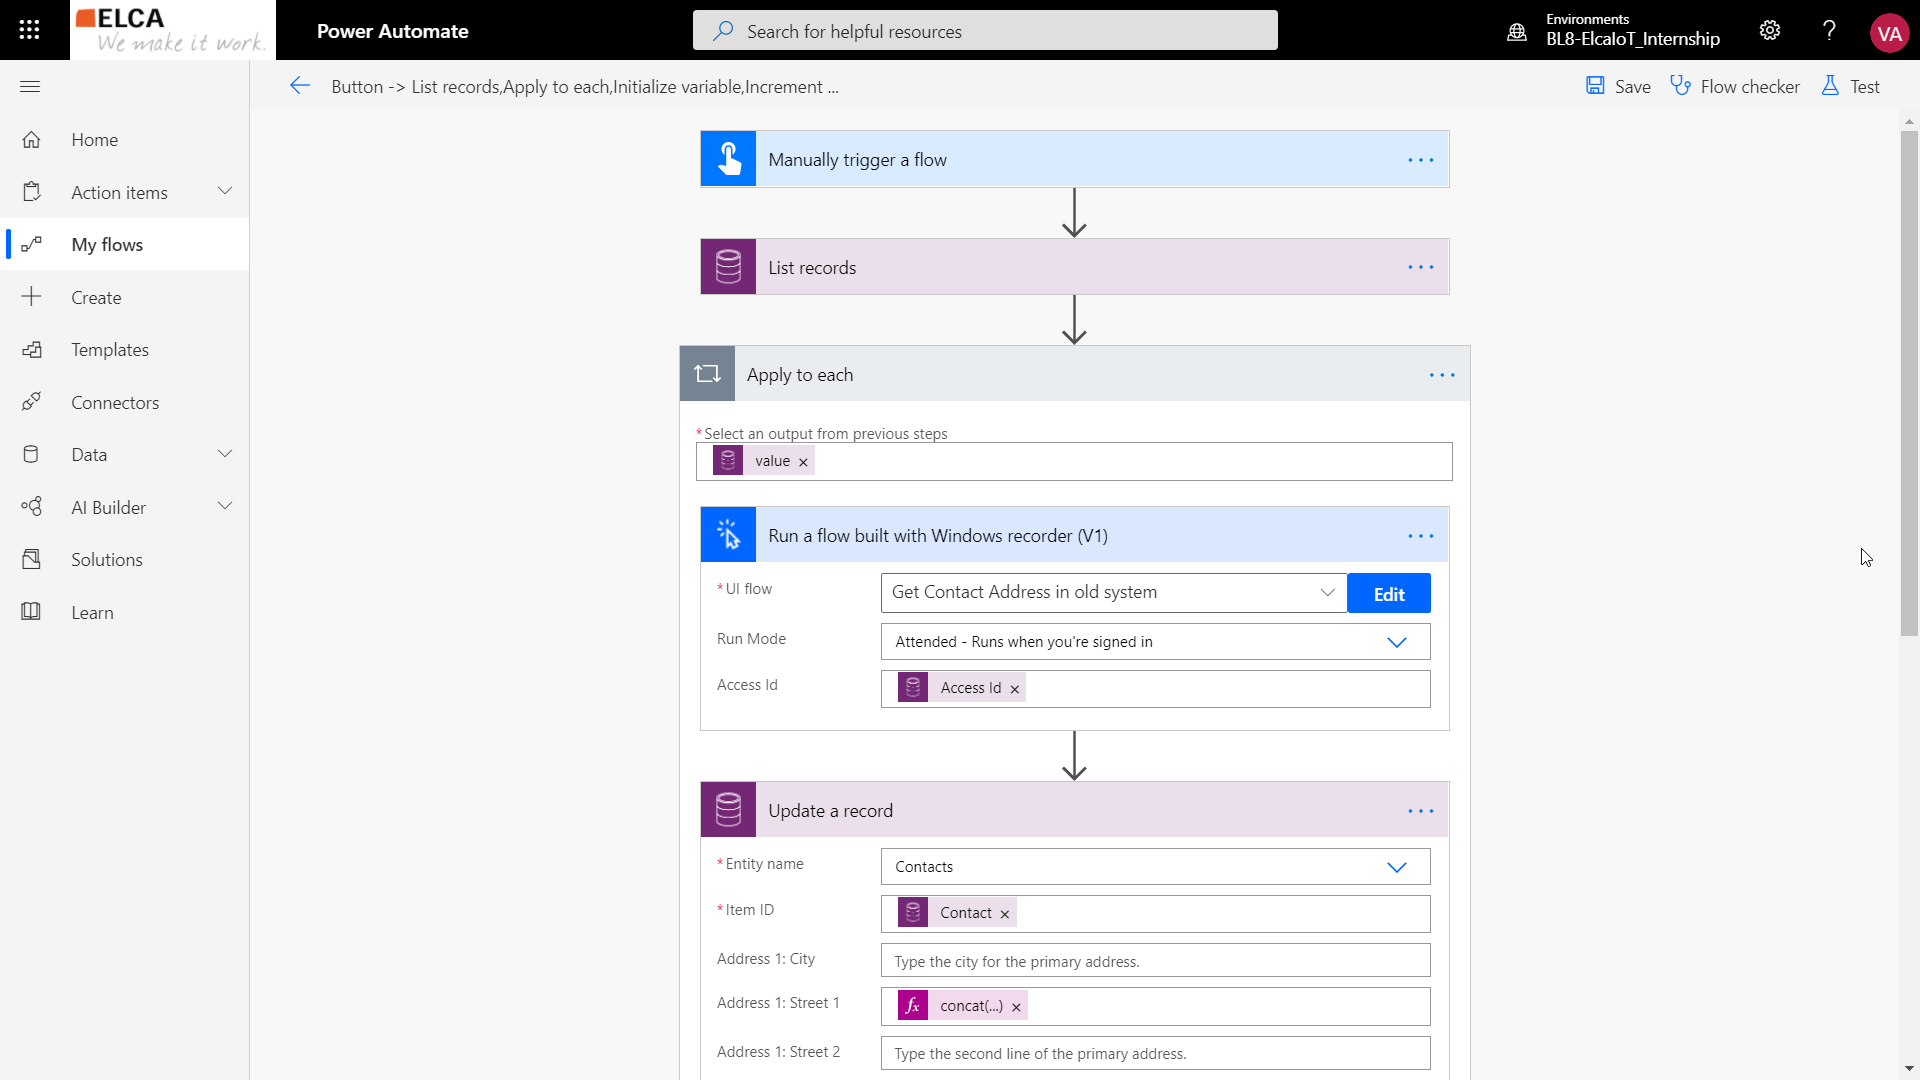
The Flow is manually triggered. First, I list the Contact records in my Common Data Service Database (database for my Dynamics 365 instance).
Then, for each Contact:
- I launch the UI Flow, giving it the "Access Id" if the current Contact as input.
- The UI Flow action returns the Address, City, County and Postal fields for this record, coming from the Access Database.
- I update the Contact in Dynamics 365 with the Concatenation of the four fields.
Here is the result for one Contact, with the legacy information in the Access Form (on the left), and this information reported in Dynamics 365 (on the right):
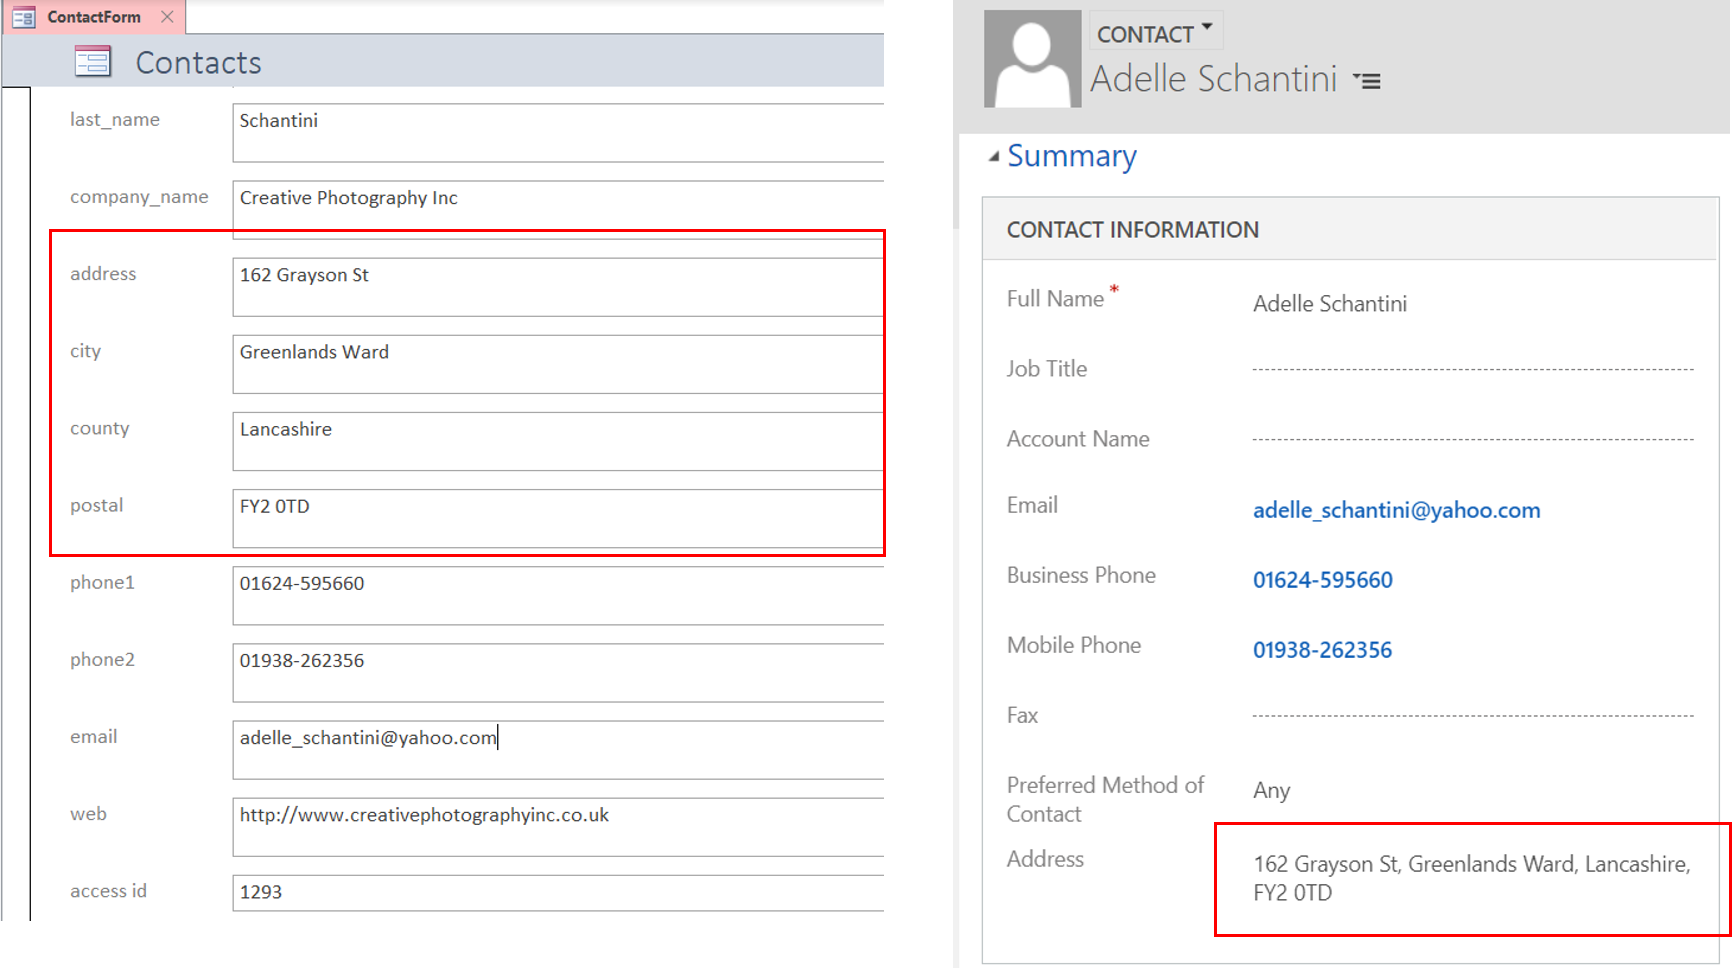
And here it is. We now have a Power Automate Flow that connects together a web API-based application with a legacy application without API !
UI Flows for Web applications
Use case
As said before, UI Flows for web applications are based on Selenium.
Selenium is tool used to test web applications. It has dozens of commands that allow to reproduce actions in a web browser, to make unit tests, to use and store variables.
Selenium can be a very useful tool for Dynamics 365 to automatically perform tests.
The interest of UI Flows for web applications is to integrate them in Power Automate Flows.
Our use case here is the following:
We create a Power Automate Flow scheduled to run every day. The Flow calls an UI Flow that executes on Dynamics 365 and performs some tests. Here I just performed basic tests, like checking the value of a field, checking that a field is editable.
If a test is unsuccessful, an output is returned from Selenium to the Power Automate Flow. And a mail is then sent with an indication on the test that failed.
Note that this could part of a Continuous Integration/Continuous Delivery pipeline, with no code involved!
Tutorial
Again, create a UI Flow either from the Power Apps portal or directly from the Power Automate portal.
This time, select "Selenium IDE" for the type of the UI Flow.
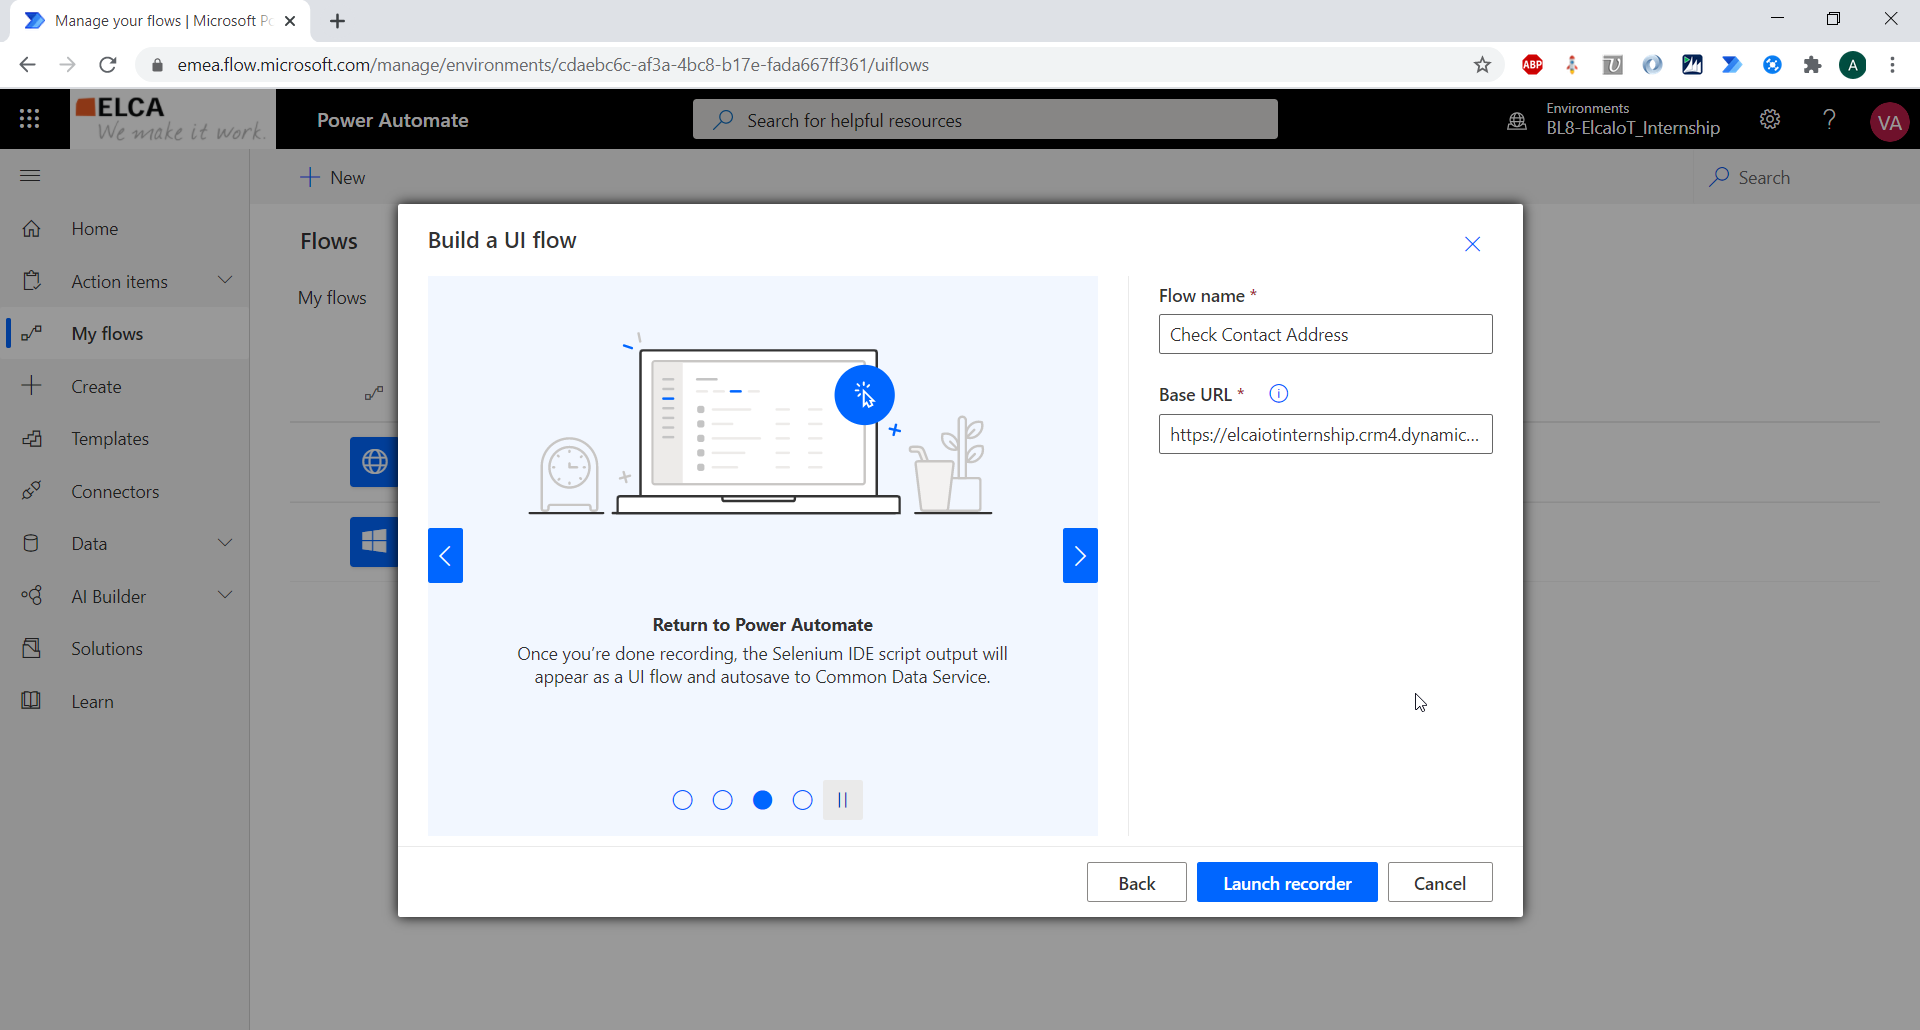
The next menu will ask to name the UI Flow and to provide a "Base URL". This URL is the starting point for the UI Flow.
Then, select "Launch recorder". This will launch the Selenium IDE:
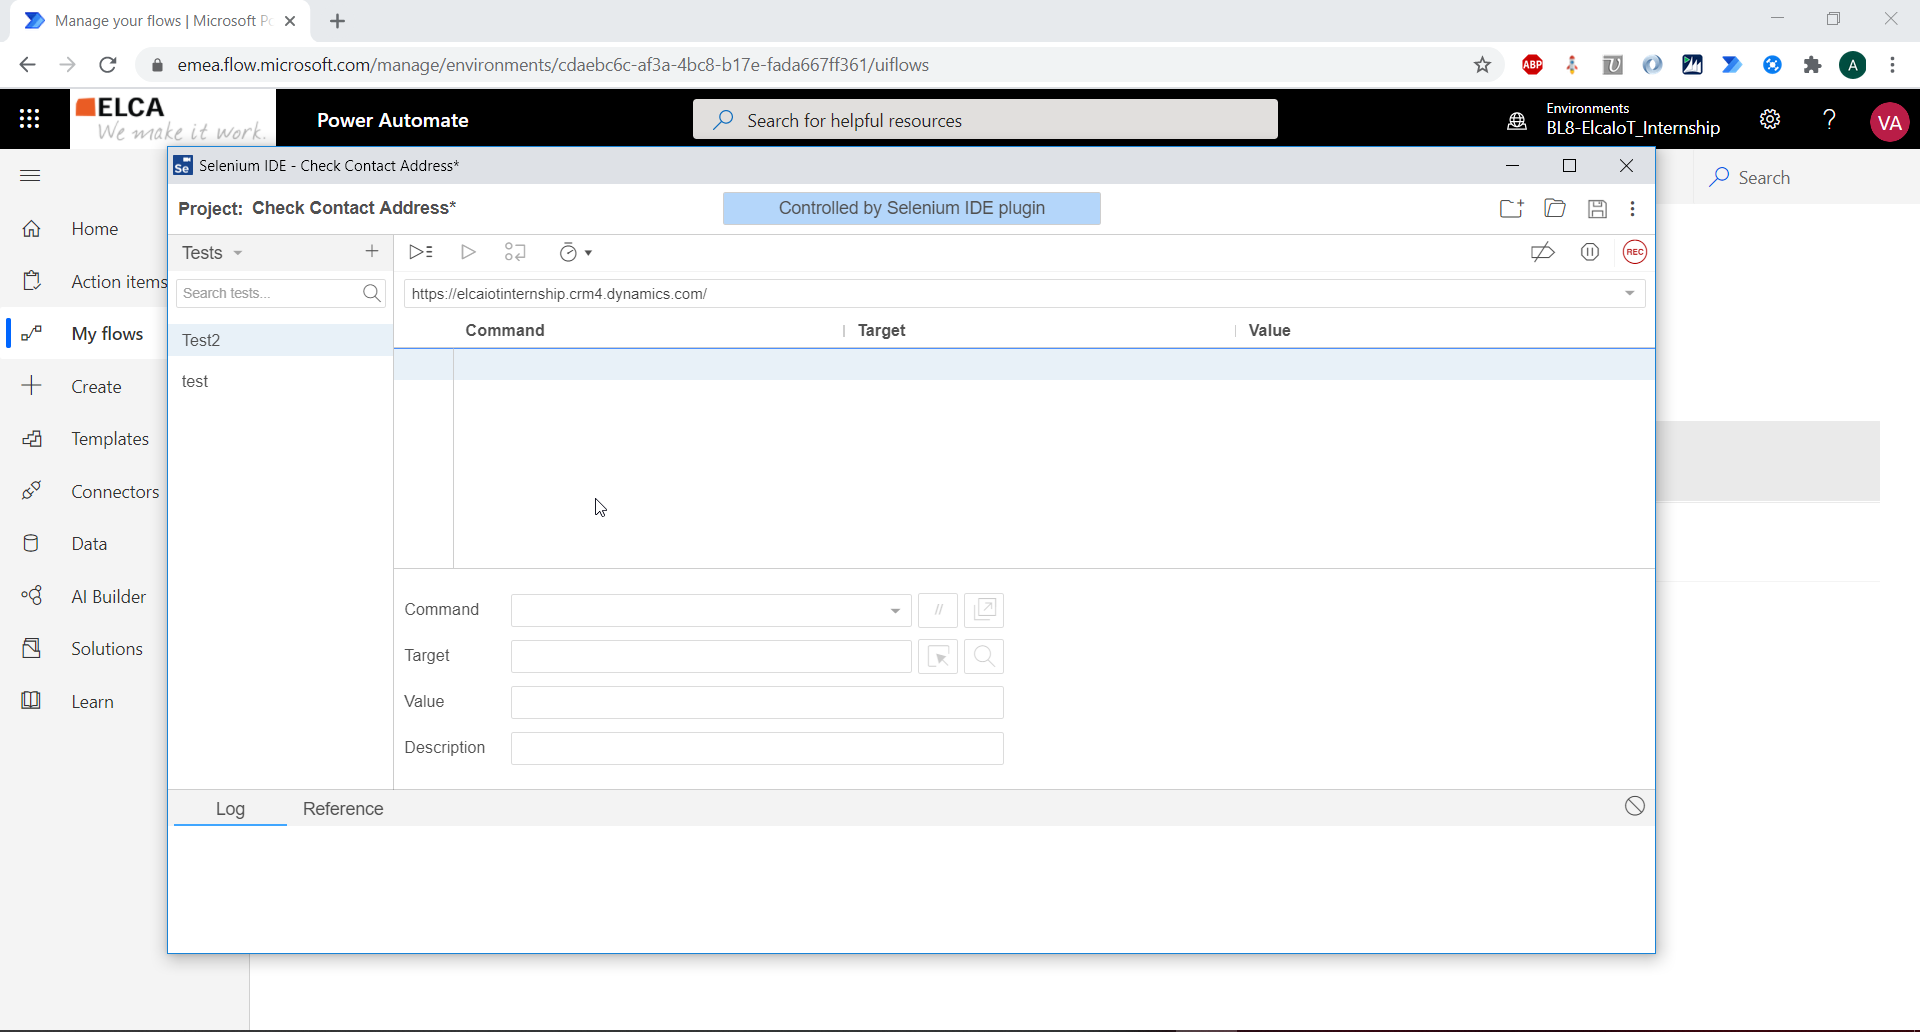
The UI Flow for web application will entirely be made with the Selenium IDE.
When you are ready for the recording, click the "REC" button. It opens the Base URL you provided. And a message in the right-hand bottom corner of the browser shows that Selenium is recording the actions you perform.
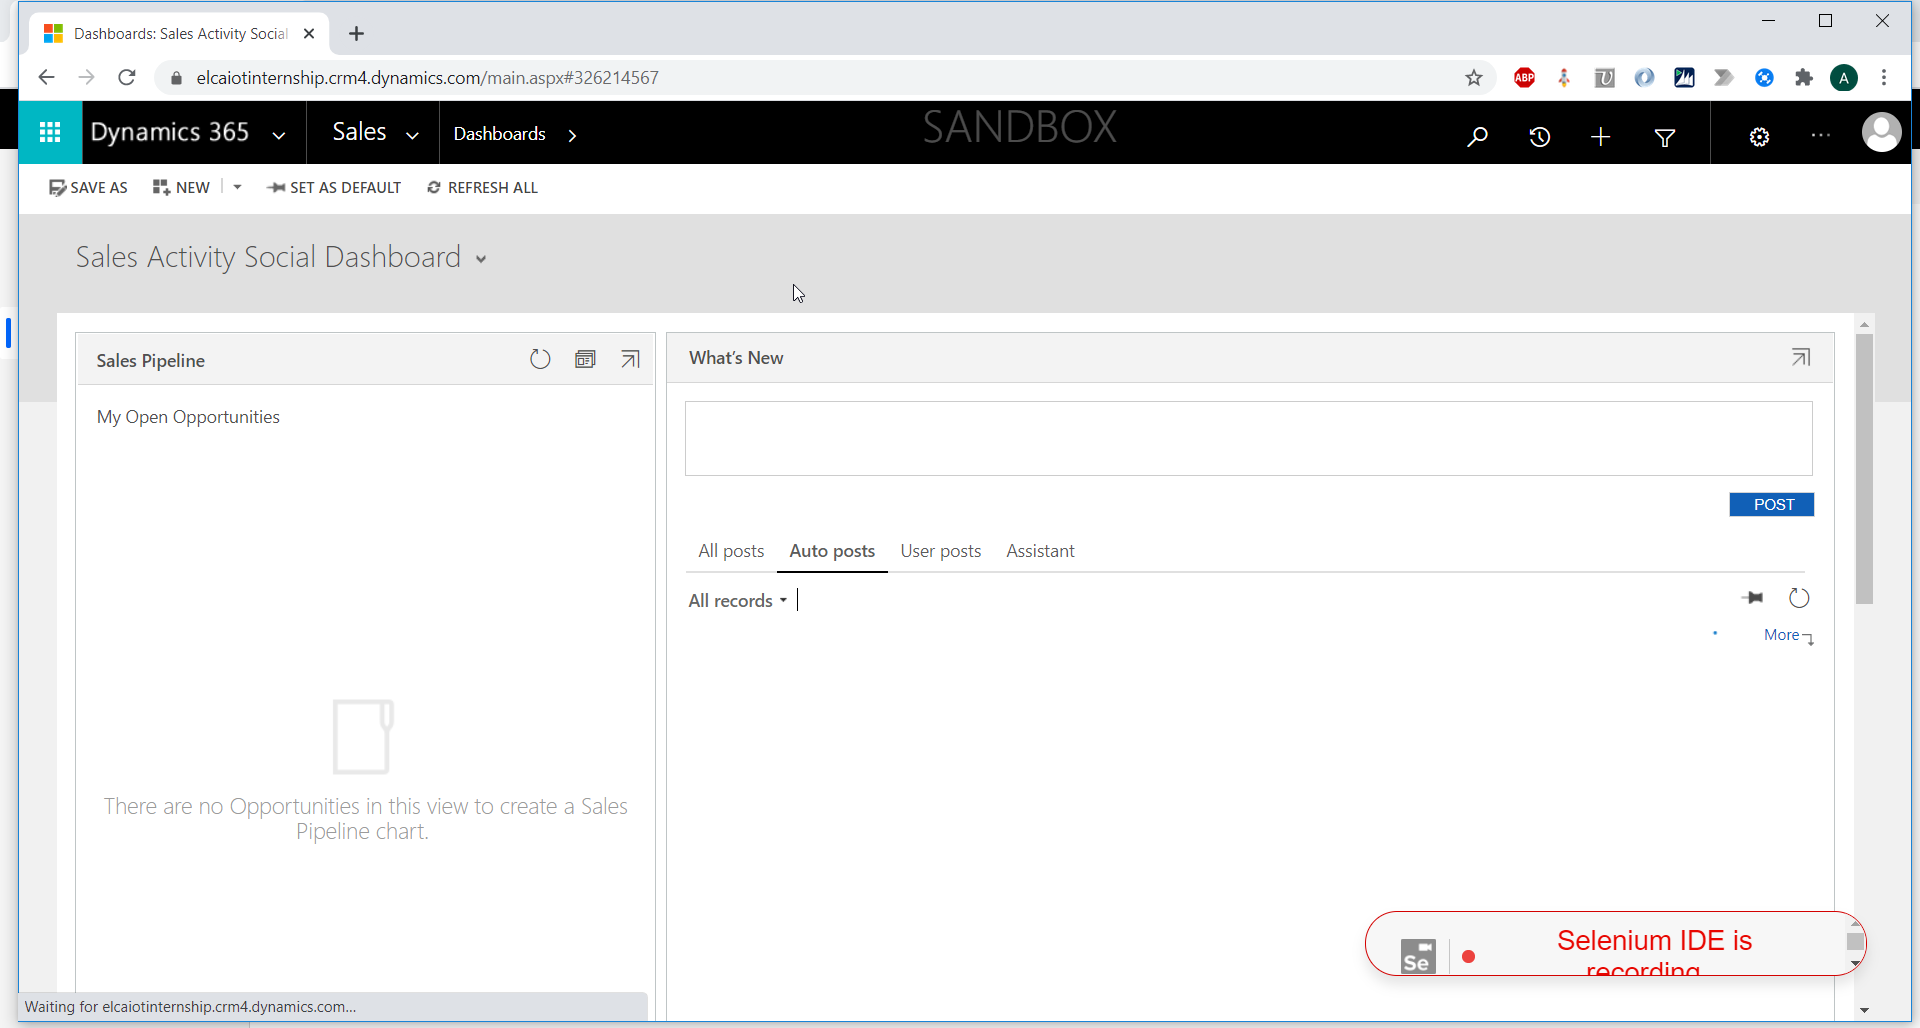
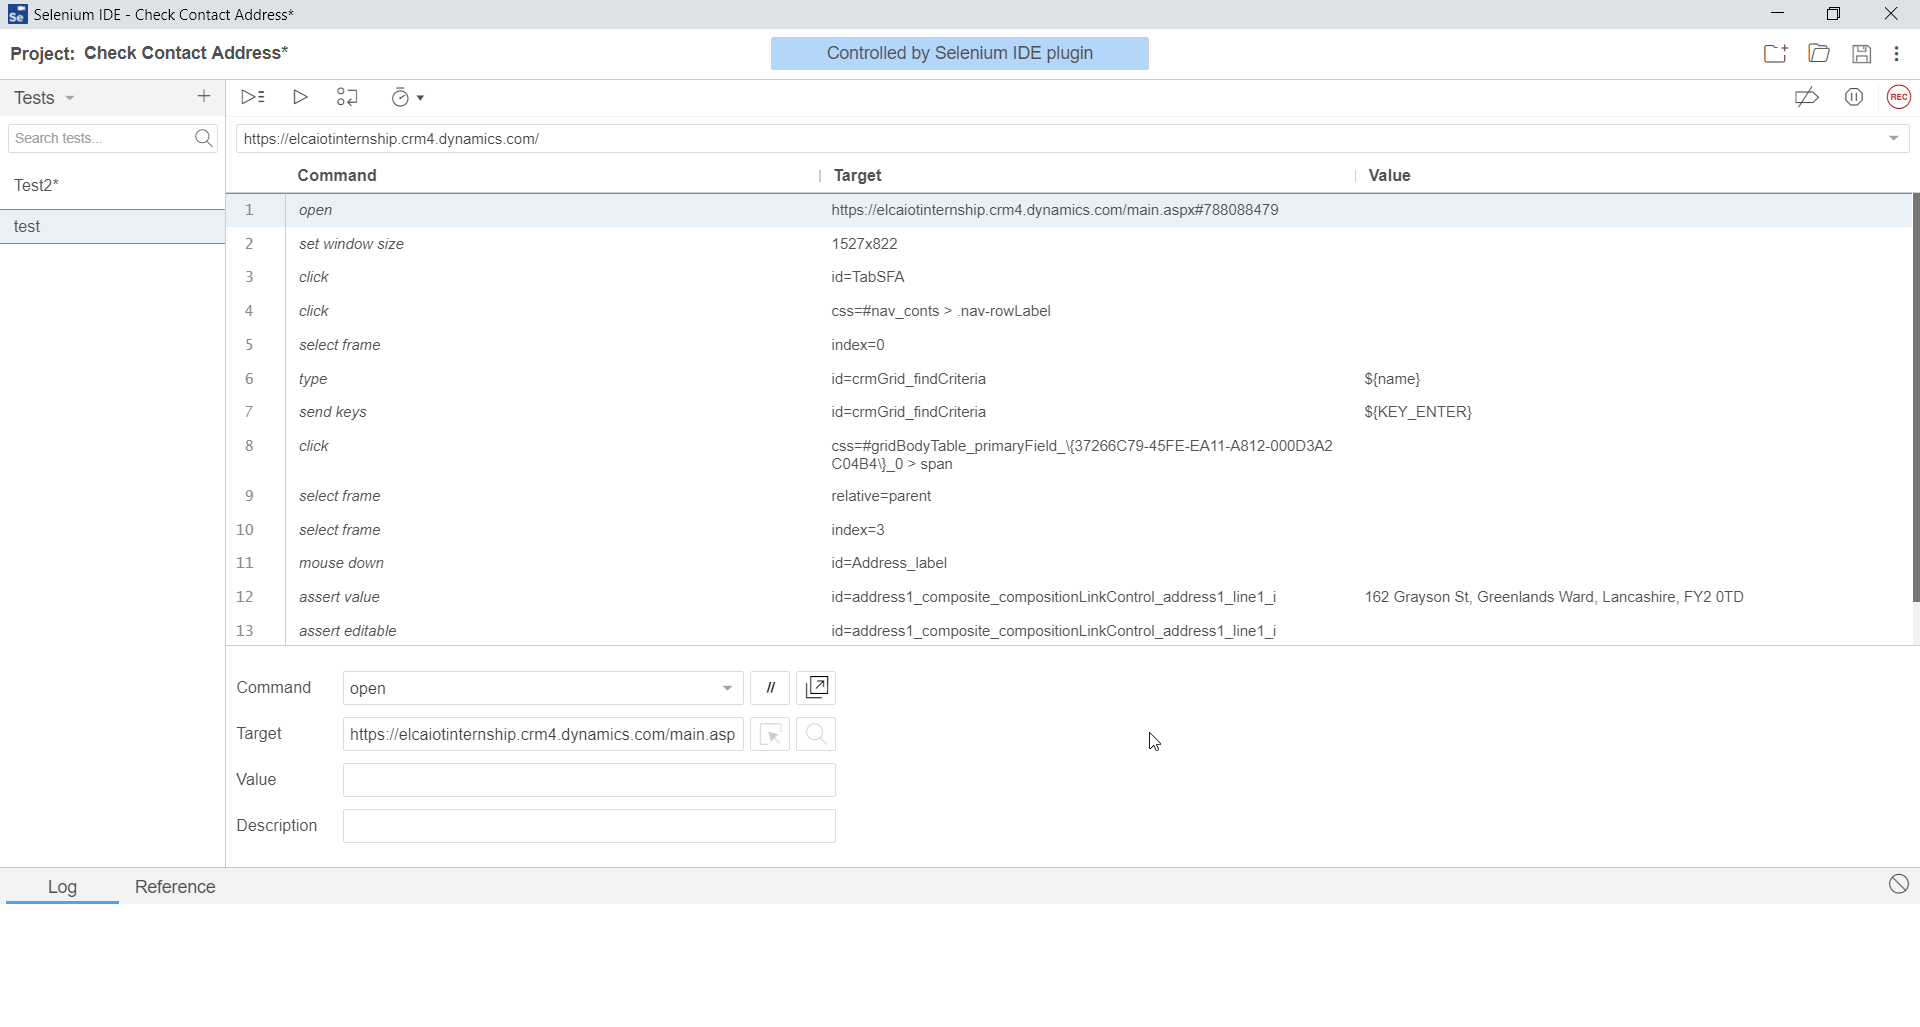
Each action made translates into a command in Selenium:
When recording, you can right click to add Selenium commands such as assertions.
Click the Stop button when you are done recording.
In this Selenium recording, I opened the menu of Dynamics 365, clicked on Contact to open to view, I entered the name "Adele" in the search box to get the record for the person called Adelle. I clicked on the first record in the result view (i.e. the record for the person name Adelle). In the Form, I put the cursor in the field Address and asked to check the value of the Address field (Command "assert value"), and that the Address field is editable (Command "assert editable").
In the IDE you can test your recording. Selenium will reprocess all the commands you performed. You can edit them manually in the IDE to better meet your expectations.
When you save the Selenium project, it will automatically create a UI Flow of type "Web (Selenium)" in Power Automate:
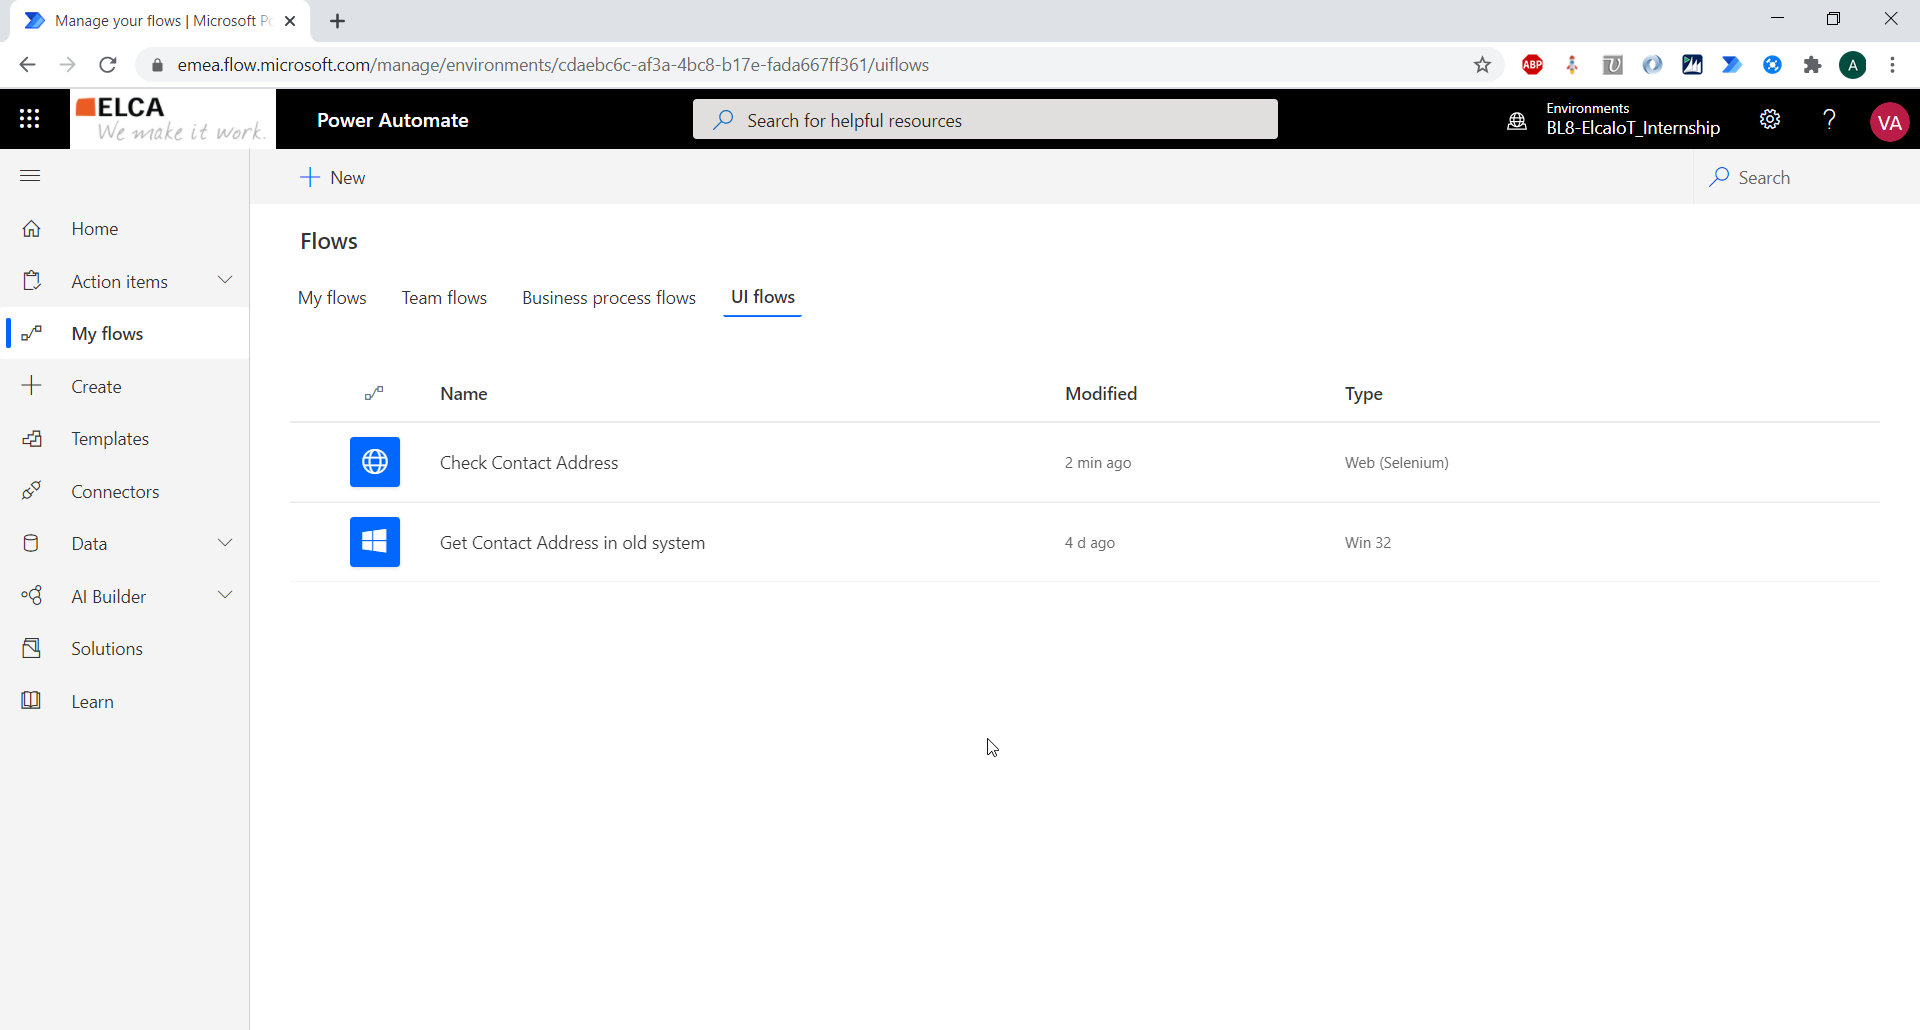
If you choose to edit this UI Flow, the Selenium IDE will reopen with the steps you recorded.
Then, as for Desktop application, you can integrate your UI Flow in a Power Automate Flow, and add a recurrence trigger, as well as an action to send an email.
When creating the Selenium Flow:
- If you use a variable without initialising it, it will be considered as an input to pass from the Power Automate Flow!
- If you create a variable, the variable value will be available in the Power Automate Flow as an output of the UI Flow action!
Then, in this use case, you could for instance update the Power Automate Flow to send an email only if the Selenium Flow returns an "Error" value. And this is standard Power Automate functionality :)
Note on Selenium for Dynamics 365
A framework based on Selenium, called EasyRepro, has been developed specifically for Dynamics 365.
It allows to create automation processes for Dynamics 365, performed on the user interface. Many functionalities are covered such as Navigation in the CRM, operations on Entities (Create, Update, Delete, Duplicate Detection, Assign), trigger workflows, run reports, etc !
EasyRepro seems to be a great tool, and it may save time compared to only using Selenium.
You can learn more about it here: https://github.com/microsoft/EasyRepro/blob/develop/README.md
UI Flows of Power Automate use the Selenium IDE. So you won't be able to use EasyRepro with it.
However, if you like this framework and you have coding skills, nothing prevents you from creating your EasyRepro testing script, deploying it, and then using it within a traditional Power Automate Flow !!
Licensing
Here is a quick overview about the licensing of UI Flows. Check this page for more details: https://flow.microsoft.com/en-us/pricing/
It seems that Dynamics 365 licences do not give use rights for UI Flows. So stand-alone licences need to be purchased.
There is one license for attended UI Flows and one for unattended UI Flows.
For Attended UI Flows:
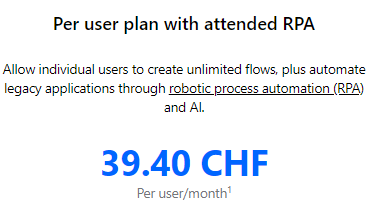
1 Purchasing and assigning Power Automate per user with attended RPA or per flow plan licenses requires access to the Microsoft 365 admin center with either the global administrator or billing administrator roles.
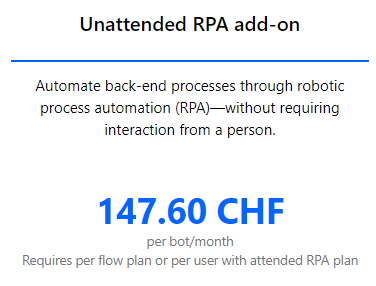
For Unattended UI Flows:
Note on Power Automate Desktop
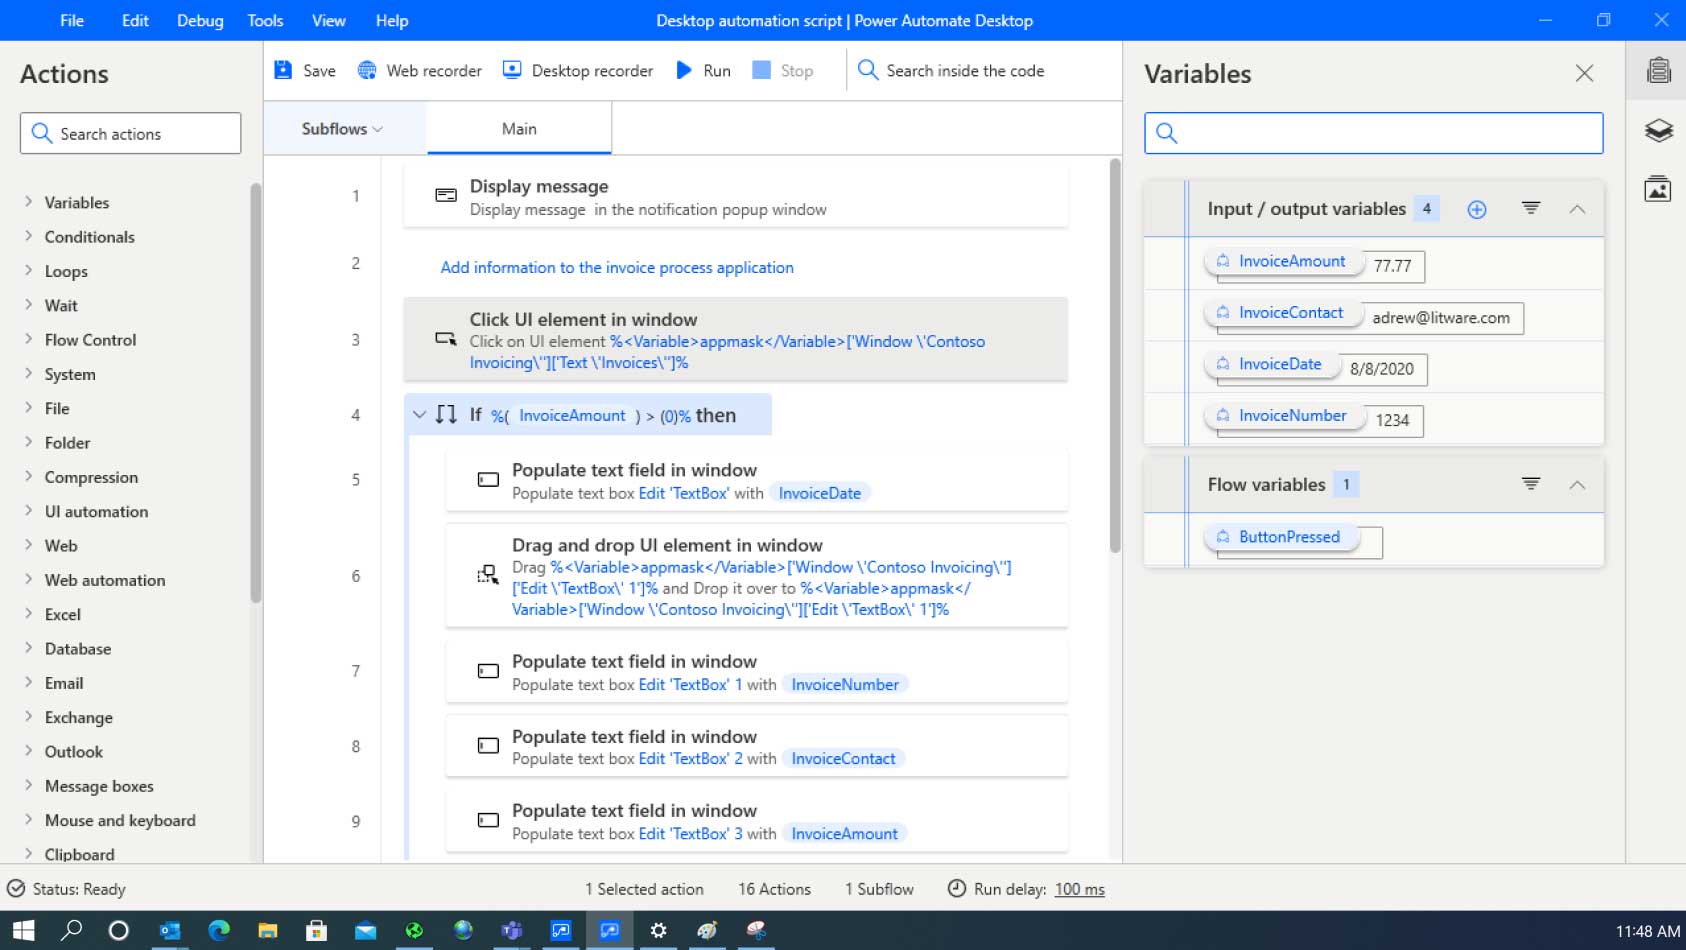
Very recently (during the redaction of this Chronicle), a new release has been made by Microsoft: Power Automate Desktop!
It is still preview but looks promising. As the name indicates, this is a Desktop Application for Power Automate.
Here is a quick look of its appearance.
This new feature might be the subject of a future Chronicle or Trick, so stay tuned.
It provides a drag & drop experience which looks very nice to create UI Flows. It might be more user-friendly than the use of UI Flows in the browser.
Conclusion
The UI Flows of Power Automate propose a very exciting opportunity: creating automation processes that involve both legacy applications (without API) with web api-based applications ! This extends the possibilities for automation very far !
As drawbacks, we can mention the difficulty to edit an existing UI Flow (particularly for Desktop applications), the quite unfriendly initial set-up, the fact that UI Flows don't always execute exactly in the way you recorded them. These are drawbacks mainly for full business people. In case of need, they may be overcome without much difficulty by an IT technician.
For Dynamics 365, we have mentioned some possible use cases: Create a process involving the CRM and a legacy application; create test processes with Selenium and use Power Automate to schedule tests/send emails, etc. And you may find many other ones !
Overall, UI Flows is an impressive new feature of Power Automate, showing infinite possibilities for Automation processes !!!