

How to access on premise resources with Power Automate
1. Introduce
The on-premises data gateway acts as a bridge. It provides quick and secure data transfer between on-premises data, which is data that isn't in the cloud, and several Microsoft cloud services. These services include Power BI, Power Apps, Power Automate, Azure Analysis Services, and Azure Logic Apps. By using a gateway, organizations can keep databases and other data sources on their on-premises networks while securely using that on-premises data in cloud services.
In this article, I will focus in set up and intergate On-permises data gateway and Power Automate.
2. Data Gateway
To start off, you will need to install a gateway on a machine that is in the same network as the SQL server. This machine must be always on and be always connected to the internet in order to be accessed from cloud.
- .NET Framework 4.8
How to install:
- Download the standard gateway from Microsoft.
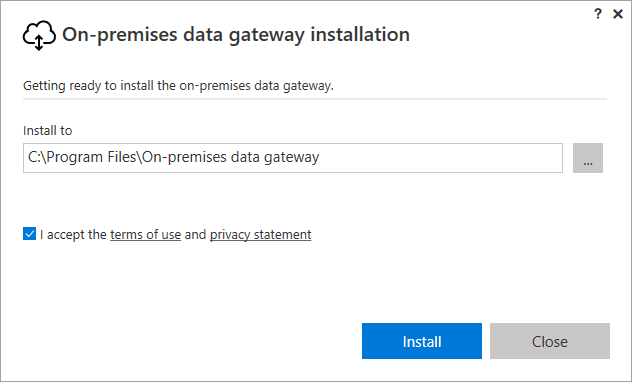
- Set installation path and accept the terms of use then select Install.
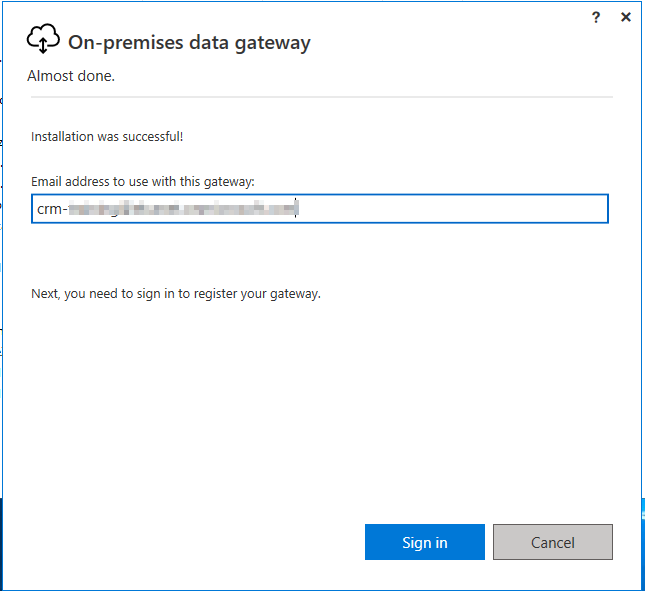
- Sign in with your Office 365 account.
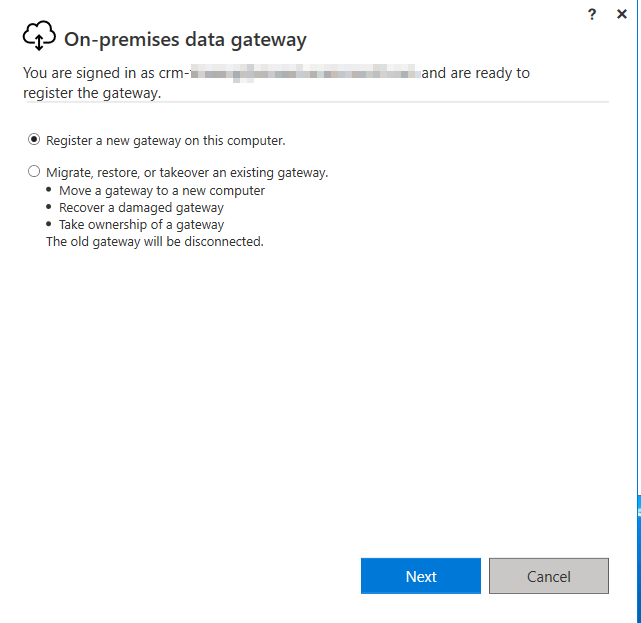
- Select Requester a new gateway on this computer and Next.
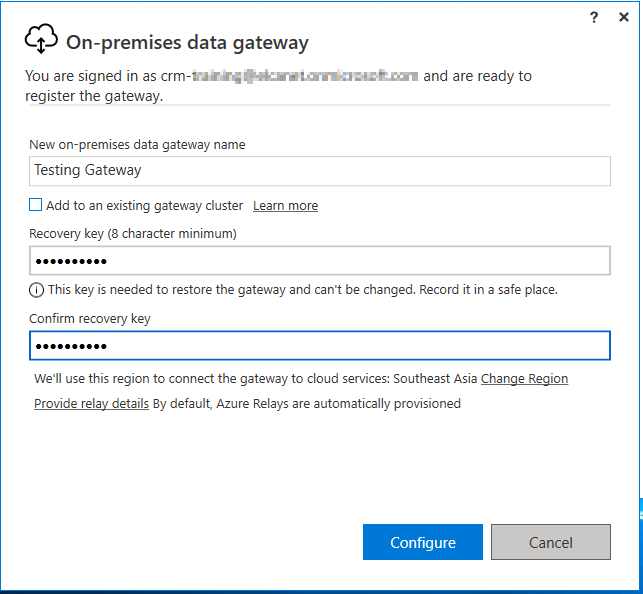
- Enter a name for gateway and Configure
- Check all information in final window.
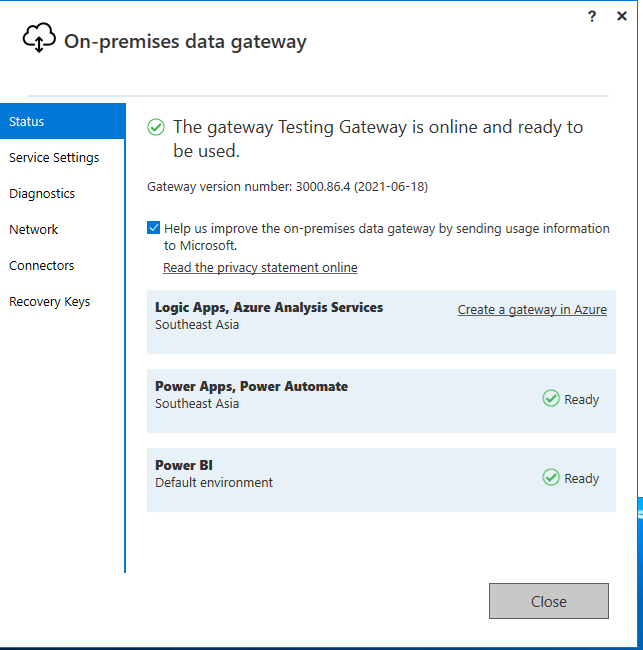
Note: the account I used when configuring on-premises data gateway will be used to create flow.
3. Integrate Dynamics 365 On-premises in Power Automate:
In this section, I will show you how to create an Instant Flow that will do the 2 most common works:
- Retrieve data from Dynamics 365 On-Premises:
- Create a new recrord in Dynamics 365 Online.
The example context: I need to create an instant flow which is used in Canvas App. In the flow, I will access to Dynamics 365 On-premises to find an Account that contains specific text in name and create an Account record in Dynamics 365 Online.
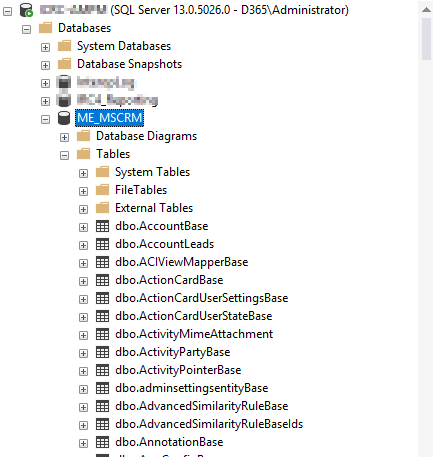
This requirement will be done thanks to SQL Server Connector in Microsoft Flow and On-premises data gateway. We will access database of Dynamics 365 and perform action in the database. In Dynamics D365 On-Premises, the data will be store in a SQL Server database and each entity will be store in a table which name is: entity name + "Base". As you can see in the following picture, the table "AccountBase" will be store all record of entity Account
Step 1: Create a Instant Flow
First of all, you need login Microsoft Power Automate homepage then choose My flows -> New flow and select Instant cloud flow.

Step 2: Connect to Dynamics 365 On-Premises via Data Gateway
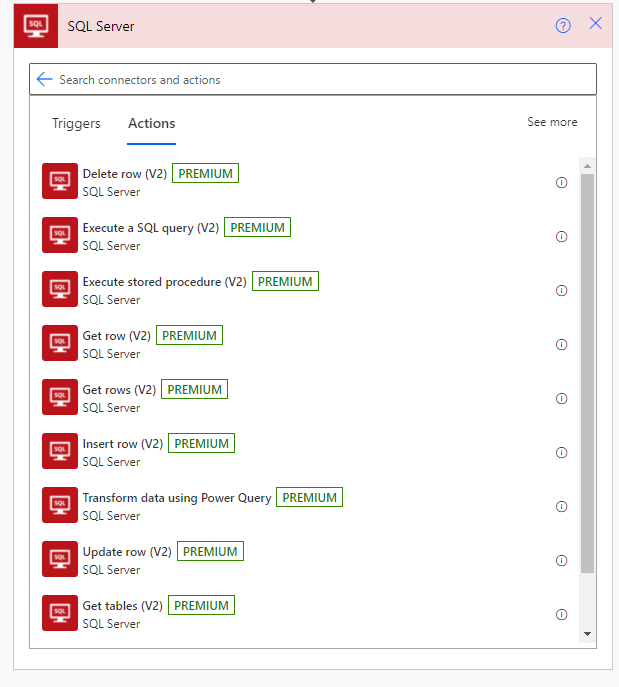
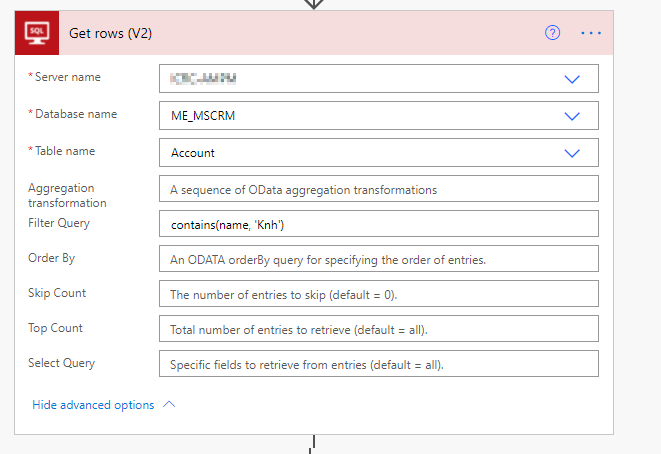
Search SQL Server action and add Get Rows (V2) action:

SQL Server has several actions and detailed of each acitions are provied at SQL Server - Connectors | Microsoft Docs.
You need to focus in 4 actions:
- Insert Row (V2): create a record in a table in the Database, which is corresponding to Add a new row action of Microsoft Dataverse.
- Get rows (V2): find records in a table in the Database with a filtering, which is corresponding to List rows action of Microsoft Dataverse.
- Get row (V2): find a row by id in a table in the Database, corresponding to Get a row by ID action in Microsoft Dataverse.
- Delete row (V2): delete row in a table in the Database, which is corresponding to Delete a row action of Microsoft Dataverse. You should be carefull with this action because it will modify database directly.
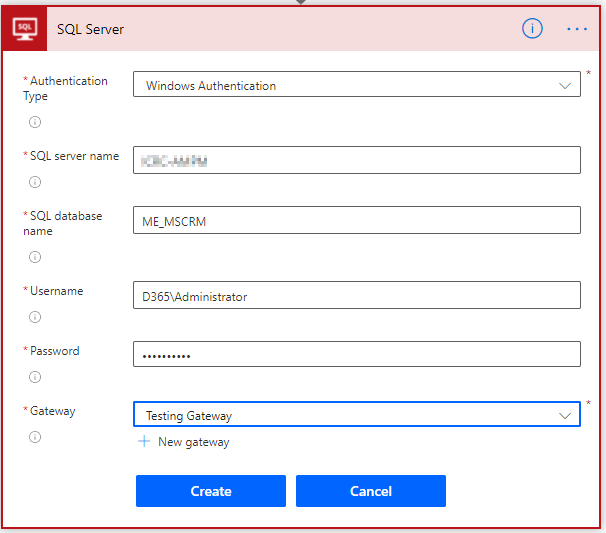
- Configure Connection: Select Authentication Type then input name of SQL server and Database of Dynamics 365 On-premises, username, password. You will see the name of On-premises data gateway in previous configration step and select it then Create.
- Add filter query condition to Get rows (V2) action: In my context, I need to retrieve account which name contains "knh".
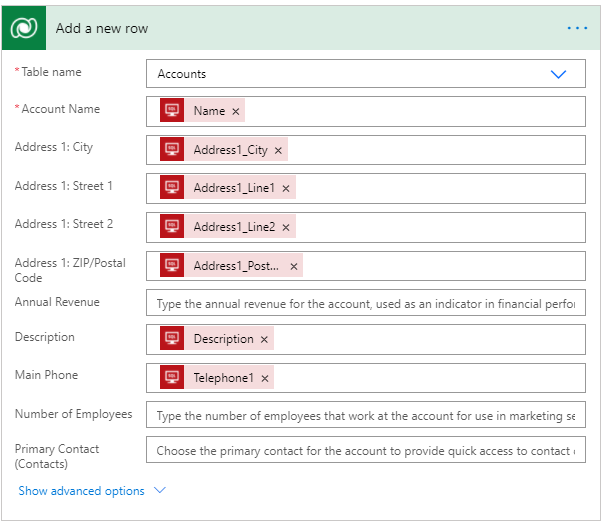
- Add a new row action (Microsoft Dataverse connector): fill all values that you want to migrate.
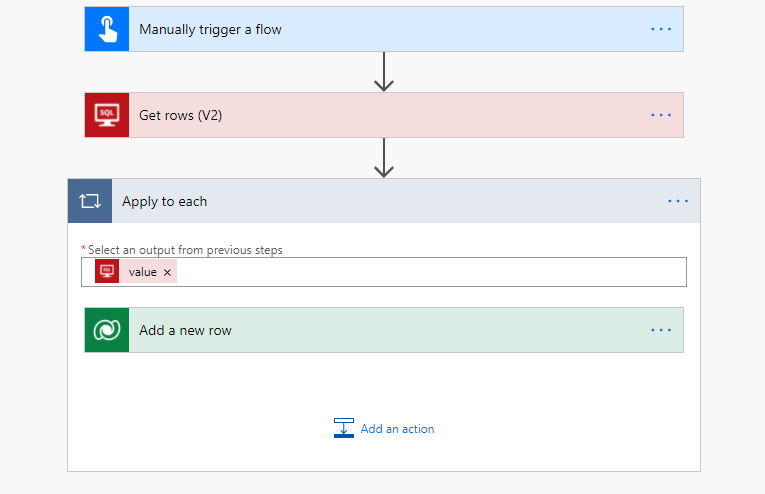
The full flow will be as following picture:
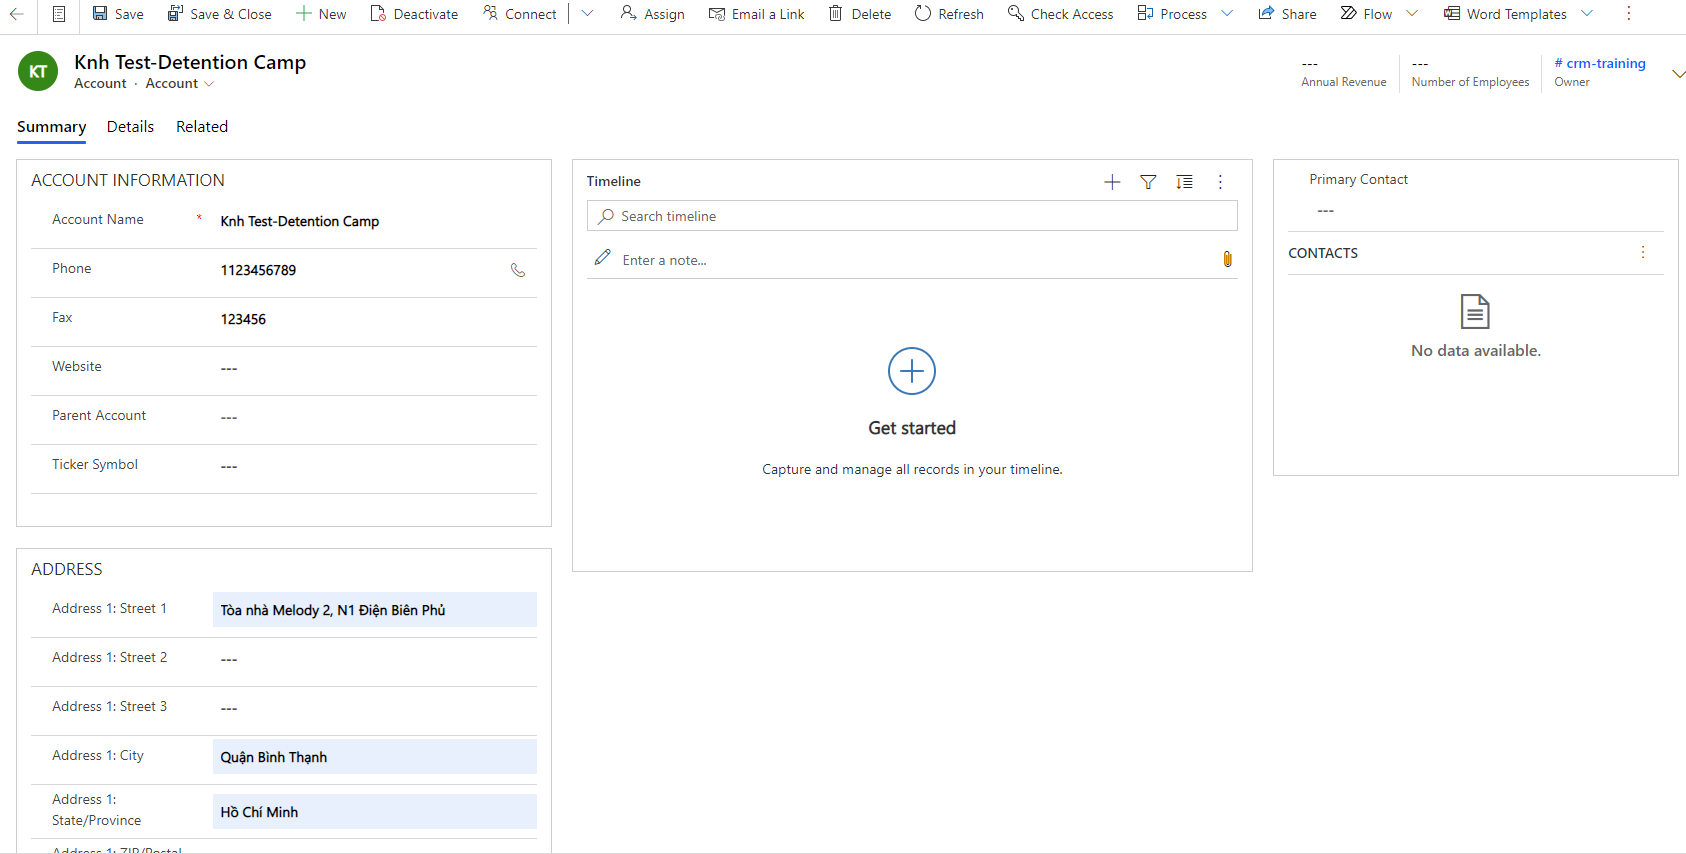
The result record in Dynamics 365 Online:
4. Conclusion:
- Thanks to On-premises data gateway, we could access data in Dynamics 365 environment now. However, you could see that these steps and actions inflow are not easy and require a piece of knowledge about the architecture of Dynamics 365 as well as the database.
- Microsoft provide a logging mechanism to monitor performance issue at additional logging.
- SQL Server action connector limit to 100 calls per 10 seconds as the announcement from Microsoft.
How to access on premise resources with Power Automate

Comments
Hello! Thank you for your…
Hello! Thank you for your manual. It's very helpful. Can you please give me link to more manuals from Microsoft about SQL filter query conditions for SQL connector?