
Dataverse : How to generate early-bound classes:
There are 2 approaches when working with a Dynamics 365 development : Early binding or Late binding.
Although the late binding approach feels very smooth and fast to get started with. It should not be the recommended style for most projects since this approach falls short on safety because of the lack of compile time validation. Another downside to this approach is that changes to entity made on the Dynamics environments which go unnoticed by the developer would be very expensive to maintain.
Early binding should be the norm when it comes to working with Organization service assembly. This method provides us with better IntelliSense supports, compile time validation and better code quality for a slight performance trade-off comparing to late binding. The early binding approach requires developers first to generate a set of classes (Early-bound classes) based on the table and column definition of the project’s Dynamics environment. These classes will then provide us with various information about entity’s properties, relationships, etc.
You can find a good comparison in this article : Dataverse : Early bound vs Late bound programming
As you can see, the tricky part in early binding approach is generating the early-bound classes. The main reason of this article is for me to share tips, tricks and issues when generating early-bound classes for a Dynamics project.
Generate early-bound classes using CrmSvcUtil.exe
The classic way to perform this task is to use CrmSvcUtil.exe tool from Microsoft.CrmSdk.CoreAssemblies.
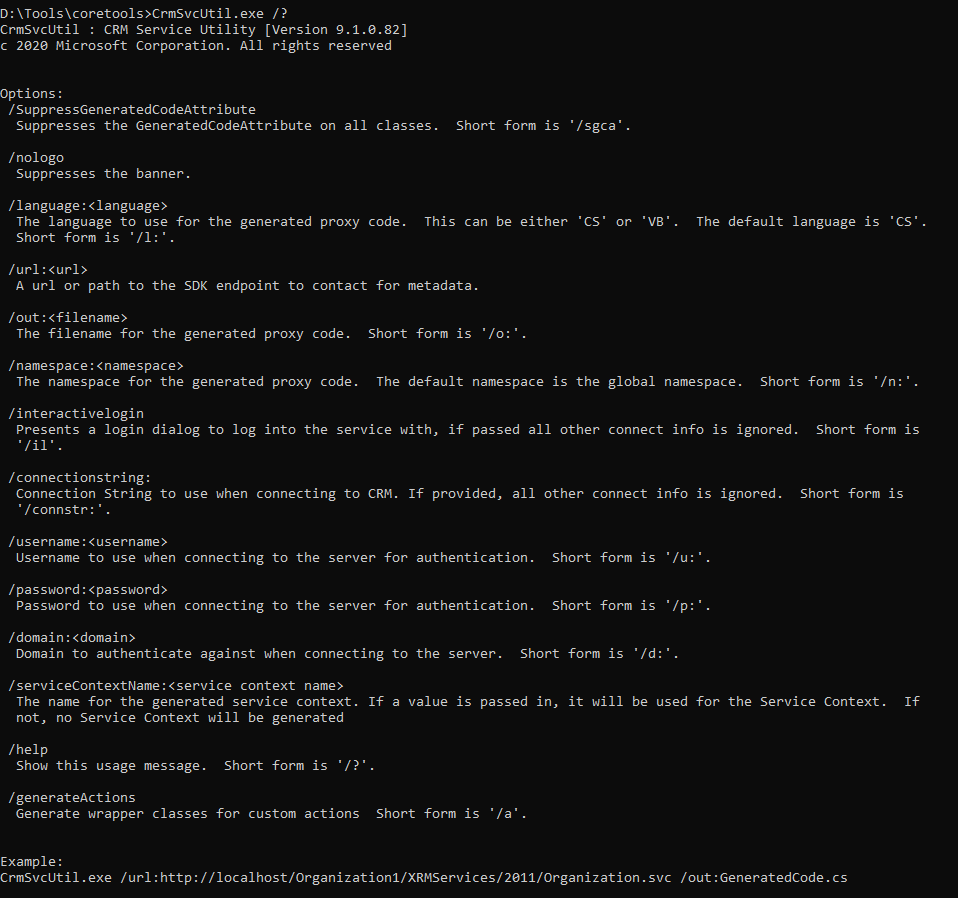
The output is a “.cs” or “.vb” file based on input parameters. Given that this output file contains classes for all entities of the targeted environment which should satisfy most requirements of developers. Microsoft also provides us the ability to extend/modify the functionalities of CrmSvcUtil.exe through several dll interfaces including ICustomizeCodeDomService, ICodeWriterFilterService, ICodeWriterMessageFilterService, IMetadataProviderService, ICodeGenerationService, INamingService. Each interface gives you multiple methods to tweak CrmSvcUtil.exe process to your liking.
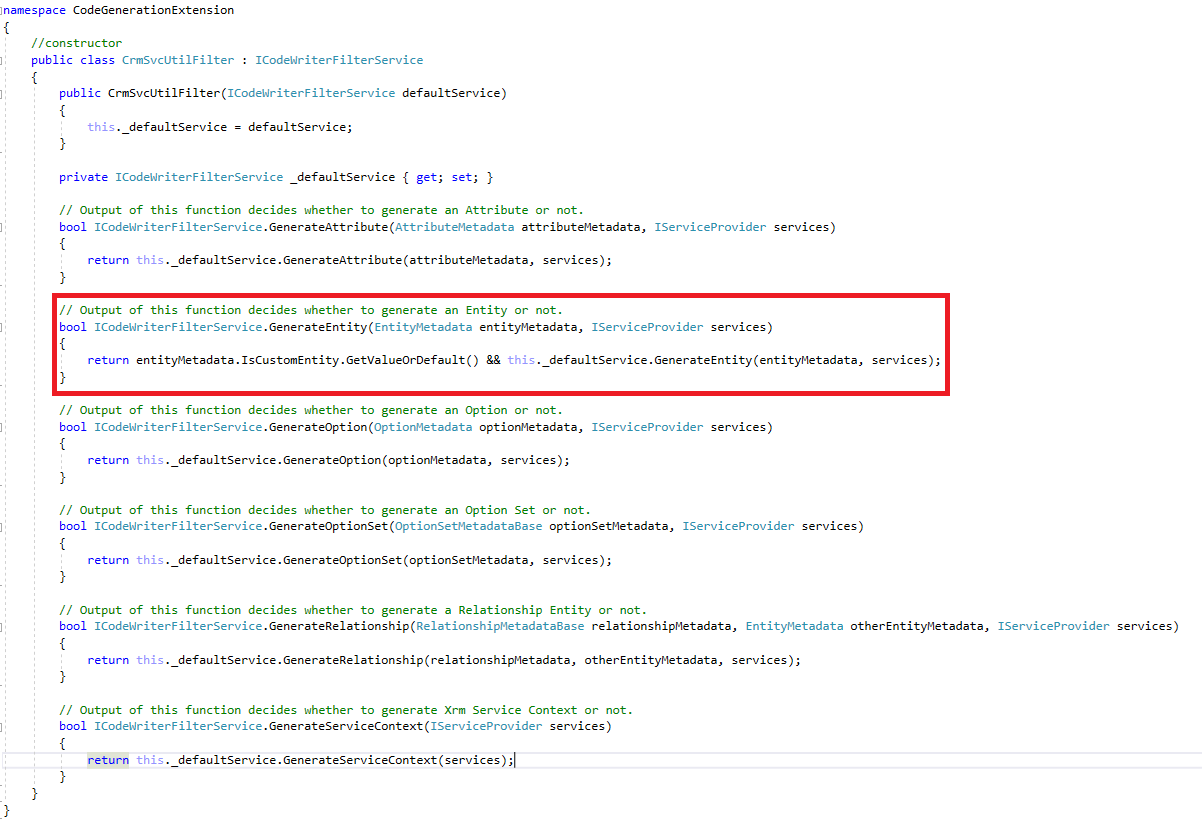
Take ICodeWriterFilterService for example. The default instance of this interface is called during the process of CodeDOM generation to determine whether a specific object or property should be generated or not. Below are steps to modify the code generation tool for it to generate custom entity only. In this example, I’m using .NET framework 4.6.2 with package version 9.0.2.34 for Microsoft.CrmSdk.CoreAssemblies.
- Create a class library project
- Add these assemblies as reference to the project. These references come from Microsoft.CrmSdk.CoreAssemblies package. Note that the framework version of our project must match the version of the assemblies and vice versa.

- For the code, a class extends the interface ICodeWriterFilterService with all the requires methods implemented. Note that if you do not want to modify the generation rule of a certain type of object or property. You should just return the output of the default service for it to work as usual.
- Build the project. It should generate all the assemblies dll you need in the Release/Debug directory.
- To reference this new library, we have 2 choices.
- Input additional parameter in the command line when we run the tool.
The format should be /<parametername>:<class name>,<assembly name>

- Add new key to “CrmSvcUtil.exe.config” as <add key=”<parametername>” value=”<class name>,<assembly name>” />.

- Input additional parameter in the command line when we run the tool.
- Run CrmSvcUtil.exe.
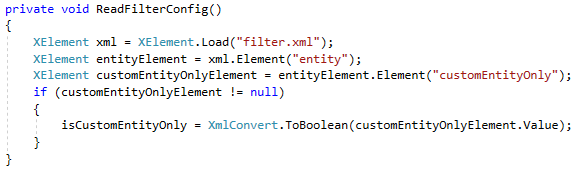
- OPTIONAL: You can design yourself a config .xml file for this class library to fit your needs. This is quite handy to have for collaboration between developers since it ensures future generated files conform to pre-defined constraints.
Custom configuration file

Then just simply read the content of your configuration file in run time.
Generate early-bound classes using EarlyBoundGenerator
An alternative solution to generate entity classes is to use a community tool named “Early Bound Generator” developed by Daryl LaBar which still uses CrmSvcUtil.exe at it cores.

Out of the box, this tool gives you the ability to flexibly modify the output file such as entity blacklist, entity whitelist, pre-defined namespace, option set as enum property, etc. In most cases, this tool is all you need when it comes to generating entity classes for your project. If “Early Bound Generator” doesn’t have the customization that you are looking for, you can always go back to extending CrmSvcUtil.exe yourself. Given that this tool also uses an XML file to store configurations. You should add this file to your project’s source control for future use.
I won’t go into details about “Early Bound Generator” because the UI is fairly straight-forward and easy to use. Take heed that you might run into trouble with some certain configurations of the tool from time to time. Some configurations just are not what you are looking for so you should play with it for a bit to see what fits.
You can also refer to this article to have more information on this tool : XrmToolBox Presentation - Early Bound Generator
Some tips
Before ending this article, here are some tips that I’ve learned while working with this task.
Tip number 1: CrmSvcUtil.exe generated classes could create ambiguity issue. This happens for later versions of Microsoft.CrmSdk.CoreAssemblies because classes for Entity and Relationship are also generated which are ambiguous since Microsoft.Xrm.Sdk assembly also have definitions for these 2 classes. There are 2 solutions for this problem.
- Manually remove class Entity and class Relationship from the generated file. Replace all reference to <yournamespace>.Entity with Microsoft.Xrm.Sdk.Entity. Replace all reference to <yournamespace>. Relationship with Microsoft.Xrm.Sdk. Relationship.
- You can exclude these 2 classes before you generate either by using the extension method or filter provided by “Early Bound Generator”.
Tip number 2: You don’t have to generate classes for all entities every time, generating classes for every entity usually takes quite a while, if you are confident about your knowledge on what changes in your Dynamics environment. Using the extension method or “Early Bound Generator”, you can specify which object or property to generate with each run.
Tip number 3: Make sure to utilize the option “Display list of available organizations” offered by interactive log-in to select the correct one if your environment has multiple organizations.
Tip number 4: When specifying the output path for generated files. It is recommended to use relative file path to ease your team’s collaborative process.
The above tips conlude my sharing for this article. I hope that it has been informative for you.
Some references
Generate early-bound classes for the Organization service
Create extensions for the code generation tool
Dataverse : How to generate early-bound classes