Dynamics 365 Field Service HowTo:
Today I am writing about one important topic that is a lifesaver in today’s world – Dynamics 365 Field Service.
This topic will be posted in a few parts since Field Service is a huge topic to cover in one blog post. In the following blog post I will show you a brief overview of how to create a work orders and how to navigate through the Field Service module. After this is done, I will lead you through more detailed blog posts about each part of Field Service and their purpose, but for now, let’s get the big picture.
Field Service can be used in various industries, from food delivery to heavy industries, sky is the limit. In the below text, I will show you how the basics of Field Service look like and how to use it.
As an example, I will take an internet provider company that installs routers and additional equipment to customers locations, in our case, Laveo Hotel.
When the Field Service module is loaded, the below dashboard is the start-screen for user.
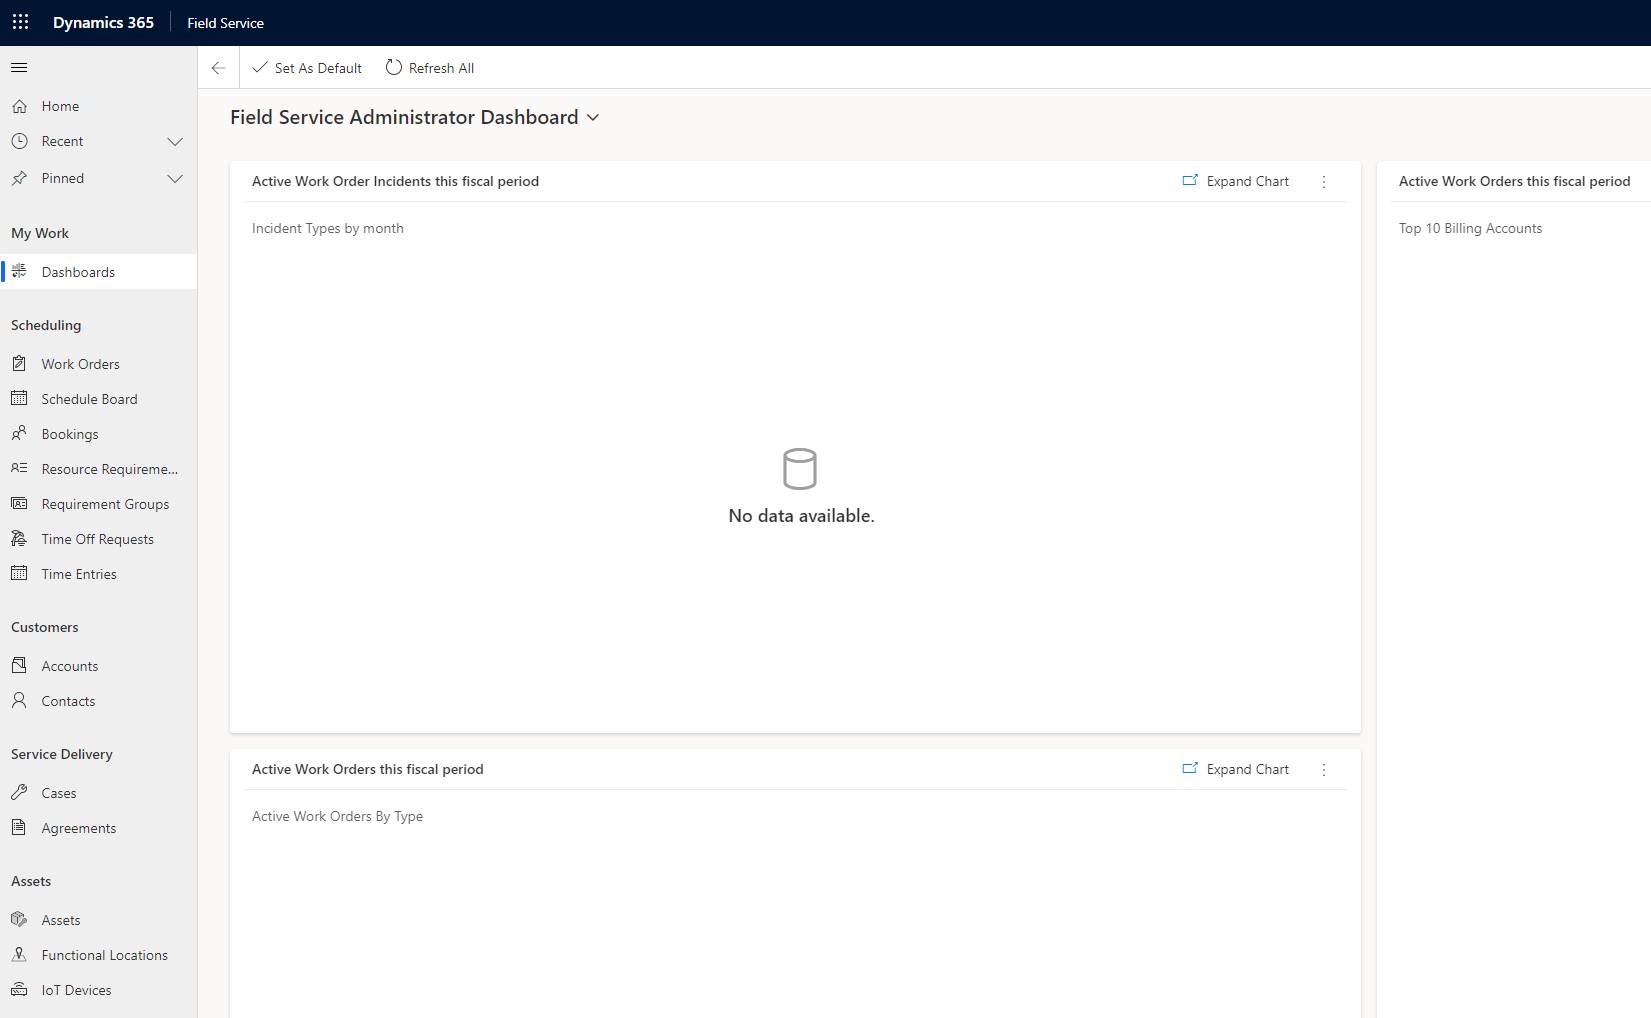
We will go through left side menu items (red area), in this blog, through Work Orders, Schedule Board, Bookings and Resource Requirement and see how it could work in real life.

Work Orders have their own process and has four stages:
1.Created
2.Scheduled to resources
3.Performed by field technicians
4.Completed and reviewed
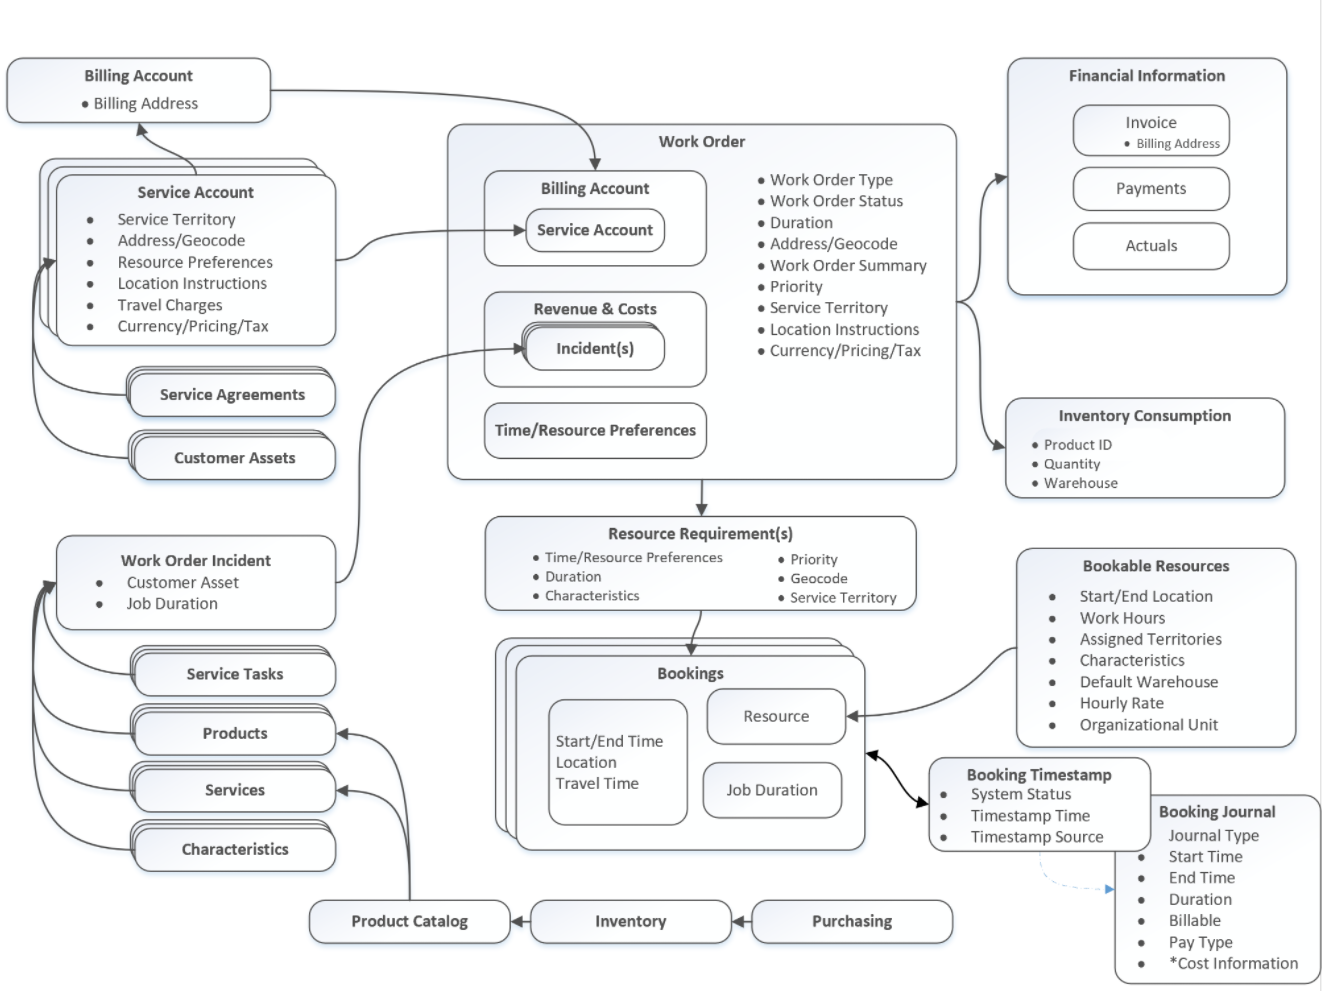
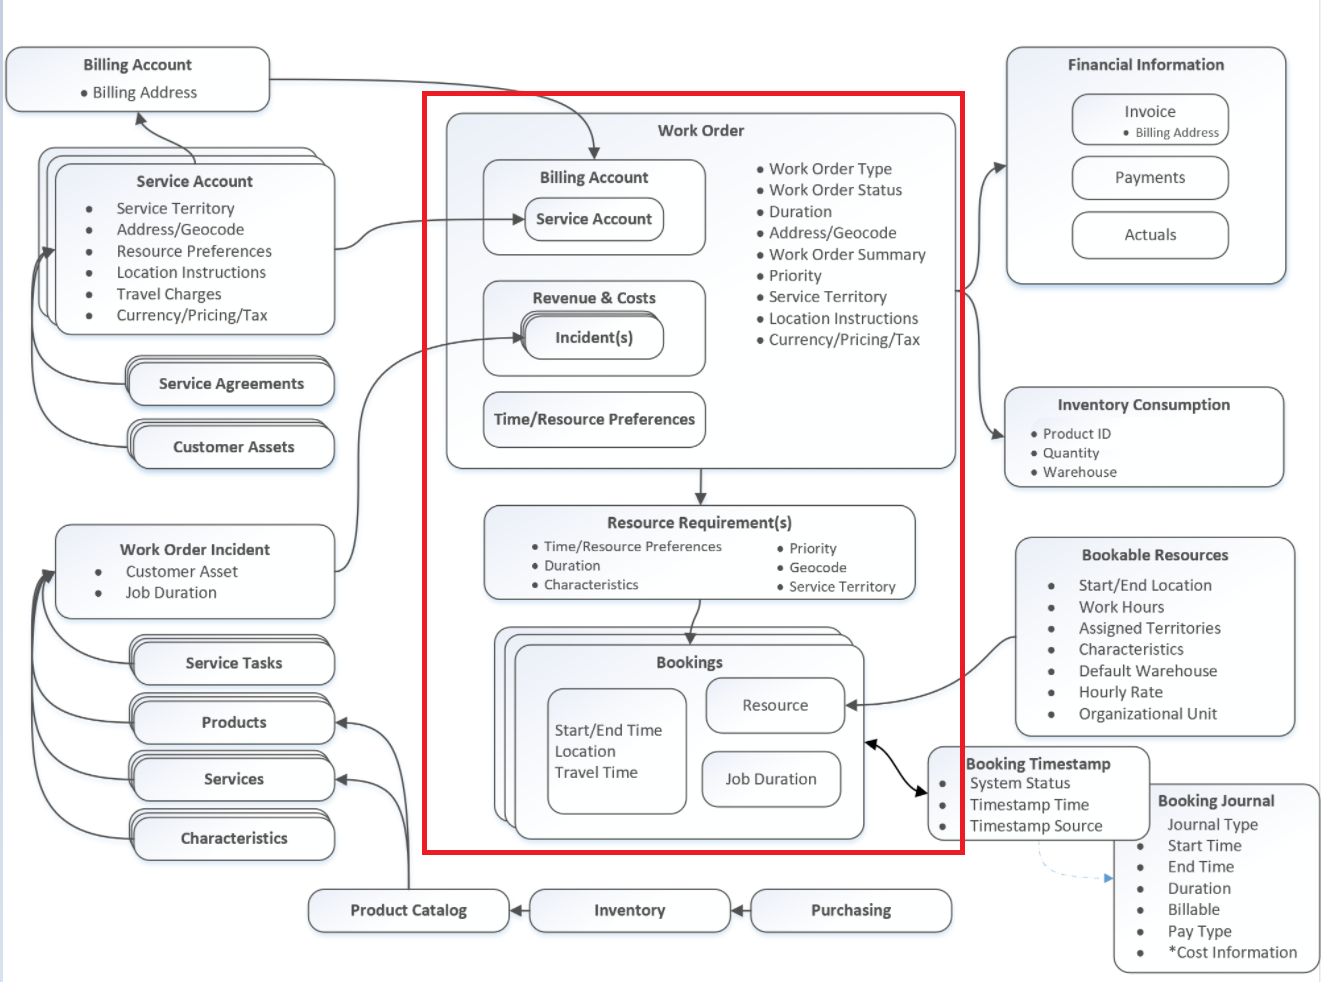
Below diagram explains work order in details and helps understand connected entities, attributes and relationships that enable work order to be what it is. We won’t go in details at the moment, since the point is to show how does Field Service module works in general.
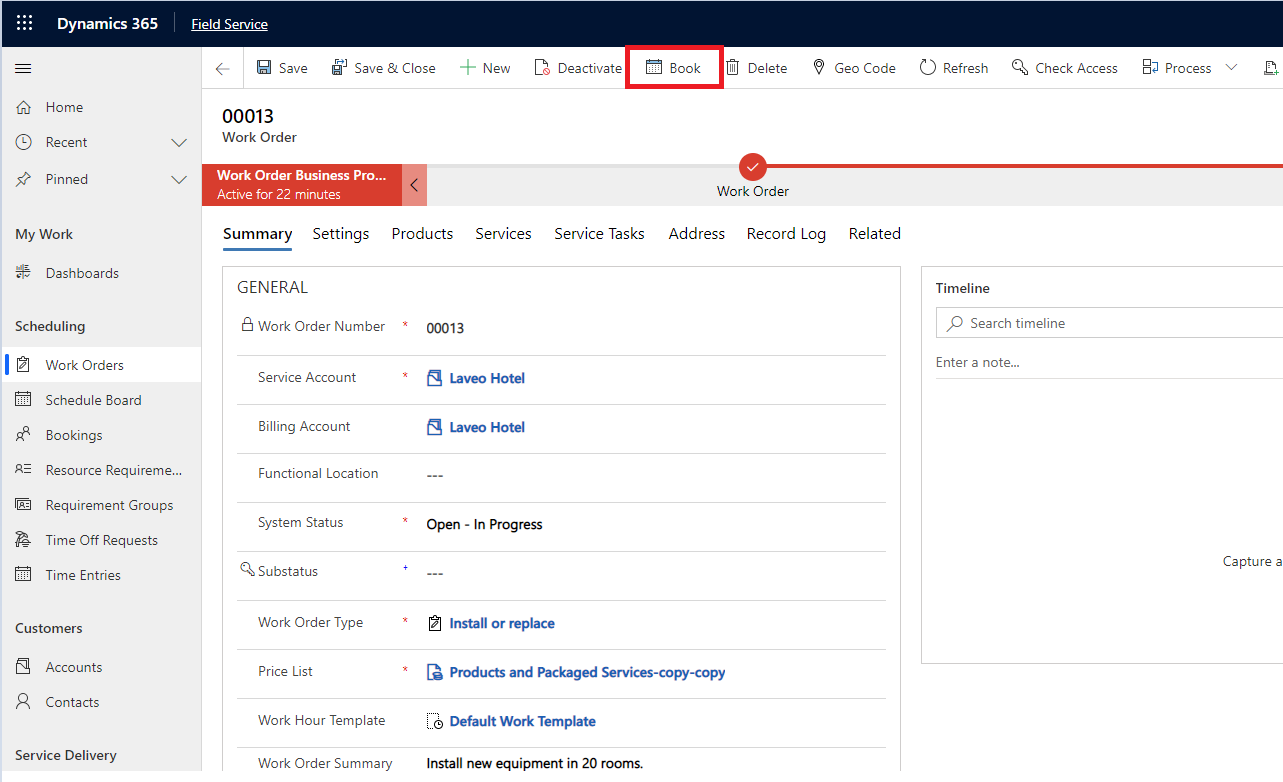
When creating new Work Order, there are some Business Required fields to be filled in before proceeding to next step.
In the Products tab, there will be 20 routers to be installed to location, with estimated values.

On top menu, there is a Book button, which is used to Book our work order with corresponding person, in this case Simon Raley. This is done in additional pop-up window by only clicking on resource and confirming action as shown below.
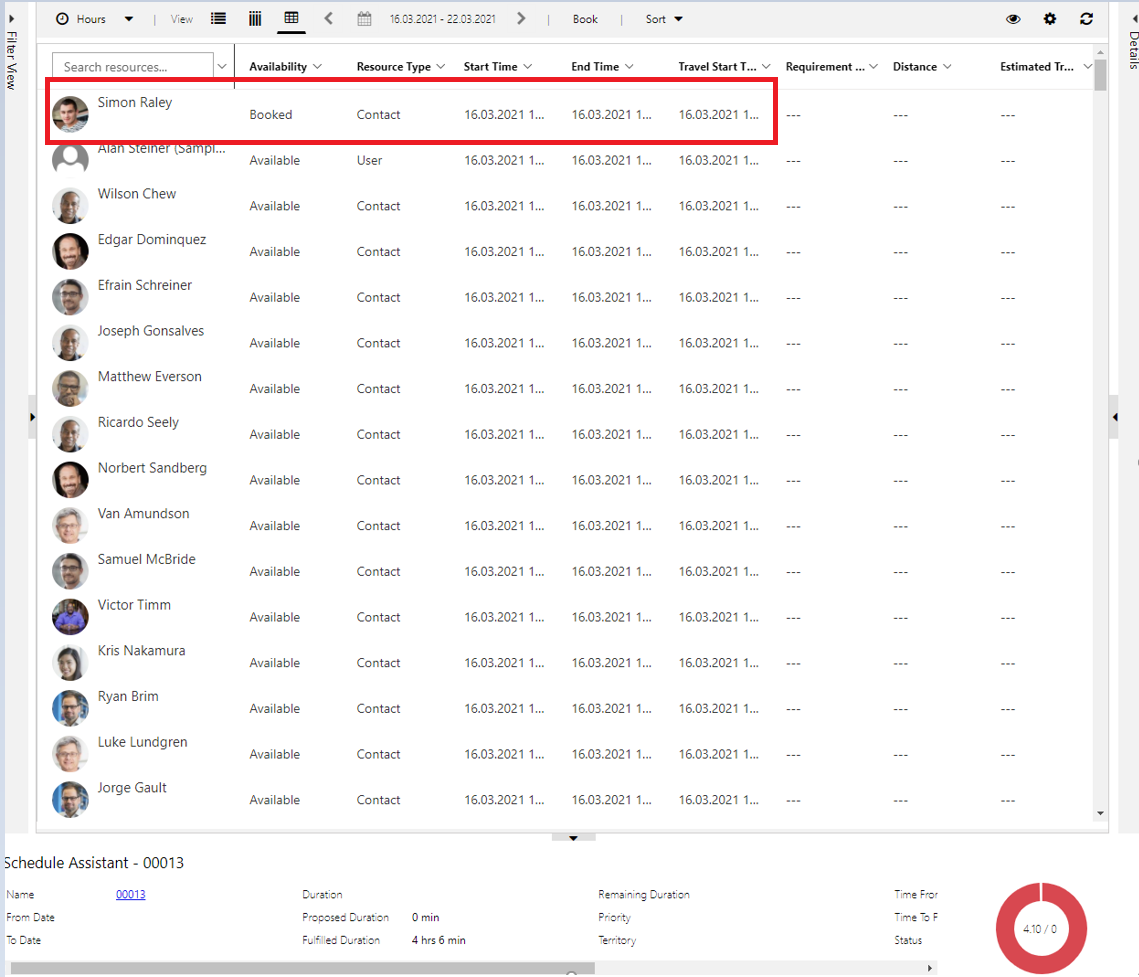
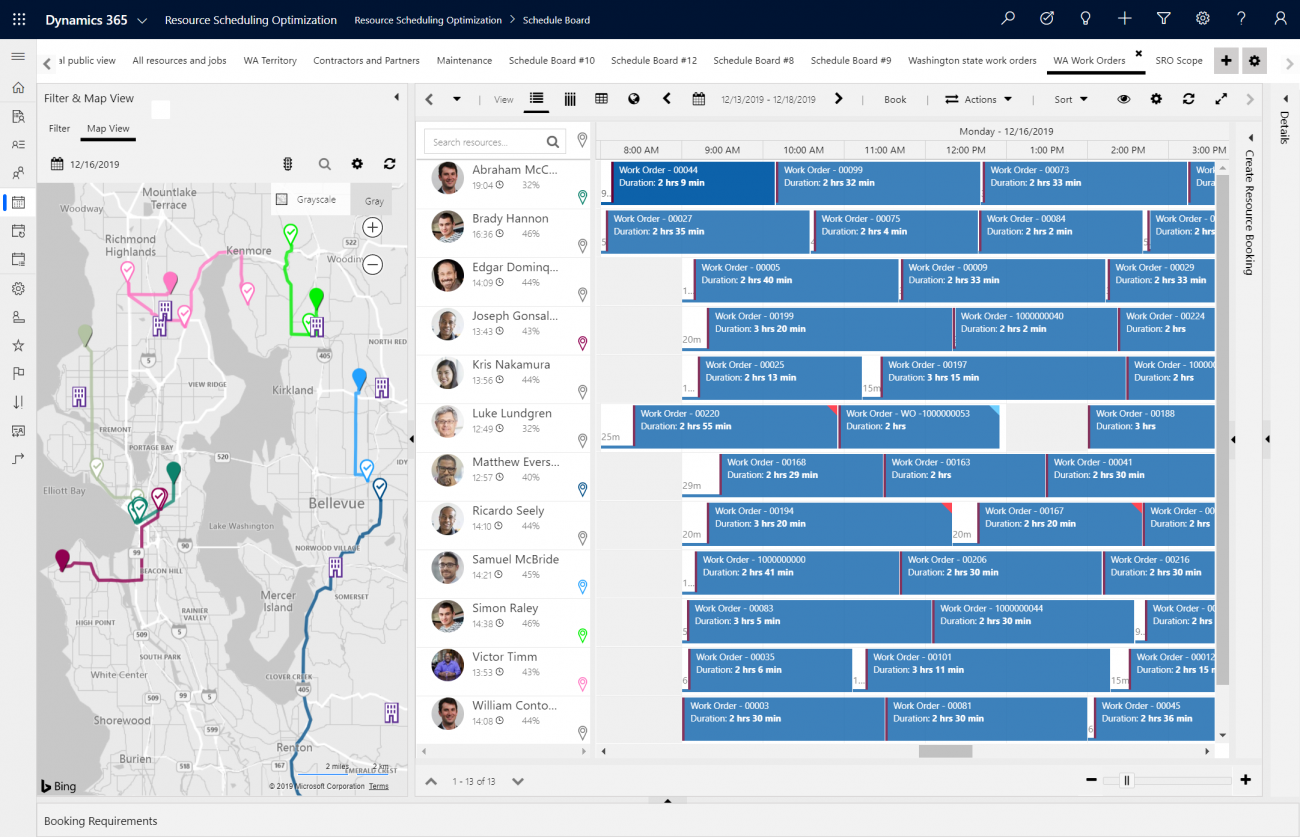
After we have done this step, we will move to Schedule Board, to see our resources for field work. Schedule board looks like following picture.
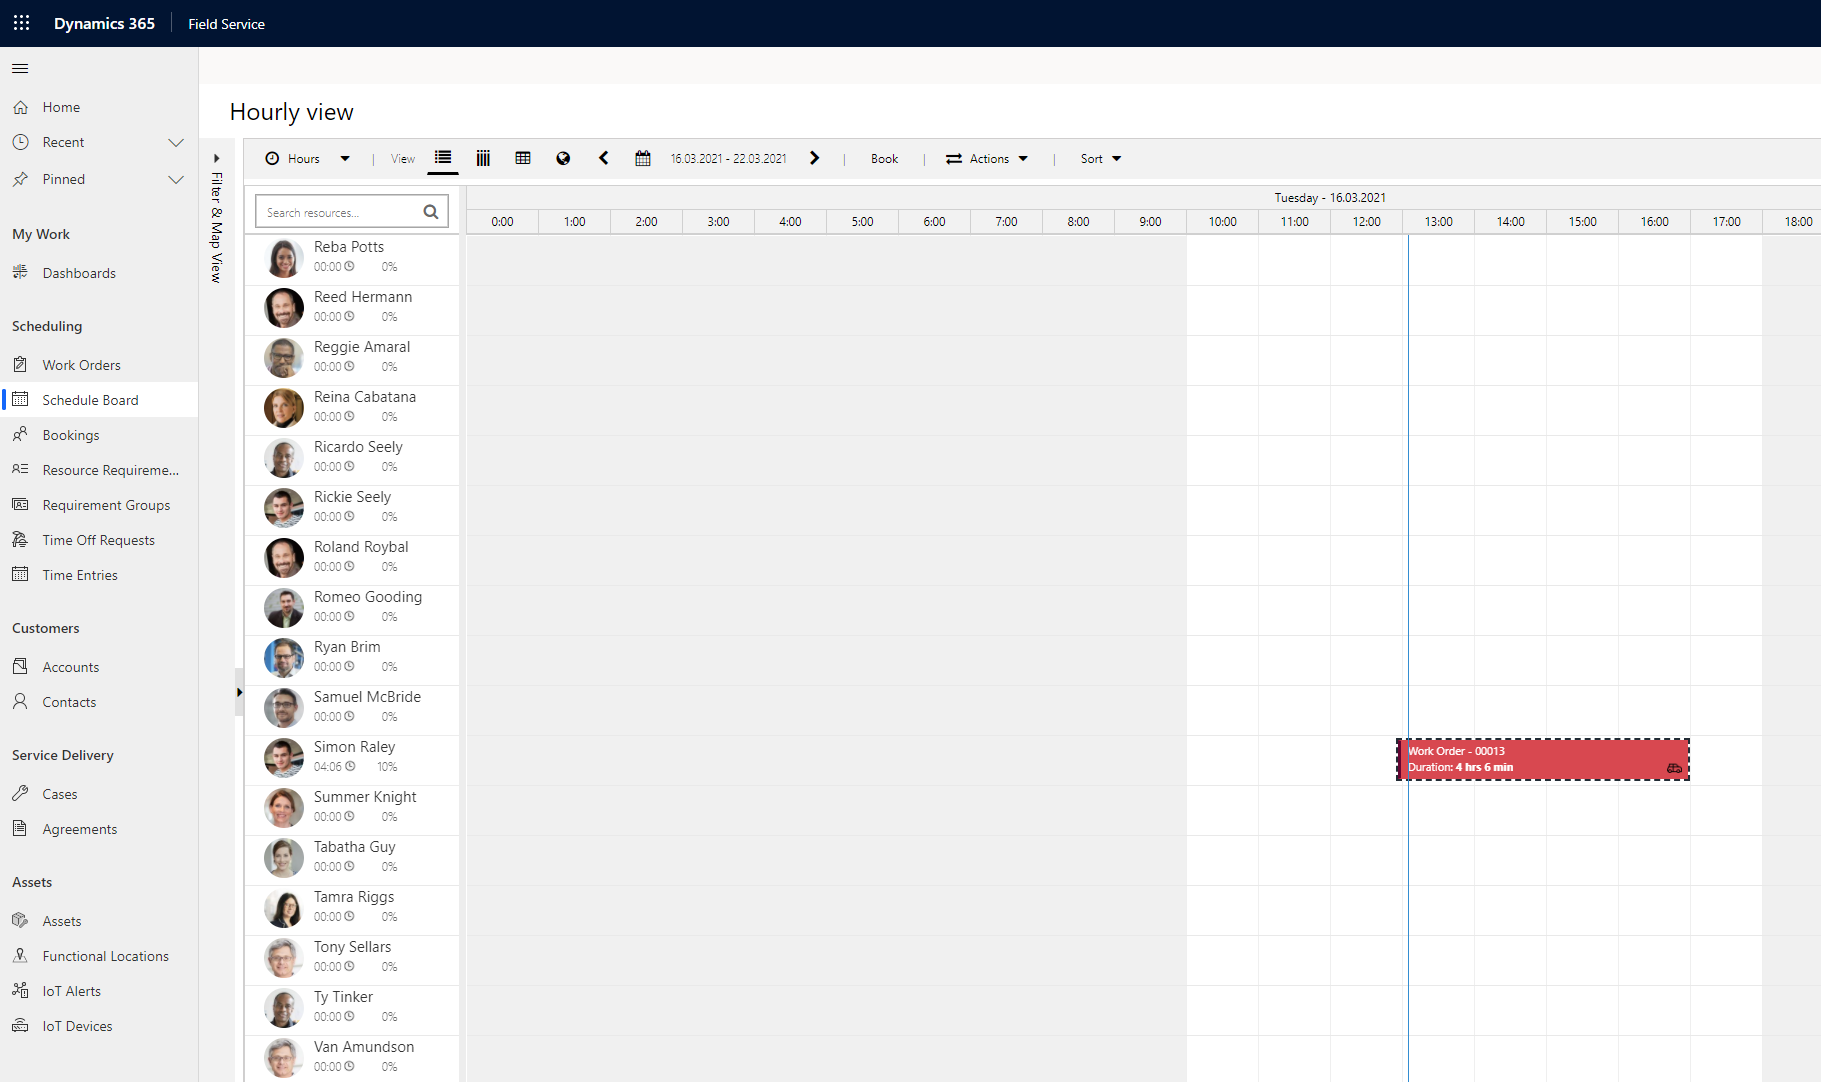
As visible on board, our good technician Simon is traveling at the moment to hotel. There are couple of statuses which can be updated during scheduled work.
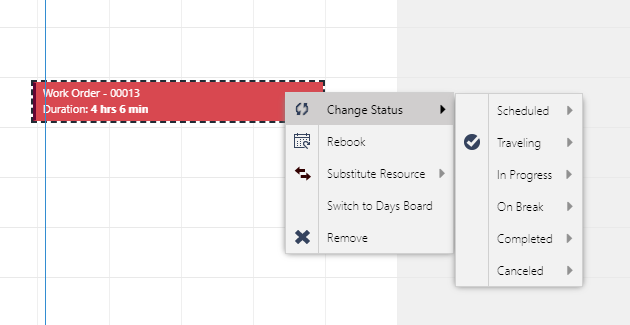
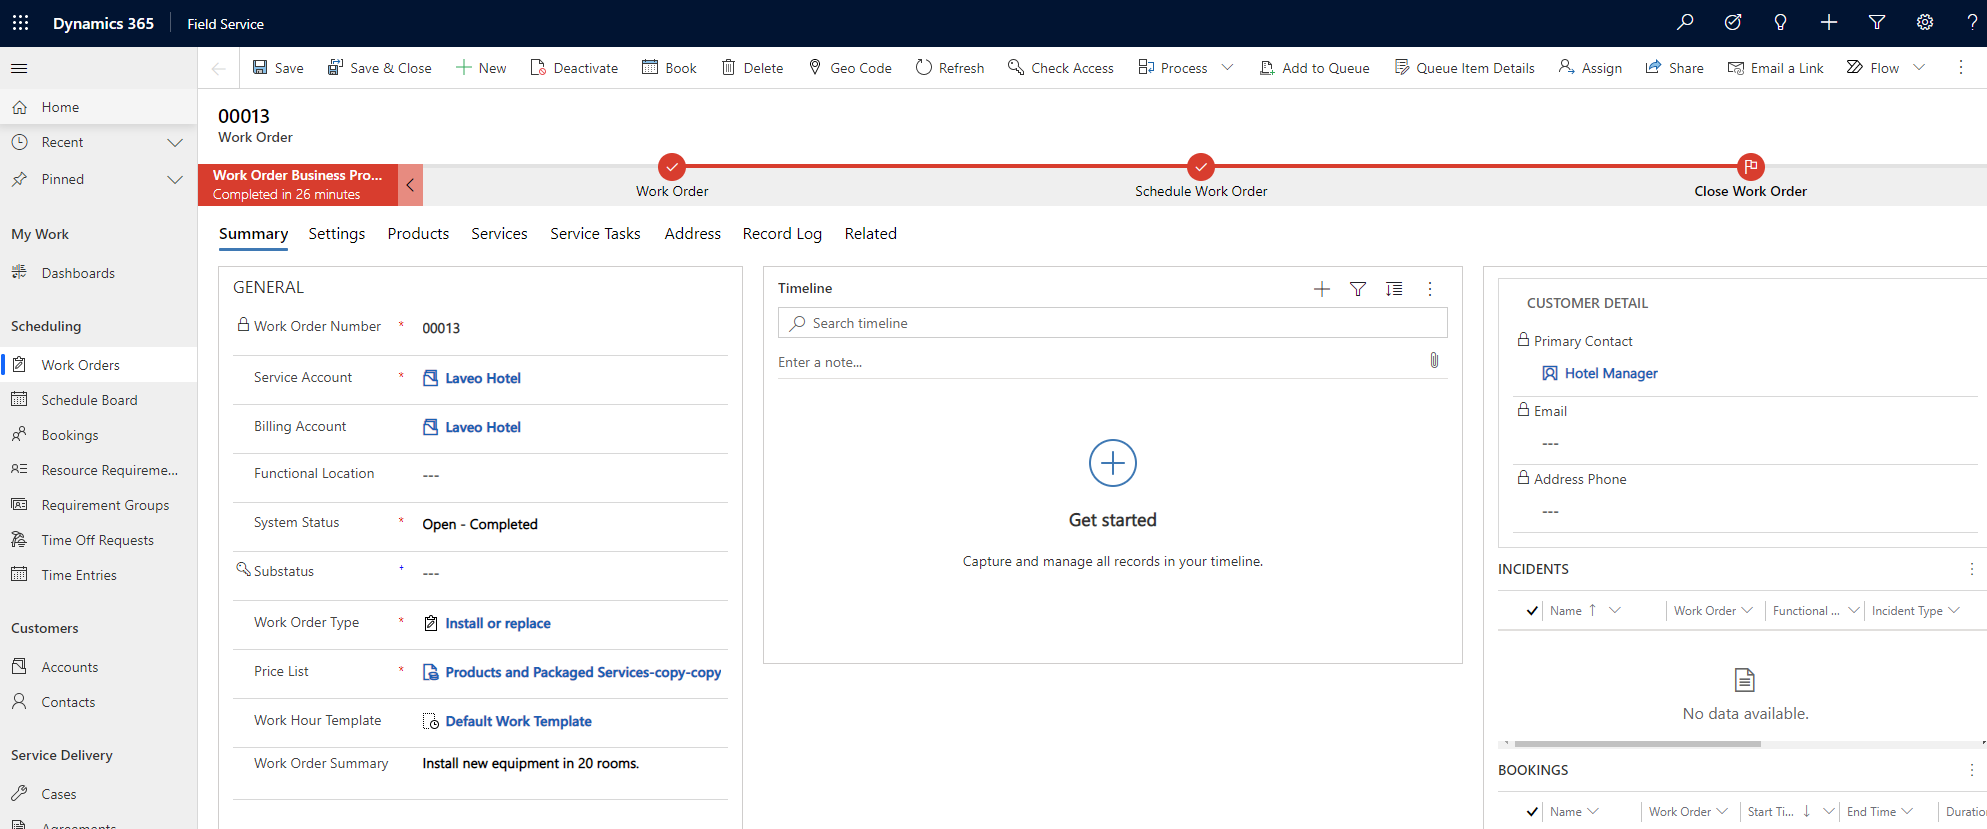
After work is done, status is changed to Completed>Completed. Which updates our work order to Completed and after that manually or automatically Closed. As I am aware, these statuses should be customizable to some point, by adding new sub-status values, for example, Completed>Completed With Problems or In Progress>Waiting for second team.
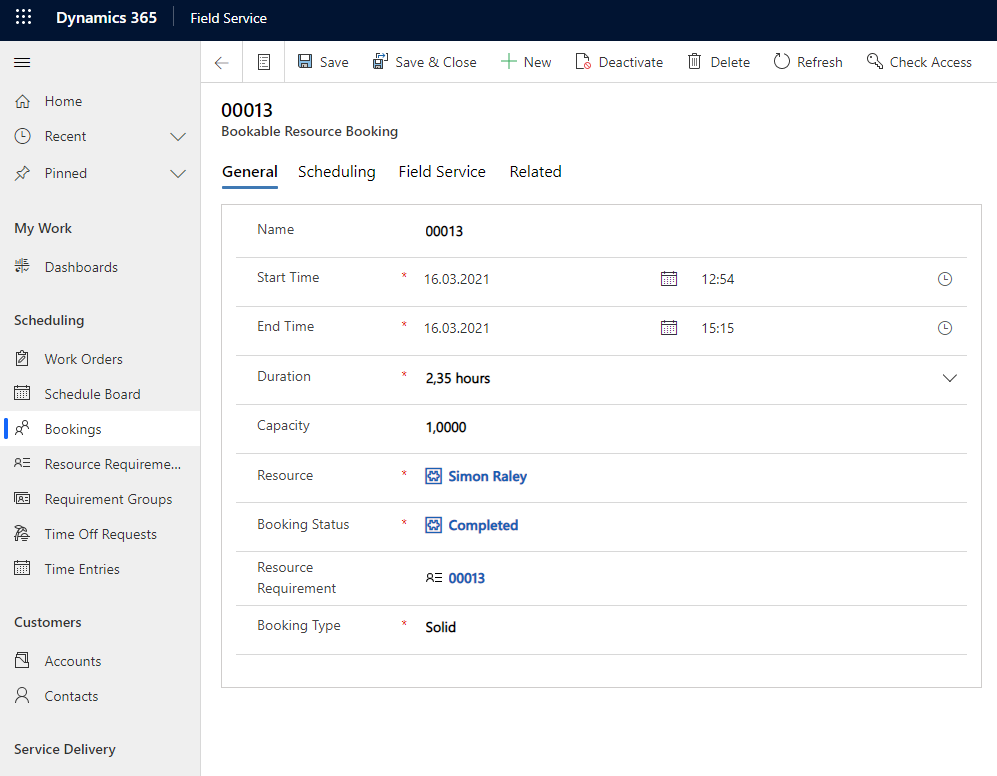
Regarding the Bookings menu item, there is visible which resource is booked with additional information and of course, you can do new booking manually. Look at this as a better version of Outlook calendar :)

With double click on Simon Raley, we can see more details on his assignment.
Resource Requirement is actually used before Booking and Schedule Board even though it is lower in menu, to assign what kind of resource are needed for the job. I have set-up that Skill needed for job is Control System Service, where Role is Network Technician(since we are installing Routers), preferred person is Simon Riley and he is coming from Switzerland organization unit.

This part of Field Service is very fun to use, if all resources are set correctly, work can be planned months in advance.
So, looking back at our Work Order architecture from the beginning, we have gone through basics of Work Order and its lifespan.
About Requirement Groups, Time Off Requests and Time Entries in Field Service we will know more in the second part of this blog very soon. Until then I hope yo uahd fun reading this part.
Diagram source with a lot of additional info regarding Work Order is here: link
Articles series :

