Introduction
In model-driven applications, forms often contain many fields spread across multiple tabs and sections, which can make it difficult and time-consuming to find key information. Navigating between these tabs slows productivity and increases the risk of missing important information. Finding key insights quickly can be a challenge.
The Row Summary feature solves this problem by displaying a clear and concise summary of the most important information. Makers can customize the columns to include and choose how the summary is presented (as bullet points or as a short paragraph). This allows users to get the necessary context at a glance, without having to scroll through the entire form.
Furthermore, the summary can include clickable links to related records.
At the time of writing this article, this feature is still in preview.
Summaries are currently only supported in the English language.
Preview features aren’t meant for production use and might have restricted functionality.
Enable Row Summary feature
Before you can configure a Row Summary, you need to enable the feature in your environment:
- Go to Power Platform Admin Center
- Select your environment
- Go to Settings > Product > Features
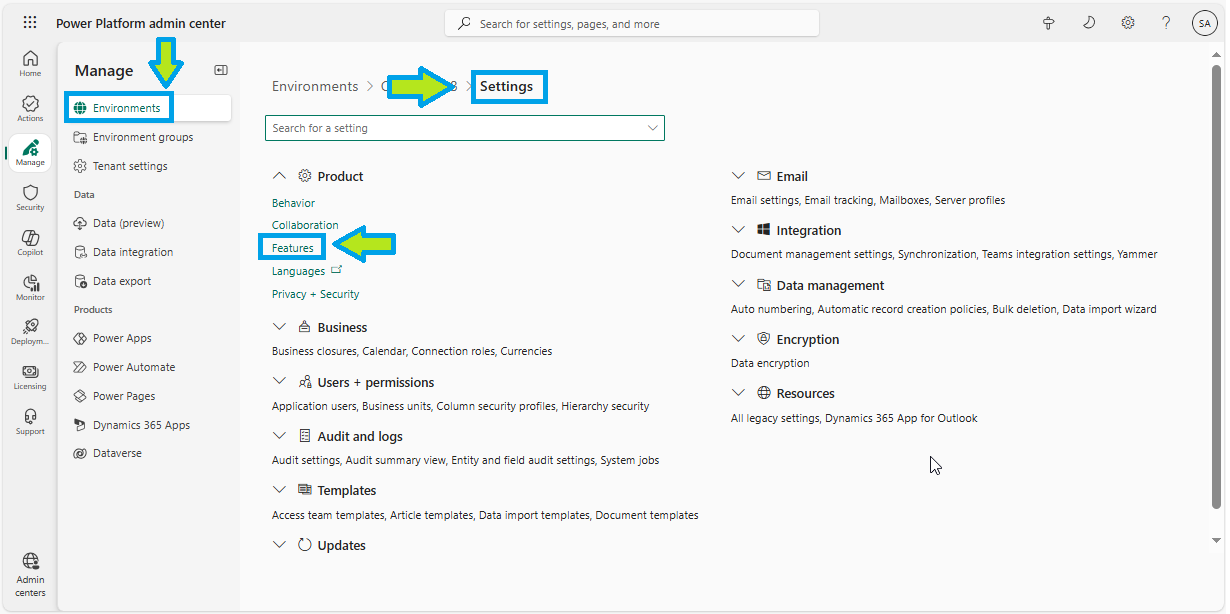
- Enable the feature AI Insight Cards
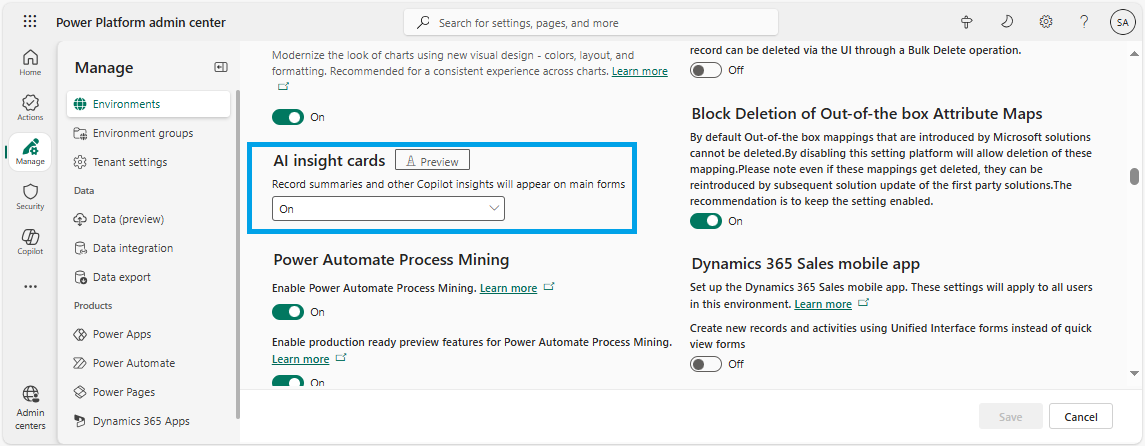
Once enabled, you’ll be able to access and configure the Row Summary feature in model-driven apps.
Configure Row Summary for a table
To configure a row summary for main forms for a specific table:
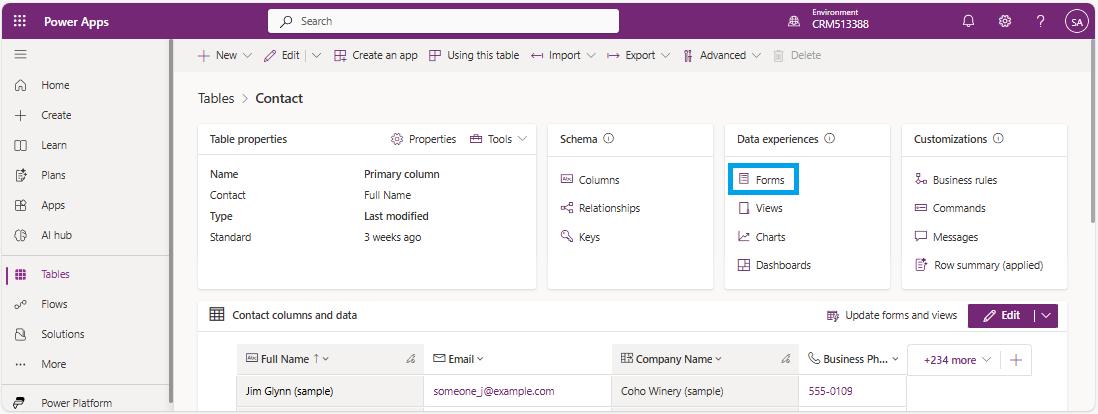
- Open Power Apps Portal and select your environment
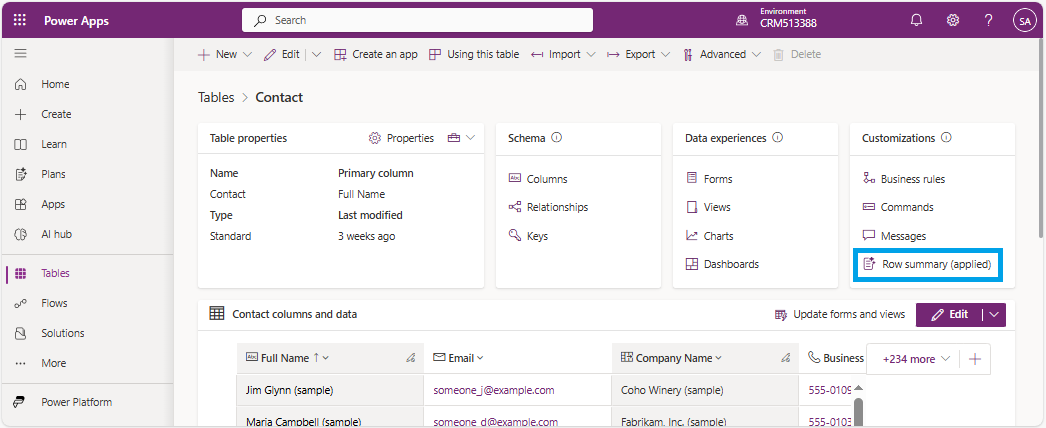
- Select the table where you want to apply the row summary (e.g., Contact) from the left navigation pane and click on Row summary in the section Customizations

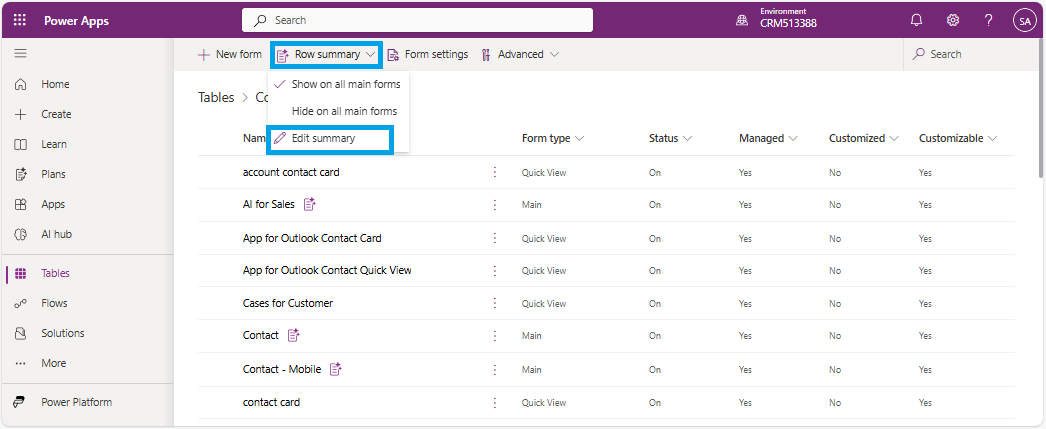
Another way is to select your table from the left navigation pane and click on Forms in the section Data experience
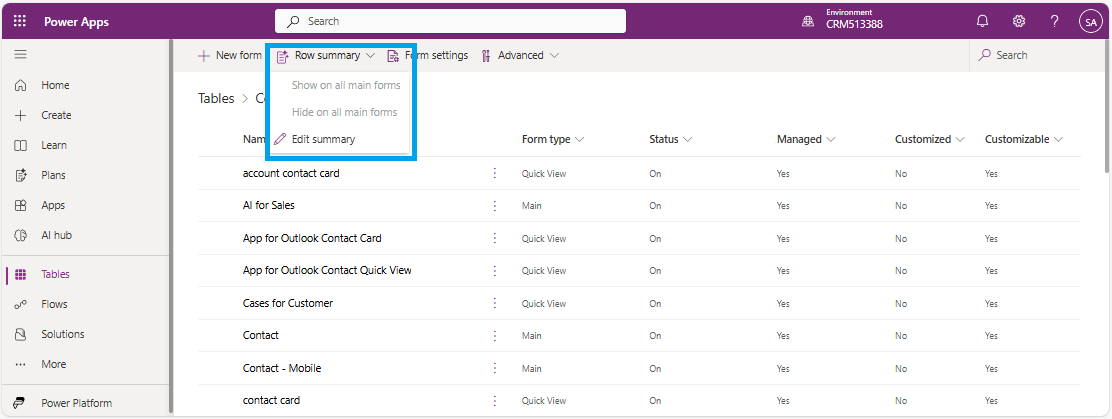
Then click on Row summary on the command bar and from the dropdown select Edit Summary to begin customization
- Following window is displayed:
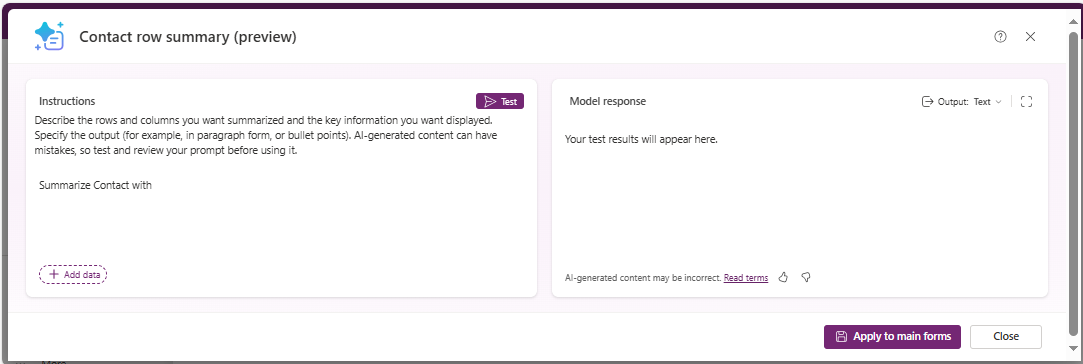
- Now you have to define columns to include in the summary and write a prompt
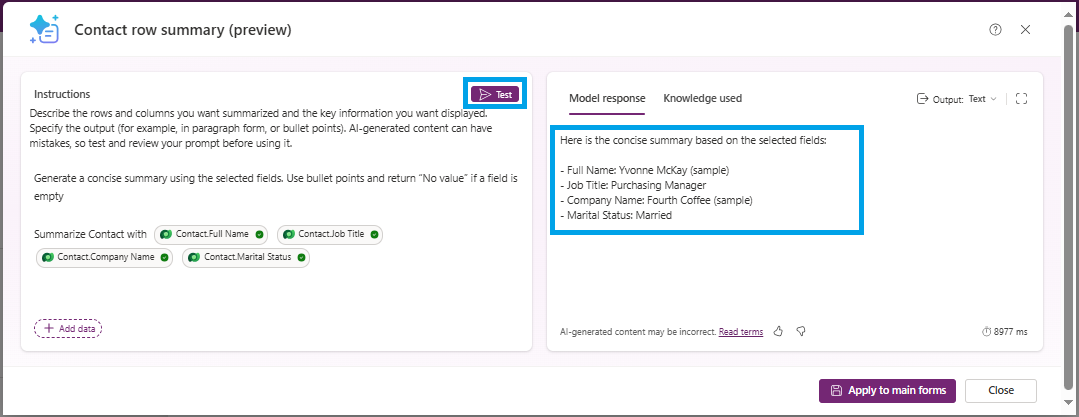
- In the Prompt editor, click on +Add data or type "/" to choose the columns you want the AI to summarize (in my example: full name, job title, company name, marital status)
If you click on +Add data you can add several columns in one step which is not the case if you type "/"
- Write a custom instruction (prompt) describing how the summary should be generated
In my example below : Generate a concise summary using the selected fields. Use bullet points and return “No value” if a field is empty

- Click on Test to preview the summary output (the most recently edited record is used to generate the test response)
- Once satisfied, click on Apply to main forms to enable the summary across all main forms for your table
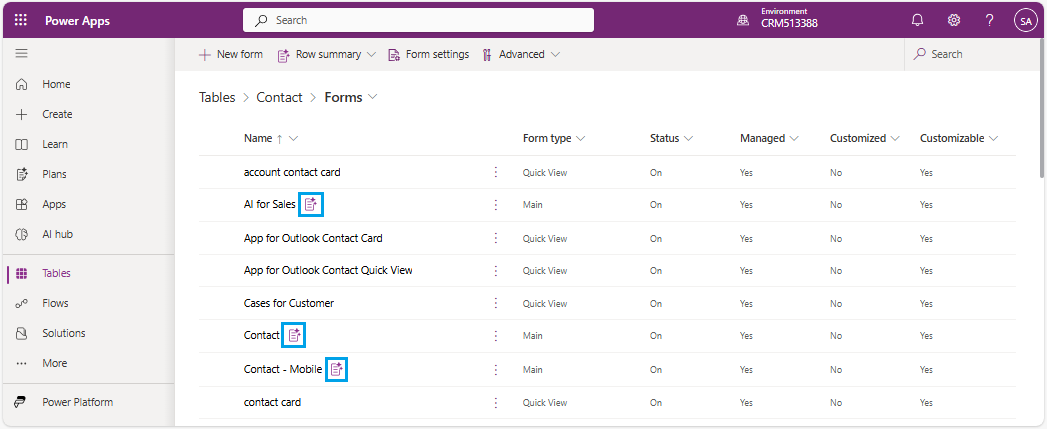
Display the list of forms : an AI icon is visible for forms where the summary is active (only main forms)
To modify an existing row summary:
- In Power Apps Portal select your table where you want to modify the row summary
- Click on Forms in the section Data experience
Then click on Row summary on the command bar and from the dropdown select Edit Summary
An alternative to the previous method (point 2) is to click on Row summary (applied) in section Customizations
- Make your changes to the prompt or included columns and reapply
To remove a summary from all forms:
- In Power Apps Portal select your table where you want to remove the row summary
- Click on Forms in the section Data experience.
Then click on Row summary on the command bar and from the dropdown select Hide on all main forms

View Row Summary in Dynamics 365
Open your app in Dynamics 365 and navigate to the entity (e.g., Contact) where the row summary is configured.
Select a record in the view : an AI summary icon is displayed.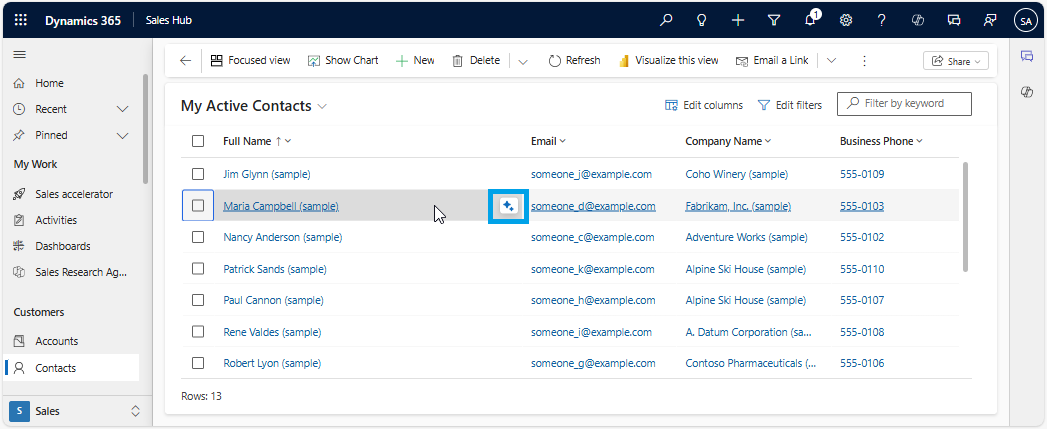
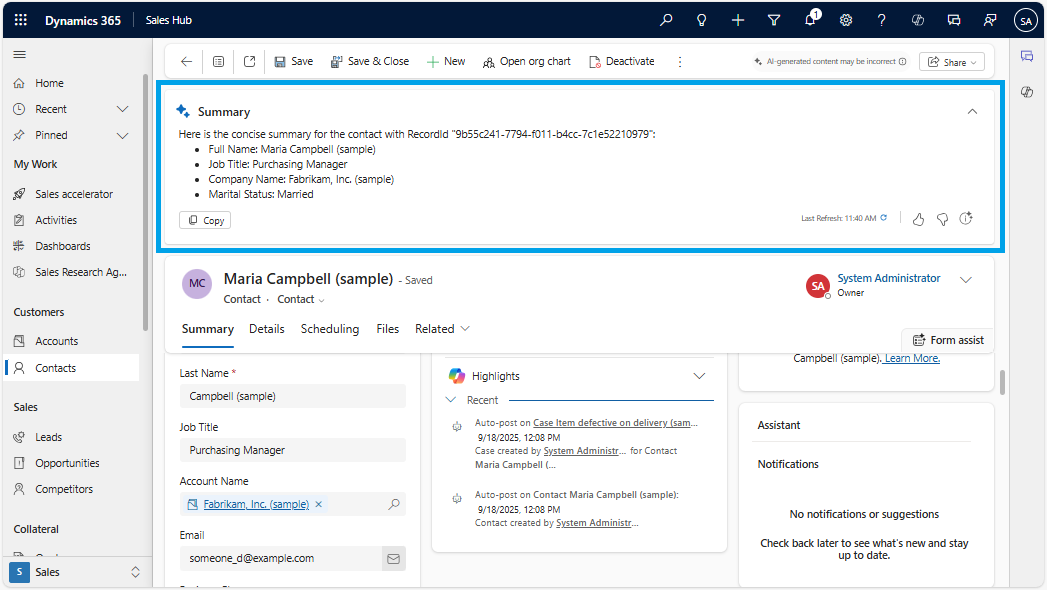
Click on this icon : AI-generated summary is displayed in a modal popup.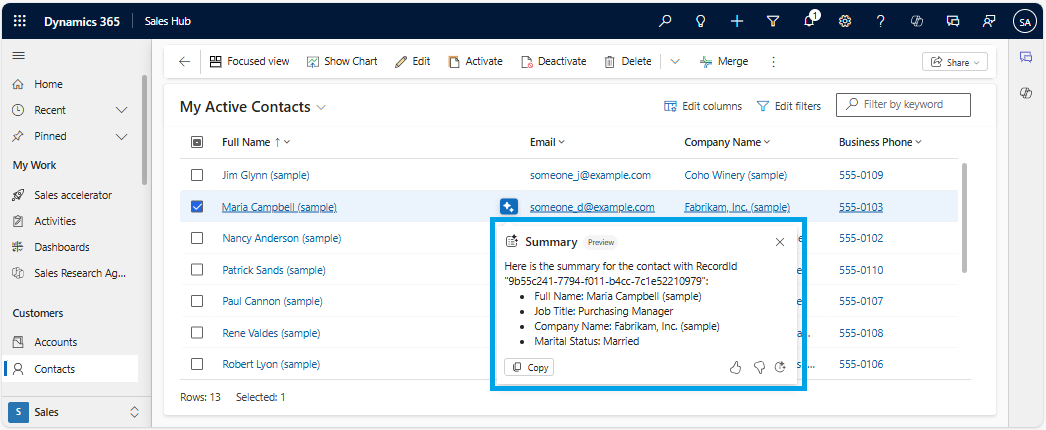
Note that you can copy the summary into the clipboard.
If you open a record (e.g., Contact) the summary is displayed at the top of the form in a collapsible bar (called Insights bar).