
Azure DevOps for Dynamics 365:
Introduction
In this Chronicle, we will explore the use of Azure DevOps for Dynamics 365 (and applying more generally to the Power Platform).
We will see how it can be used to set up CI/CD Pipelines in your environments! Please check our CI/CD category with a lot of articles that could complete this one.
This could be a great tool to:
- Automate your deployments across environments
- Save time
- Reduce manual errors
- Reduce manual manipulations
To understand this, I made a tutorial that we will follow together. We will then see the results of it, and how we could go further.
Tutorial - Presentation
We use 2 environments for the tutorial:
- A Dev environment (called CRM513268 in the printscreens)
- A Target environment (that could be your Production environment, or an environment used for testing the developments before pushing them to Production)
We make customizations in Dev environment in a Solution called "EasySolution".
In a Build pipeline, we export this Solution and publish it as Artifact.
If it runs successfully, a Release Pipeline is triggered. It will use the exported Solution and import it to Target environment. Before the import, an approbation from the System Administrator is requested.

Tutorial - Tool
In Azure DevOps we will use the tool "Power DevOps Tools" to automate the Builds and Deployments of our Dynamics 365 Solution.
This tool contains many Tasks such as:
- Update Configuration Record
- Backup Online Instance
- Check Solution (with PowerApps Checker API)
- Export Solution
- Import Solution
- Set Version
- Publish Customizations
- Create Patch
- Import Config Migration data
You can check the exhaustive list (and other information about the tool) in this link:
https://marketplace.visualstudio.com/items?itemName=WaelHamze.xrm-ci-framework-build-tasks
Tutorial - Build
Let's start with the creation of the Build Pipeline.
Go to the Azure DevOps Portal: https://dev.azure.com/
Create a project and open it:
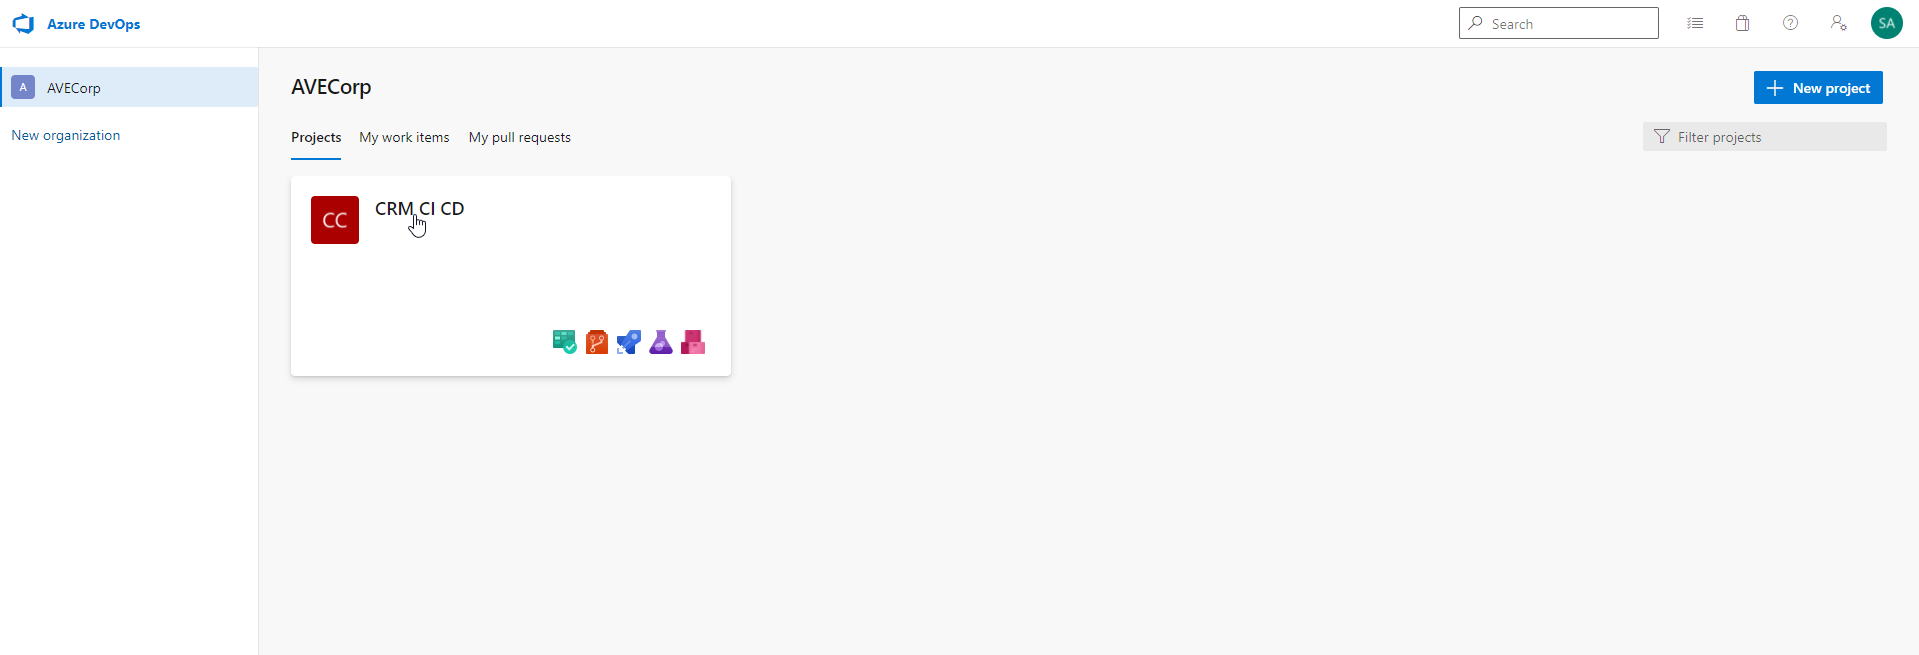
Mine is called "CRM CI CD".
You land on the "Summary" page of the project. We will focus on the "Pipeline" tab:
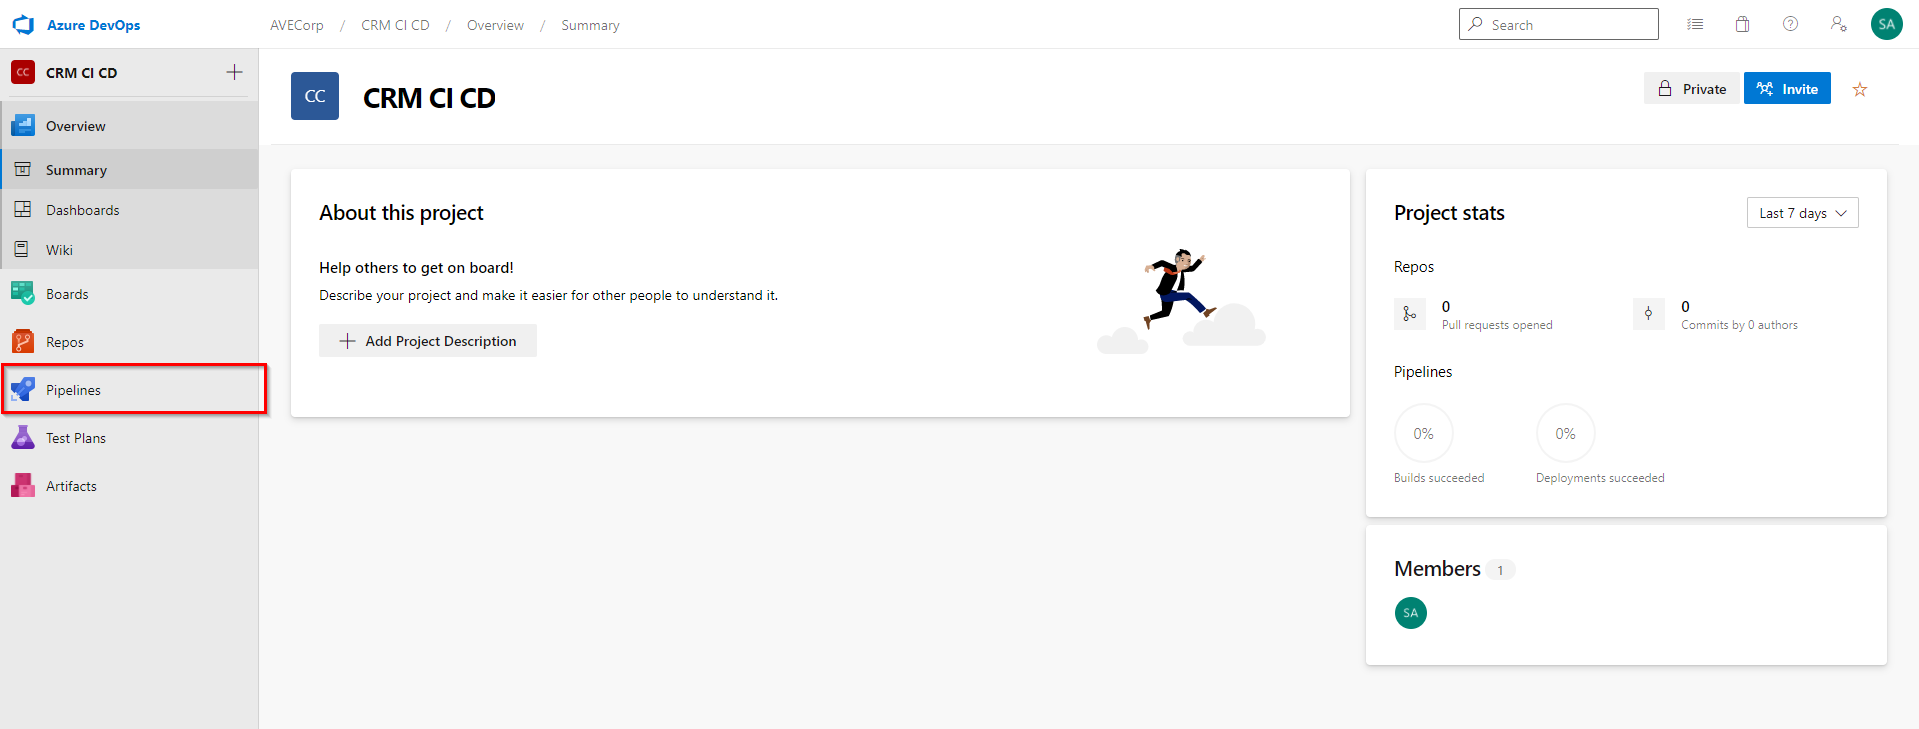
Click on "Pipelines" tab and click "New Pipeline".
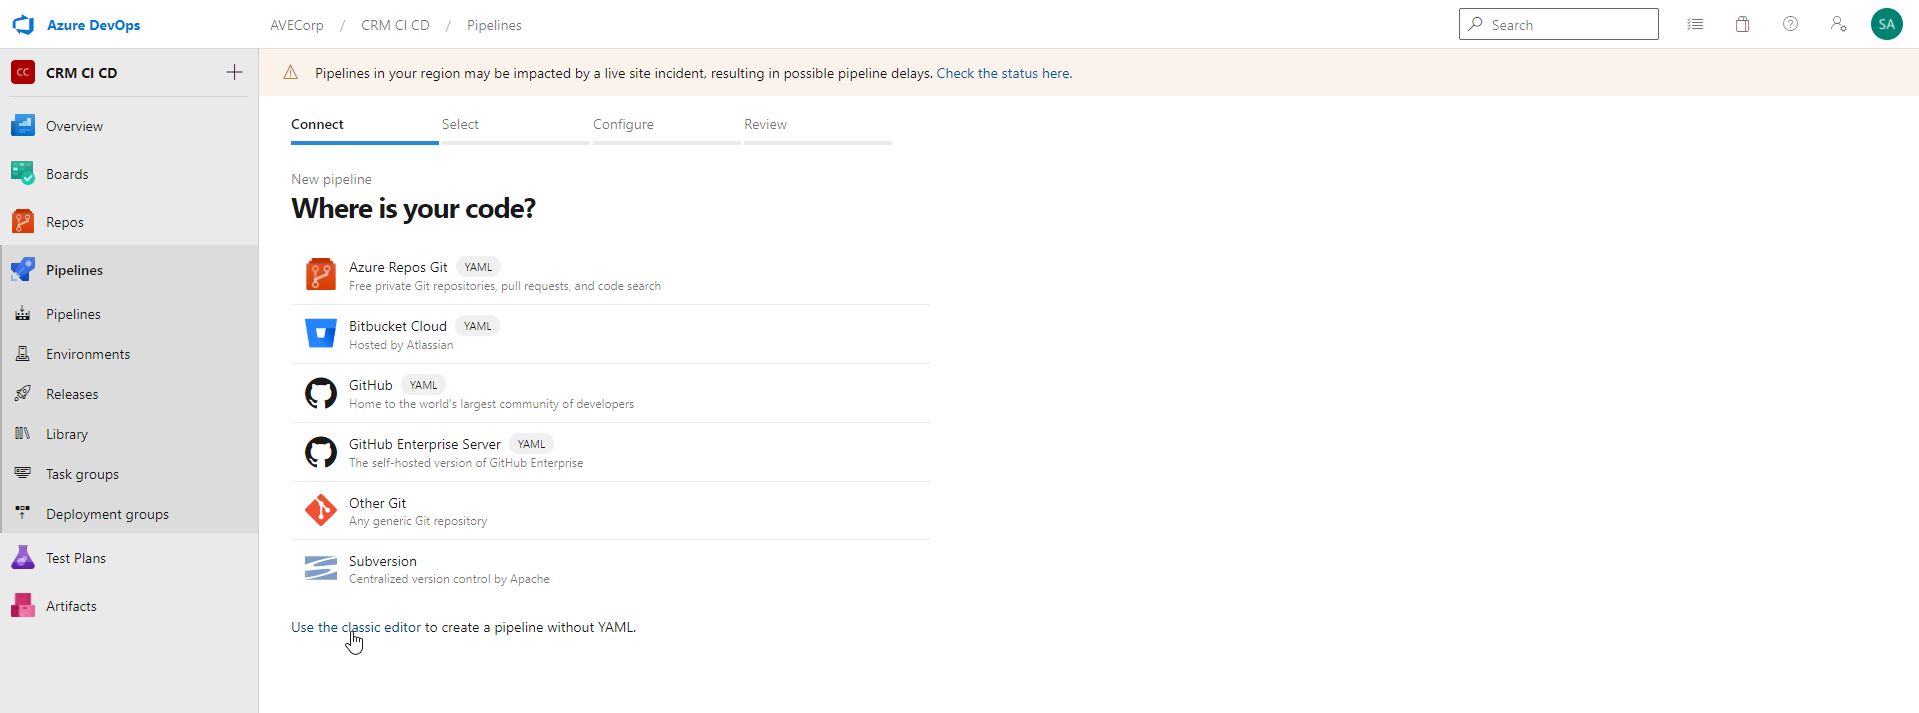
By default, the pipeline is edited with YAML code. You can click "Use the classic editor" link. This will open a graphical interface to edit the pipeline.
Then, you will be asked to select a Source:
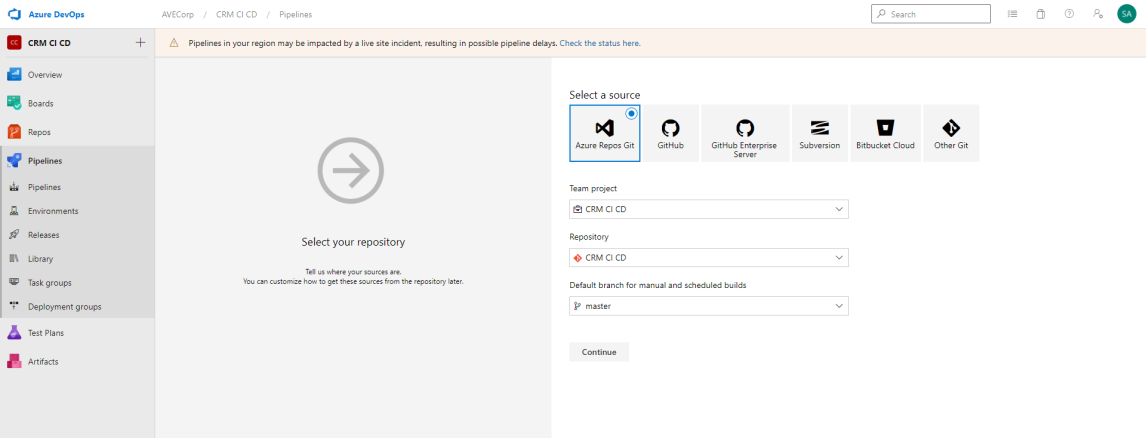
You can select a repository you already have, or create a new one.
We will actually not use any repository in this tutorial. But this step is mandatory.
Next, you can choose to start your pipeline with a template, or create an "Empty Job":
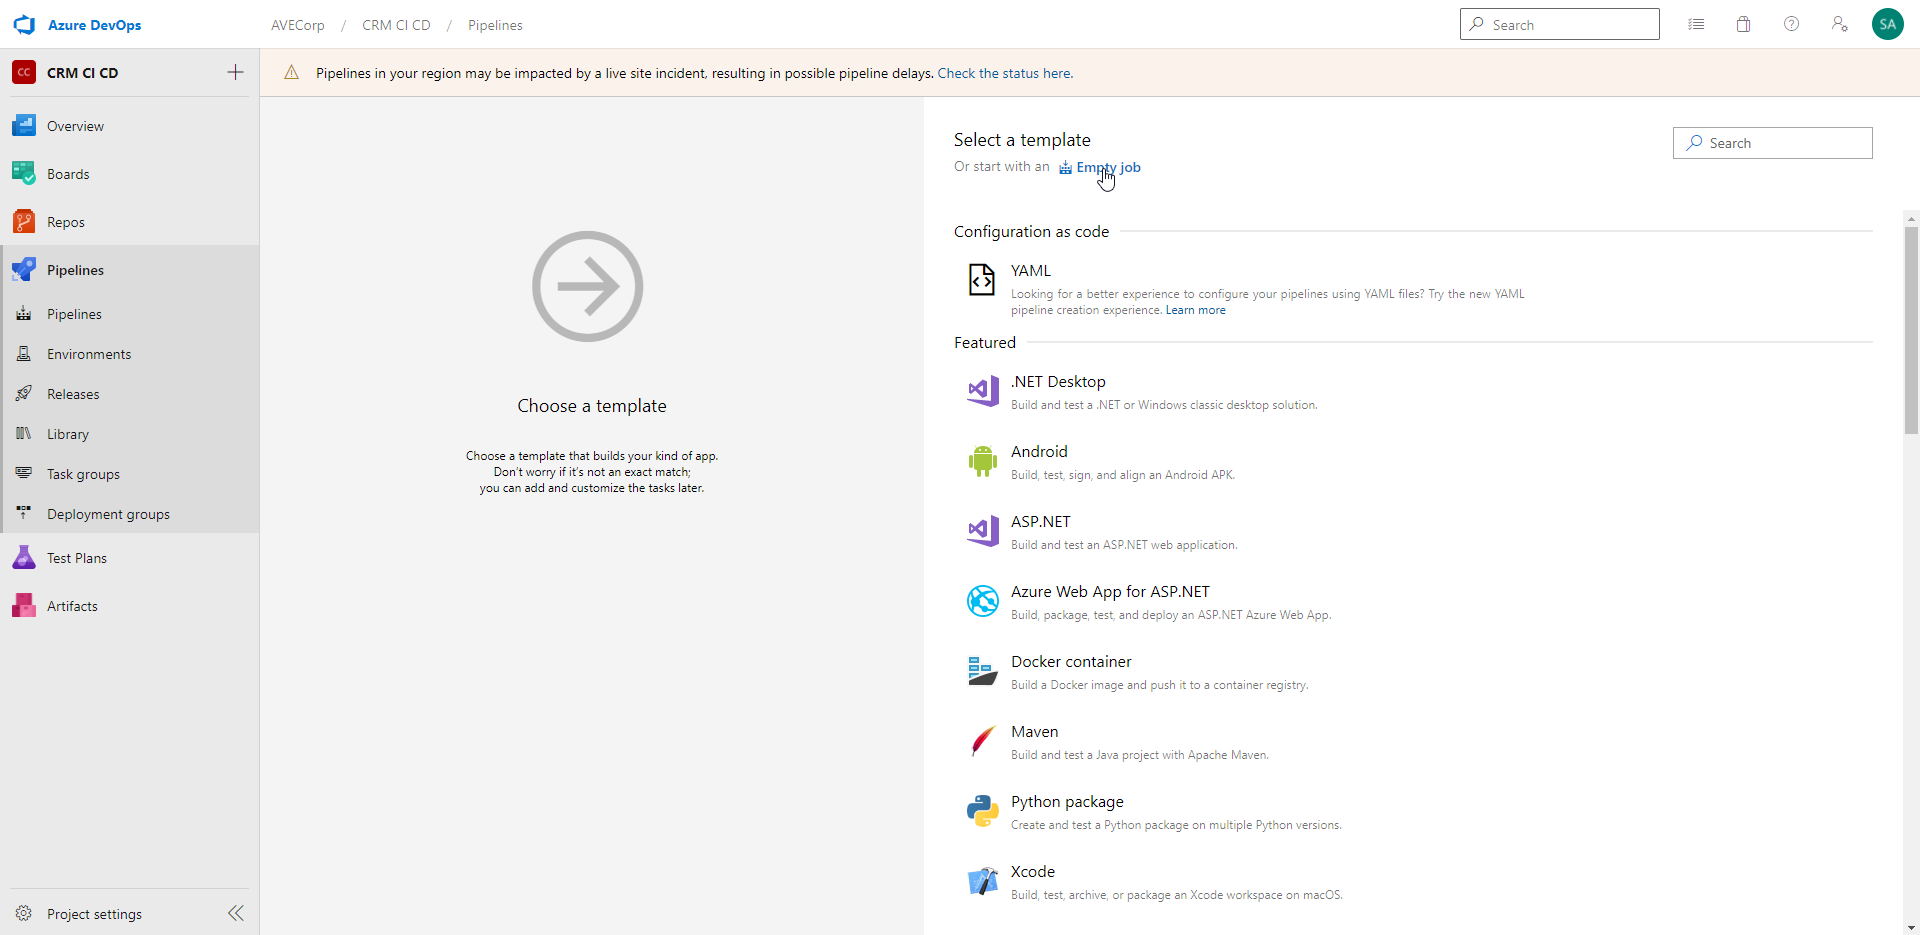
Here we will start with an empty job.
We will use the Agent job already created. In it, add a new task and look for "Power DevOps Tools":
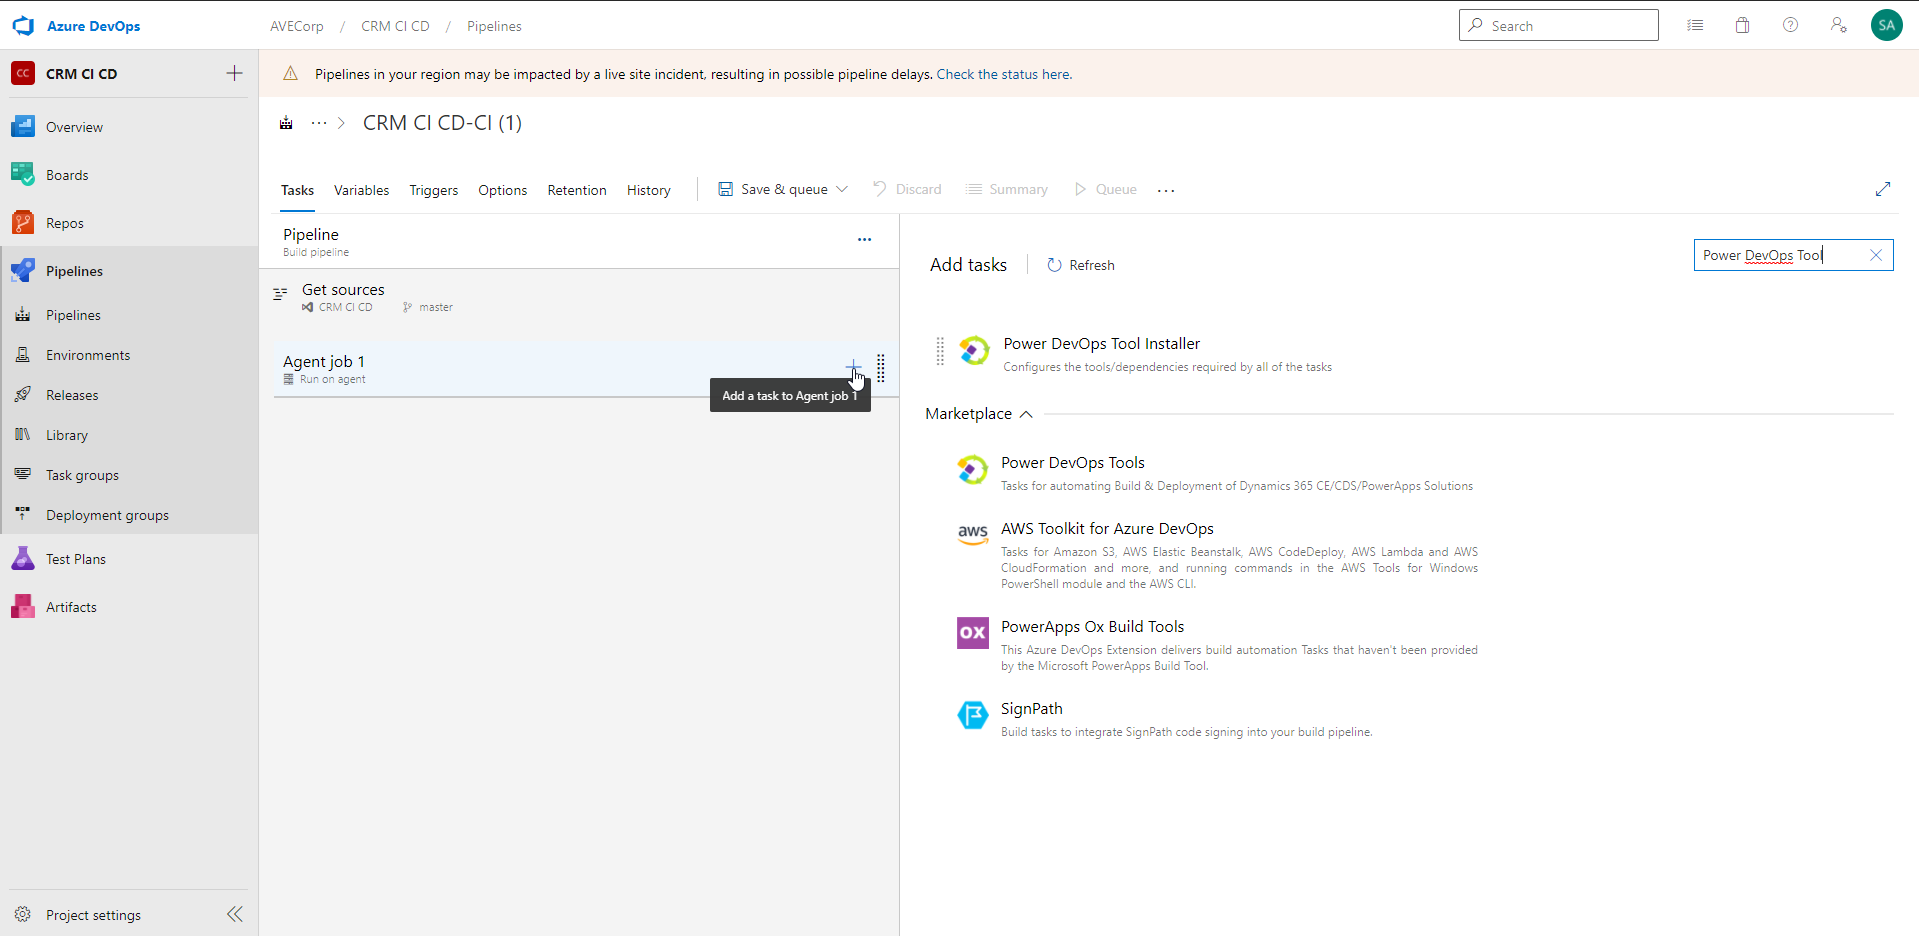
If you haven't installed it your environment before, you will find it in tab "Marketplace" with button "Get it free". So you can click it, it will redirect you to the Visual Studio marketplace. There you can click "Get if free" again and it will be added to your Azure DevOps.
And now... we are ready to get into the core of the subject and add content in our pipeline !
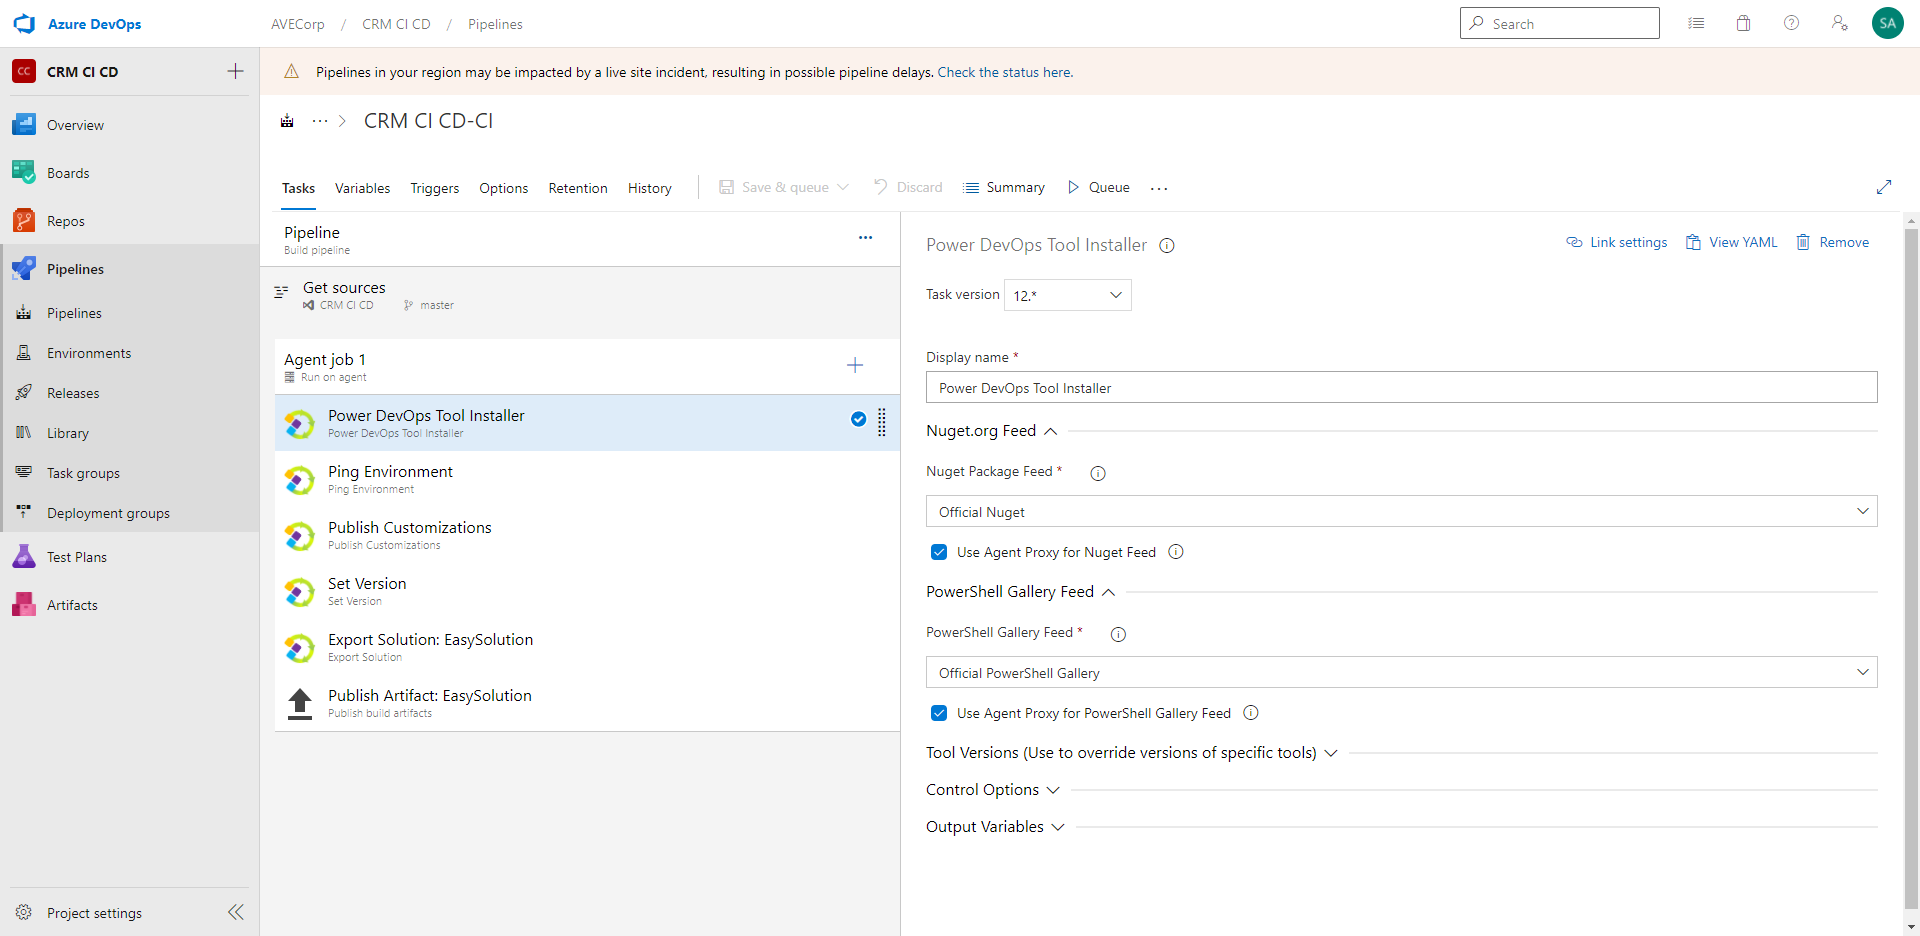
Add the Task "Power DevOps Tool Installer":
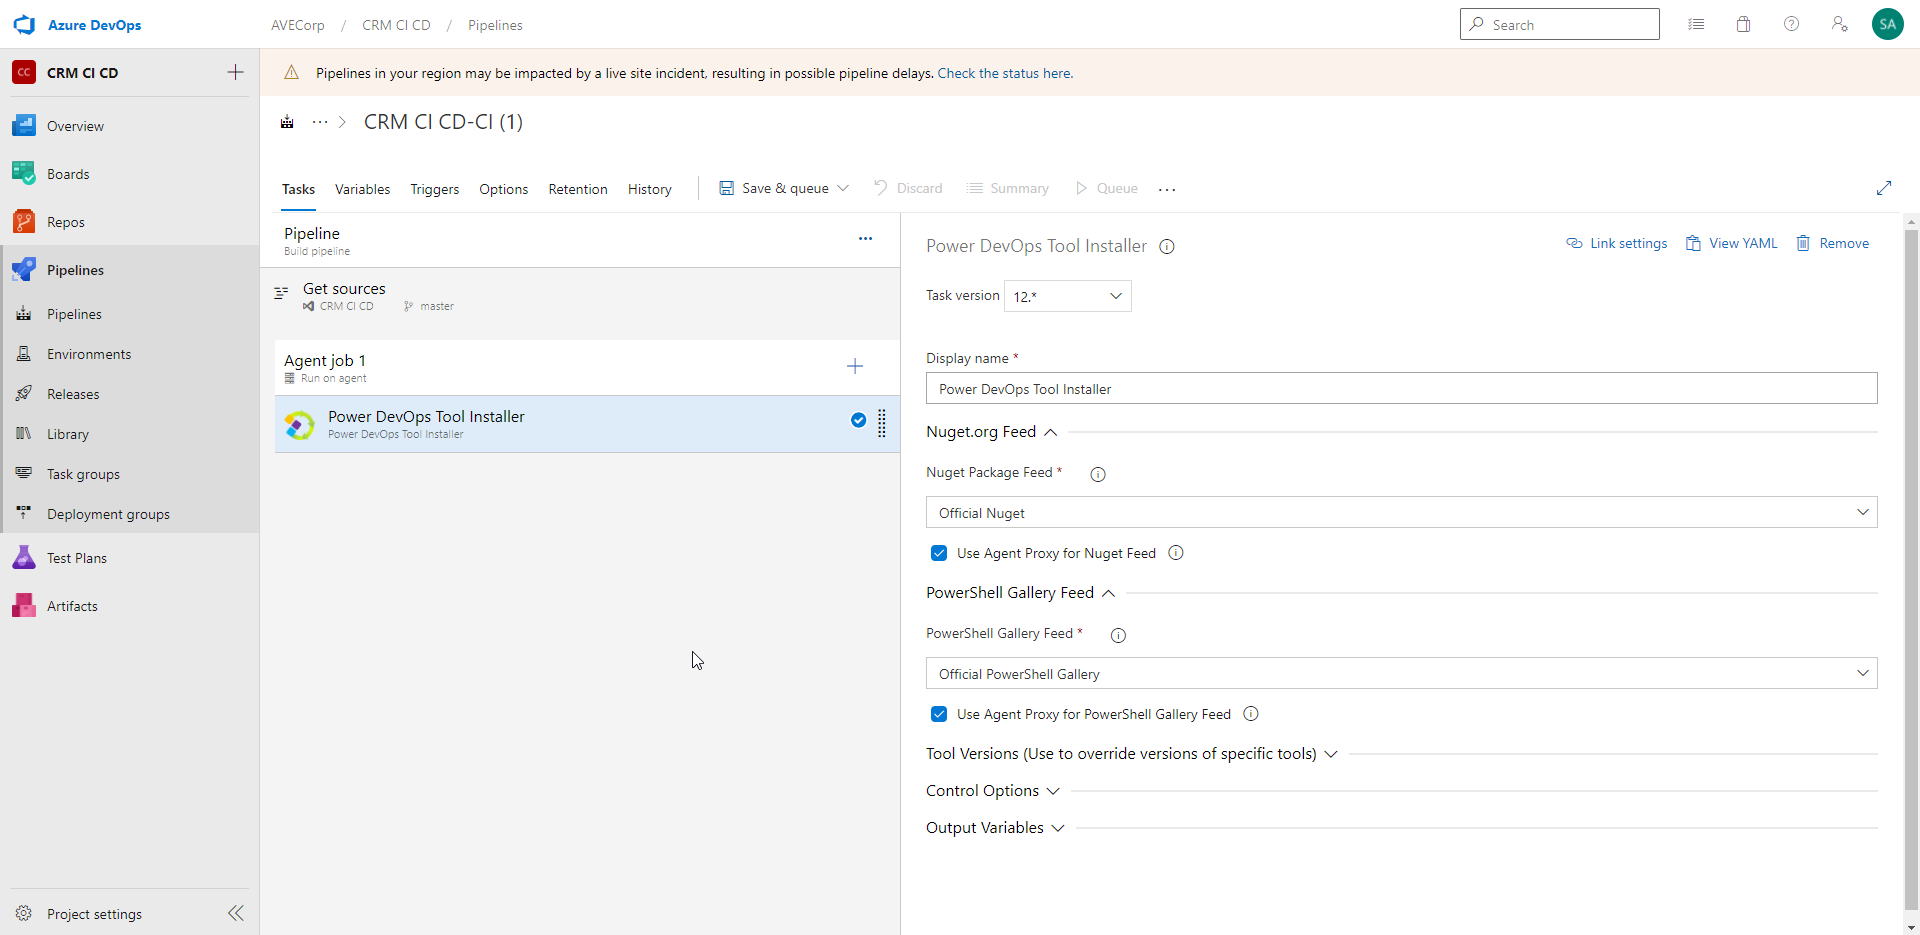
This step installs the "Power DevOps Tool" tool in the Agent Job.
Then, add the following Tasks:
- "Ping Environment"
- "Publish Customizations"
- "Set Version"
- "Export Solution"
- "Publish Artifact"
And you get this pipeline:
Let's review each Task one by one.
- "Ping Environment":
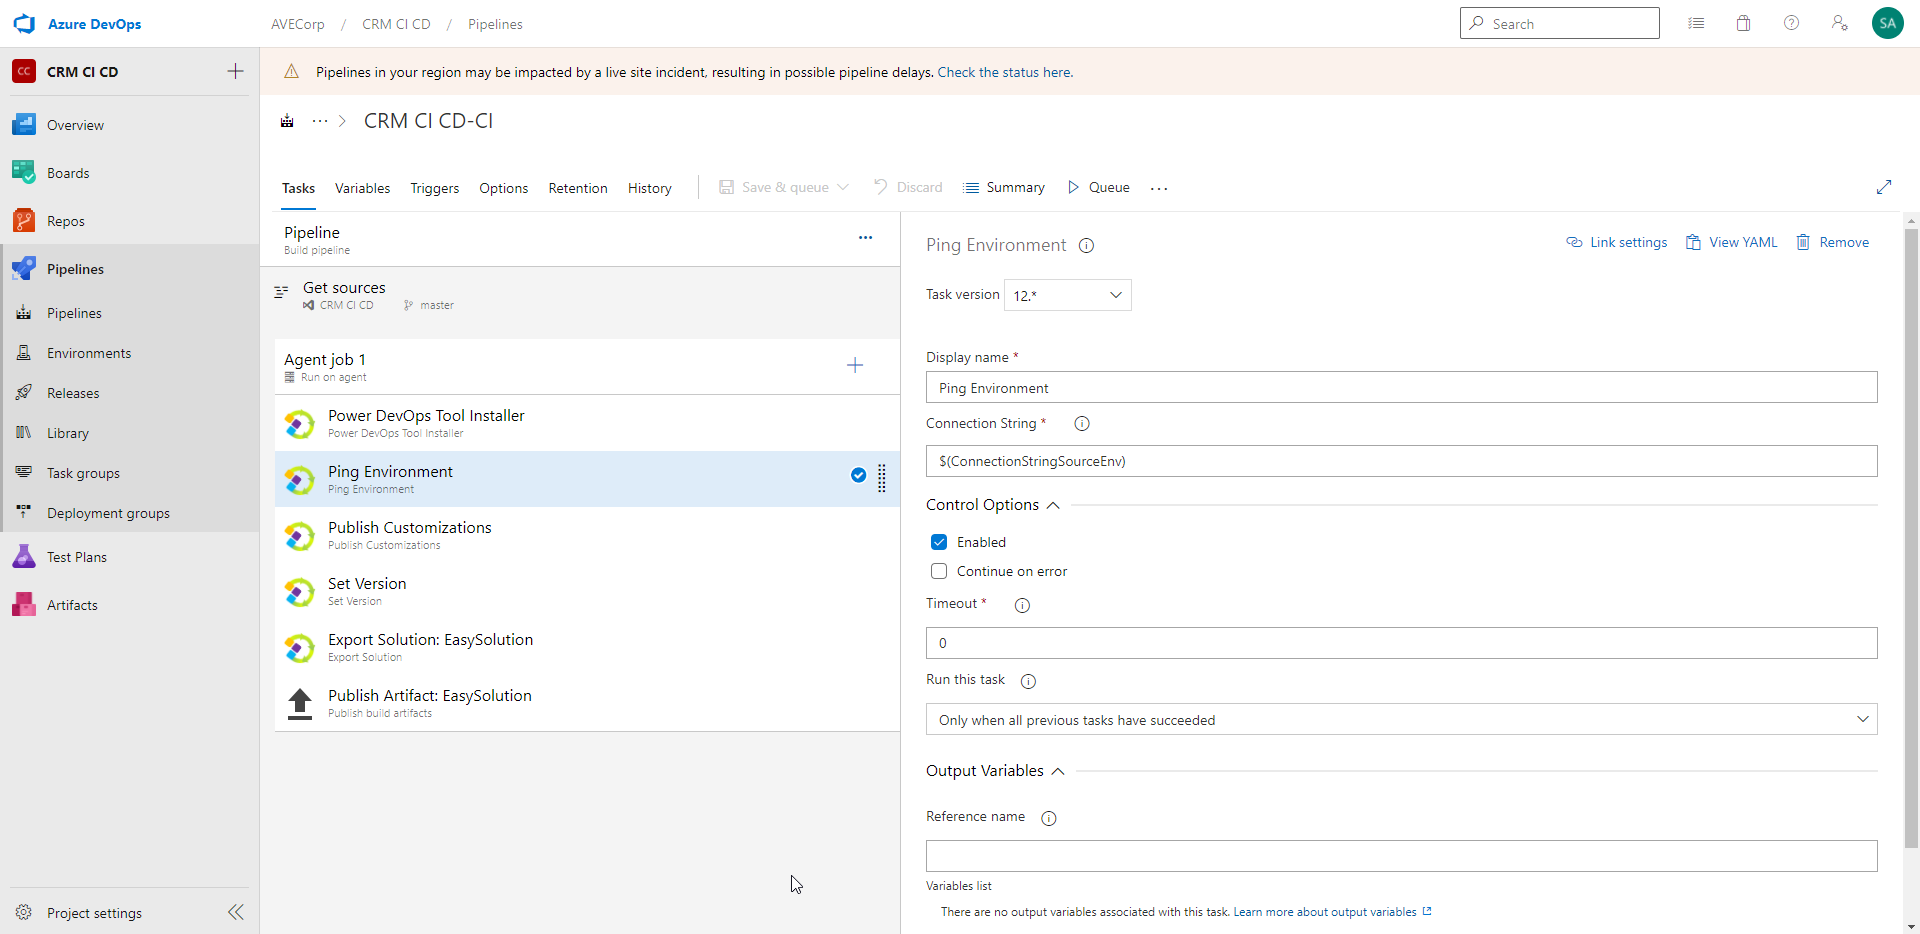
This Task just allows to check that the connection to the environment can be made successfully. It is mainly useful while building/debugging the Pipeline.
You can change the Display name if you want.
You need to enter the Connection String to connect to your environment. There are different possible ways to connect, for instance with a user account or with a Service Principal.
The possible formats of the Connection String can be found there: https://docs.microsoft.com/en-us/powerapps/developer/data-platform/xrm-tooling/use-connection-strings-xrm-tooling-connect#connection-string-parameters
To store the Connection String, I created a variable called "ConnectionStringSourceEnv":
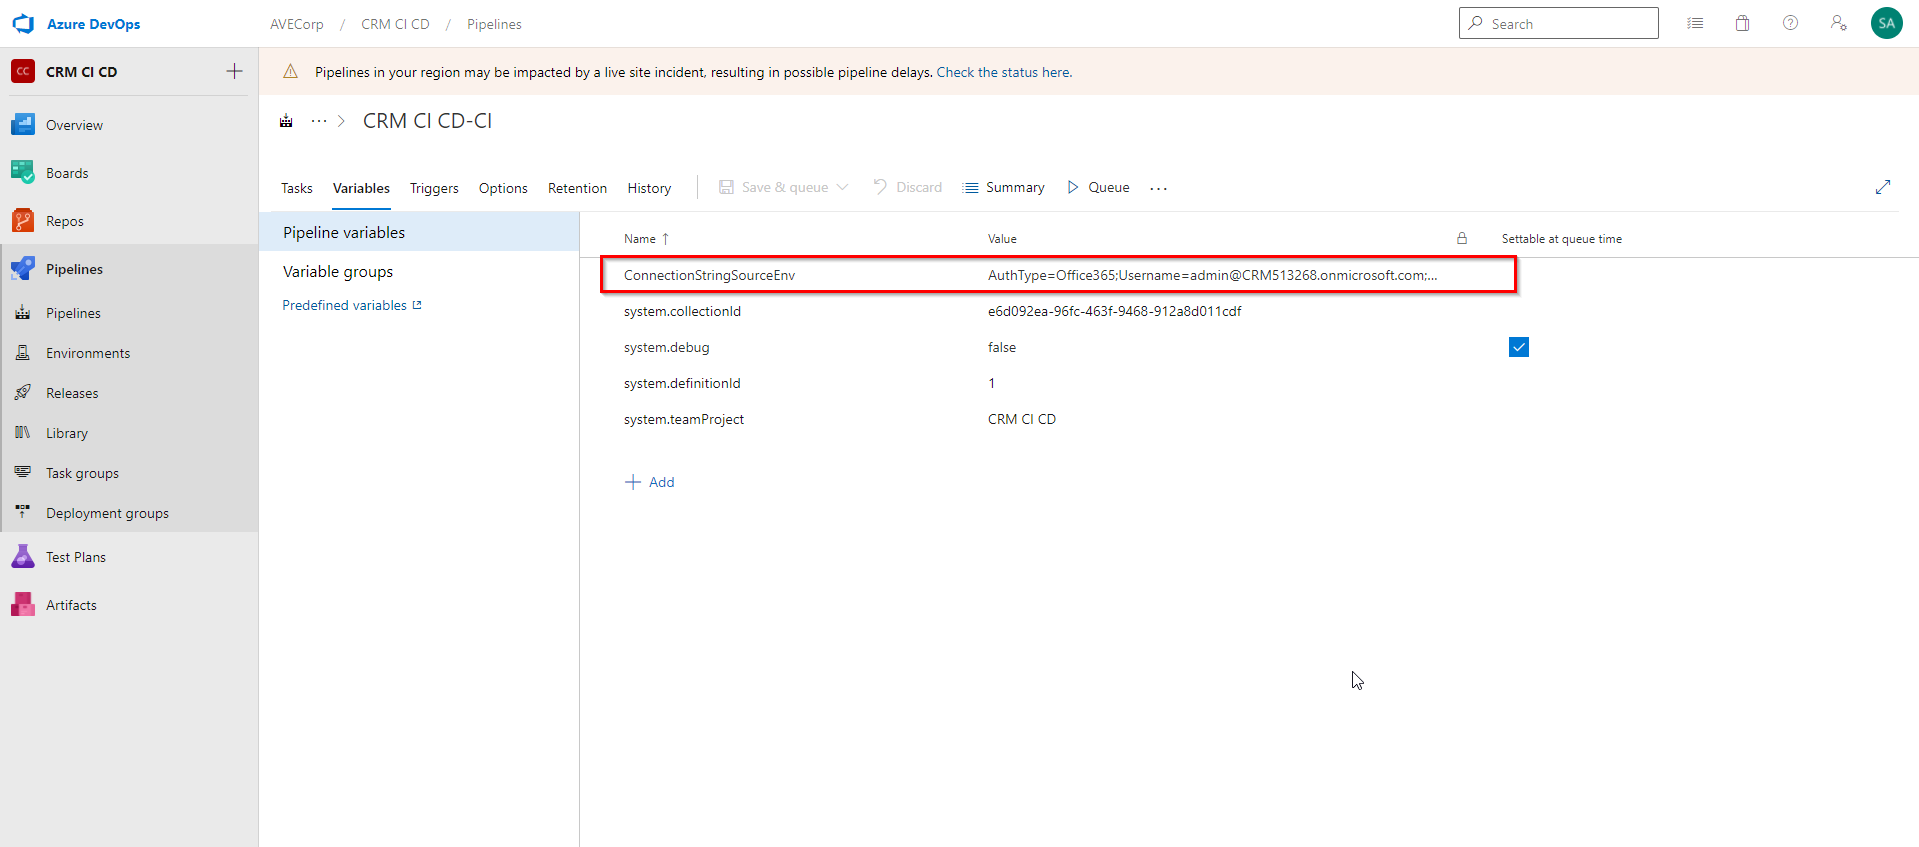
To reference a variable in the pipeline, the syntax is $(name_of_the_variable)
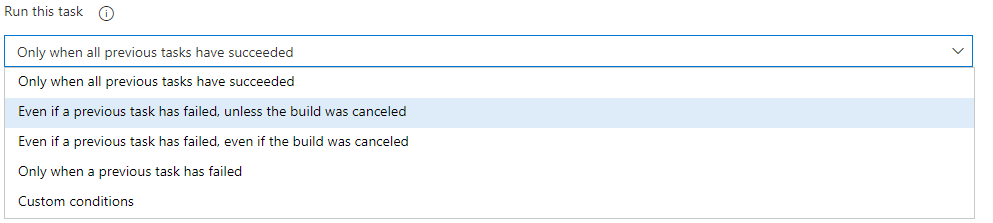
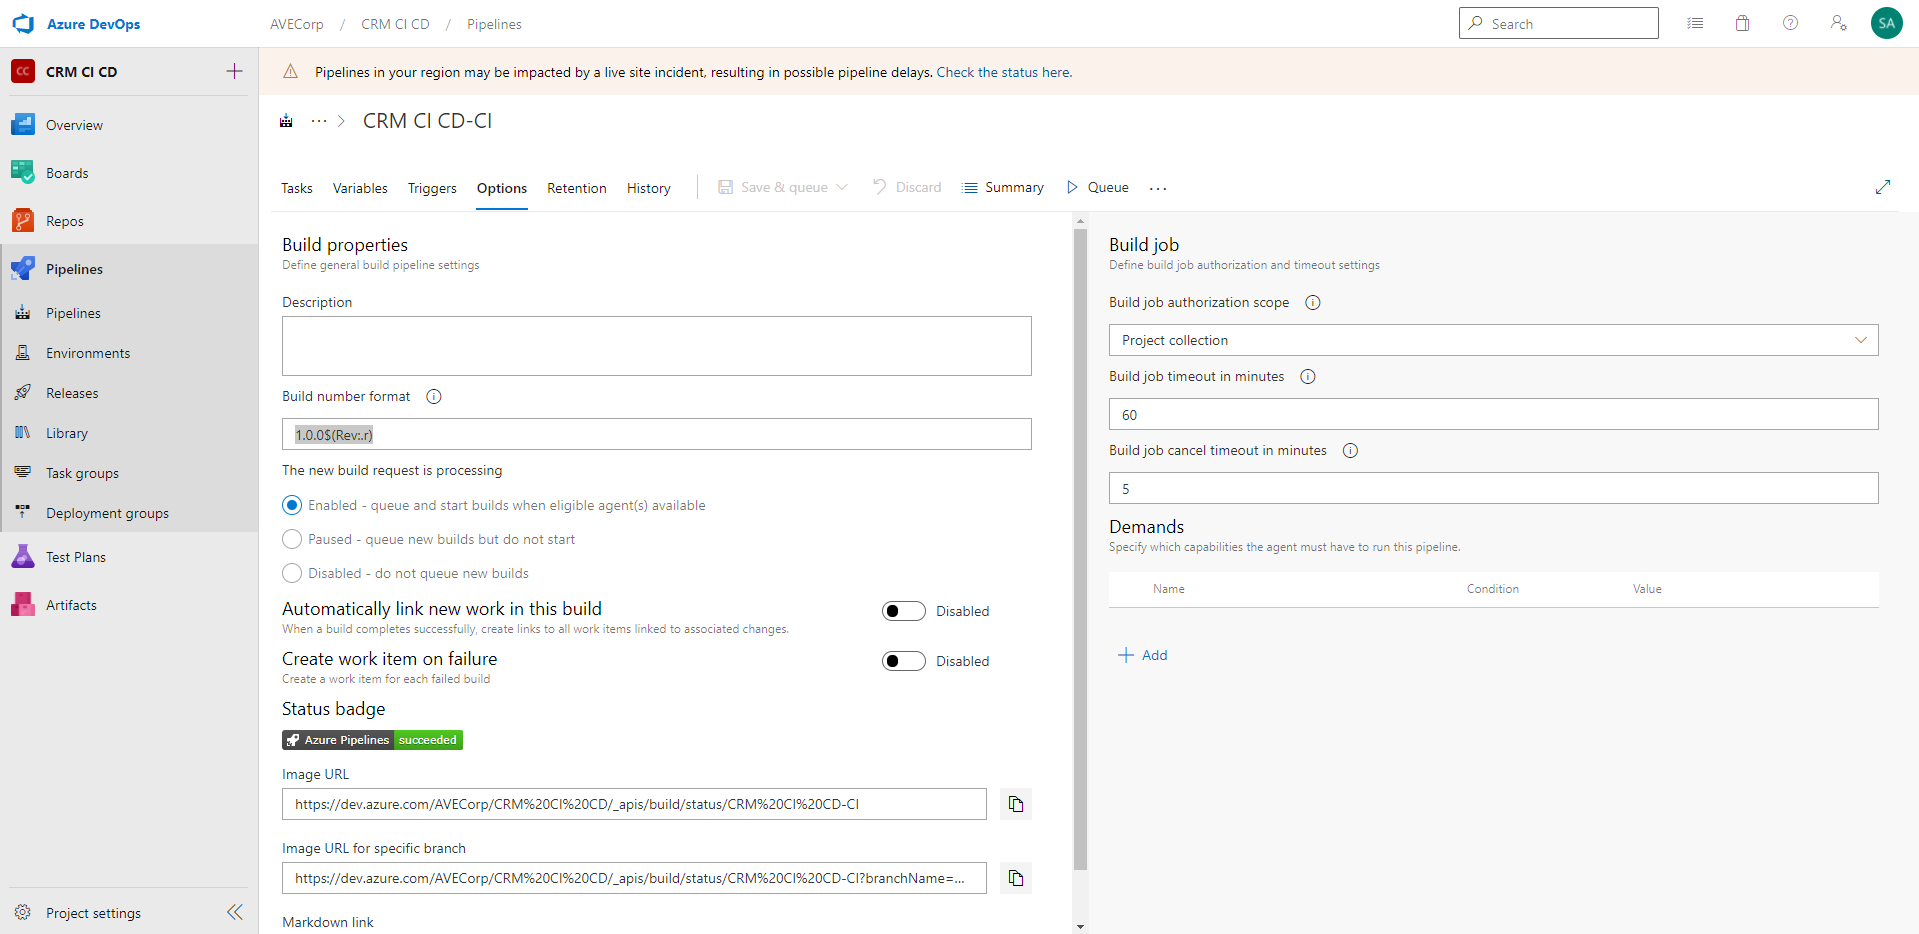
There are other parameters, common to Azure DevOps Tasks: the "Control Option" and "Output Variables". "Control Options" allow to:
-Enable/Disable a Task
-Choose to stop the execution of the Pipeline or not if the Task fails
-Set a timeout
-Choose in which case to run this Task:
- "Publish Customizations":
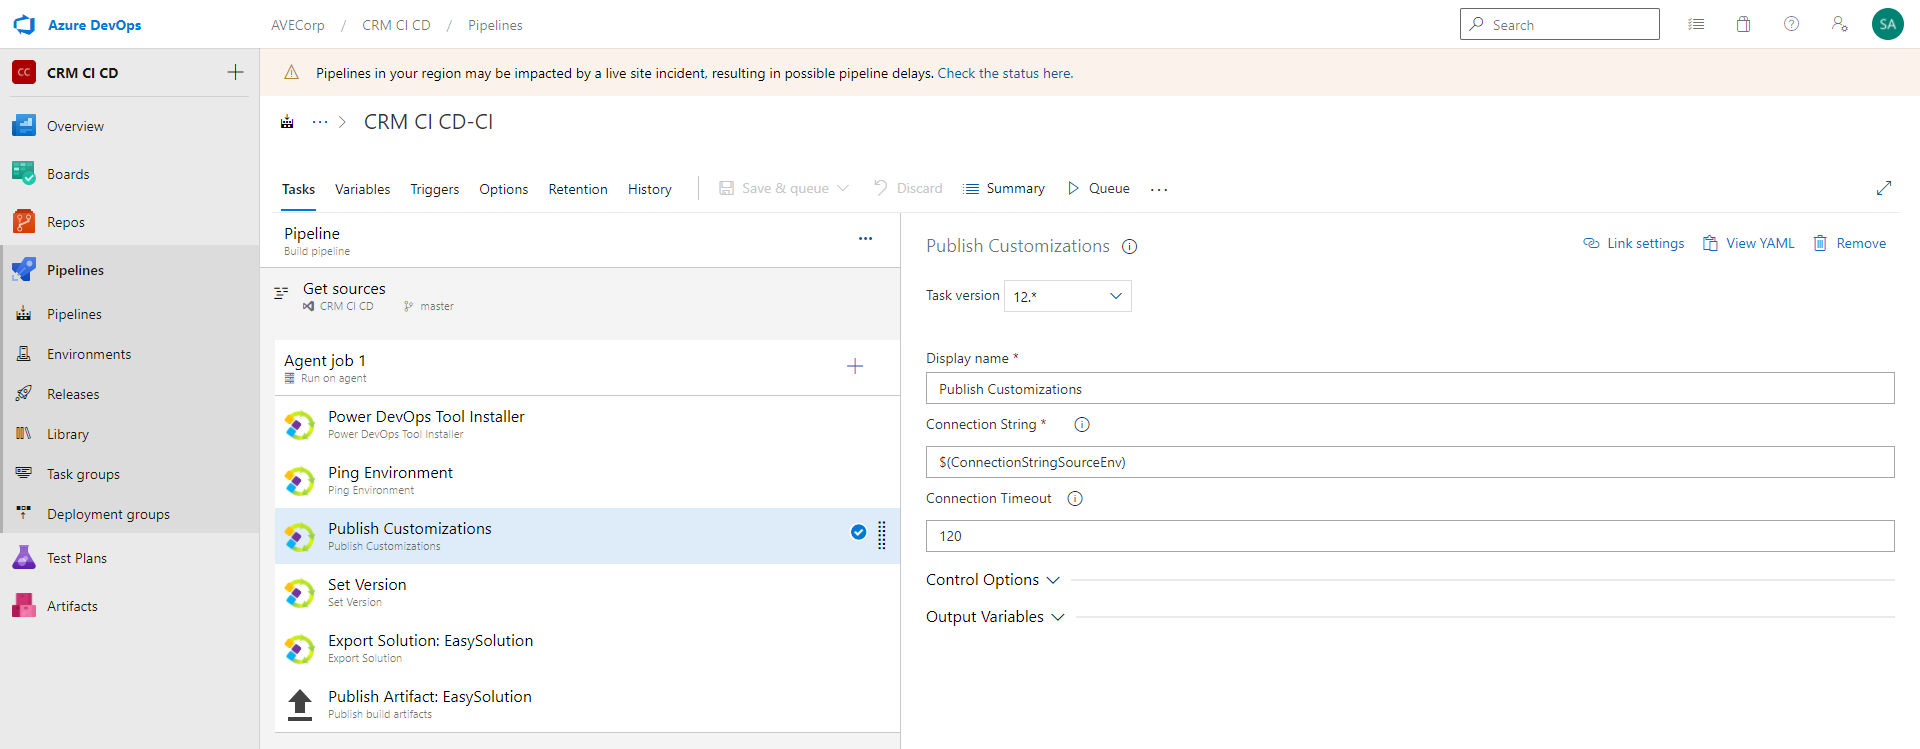
This Task publishes the customizations in your environment. This can be useful if you want to be sure to export all customizations.
The parameters are the same as for the "Ping Environment" Task. You just have one additional parameter "Connection Timeout" that allows to set a timeout for the Connection to the environment.
- "Set Version":
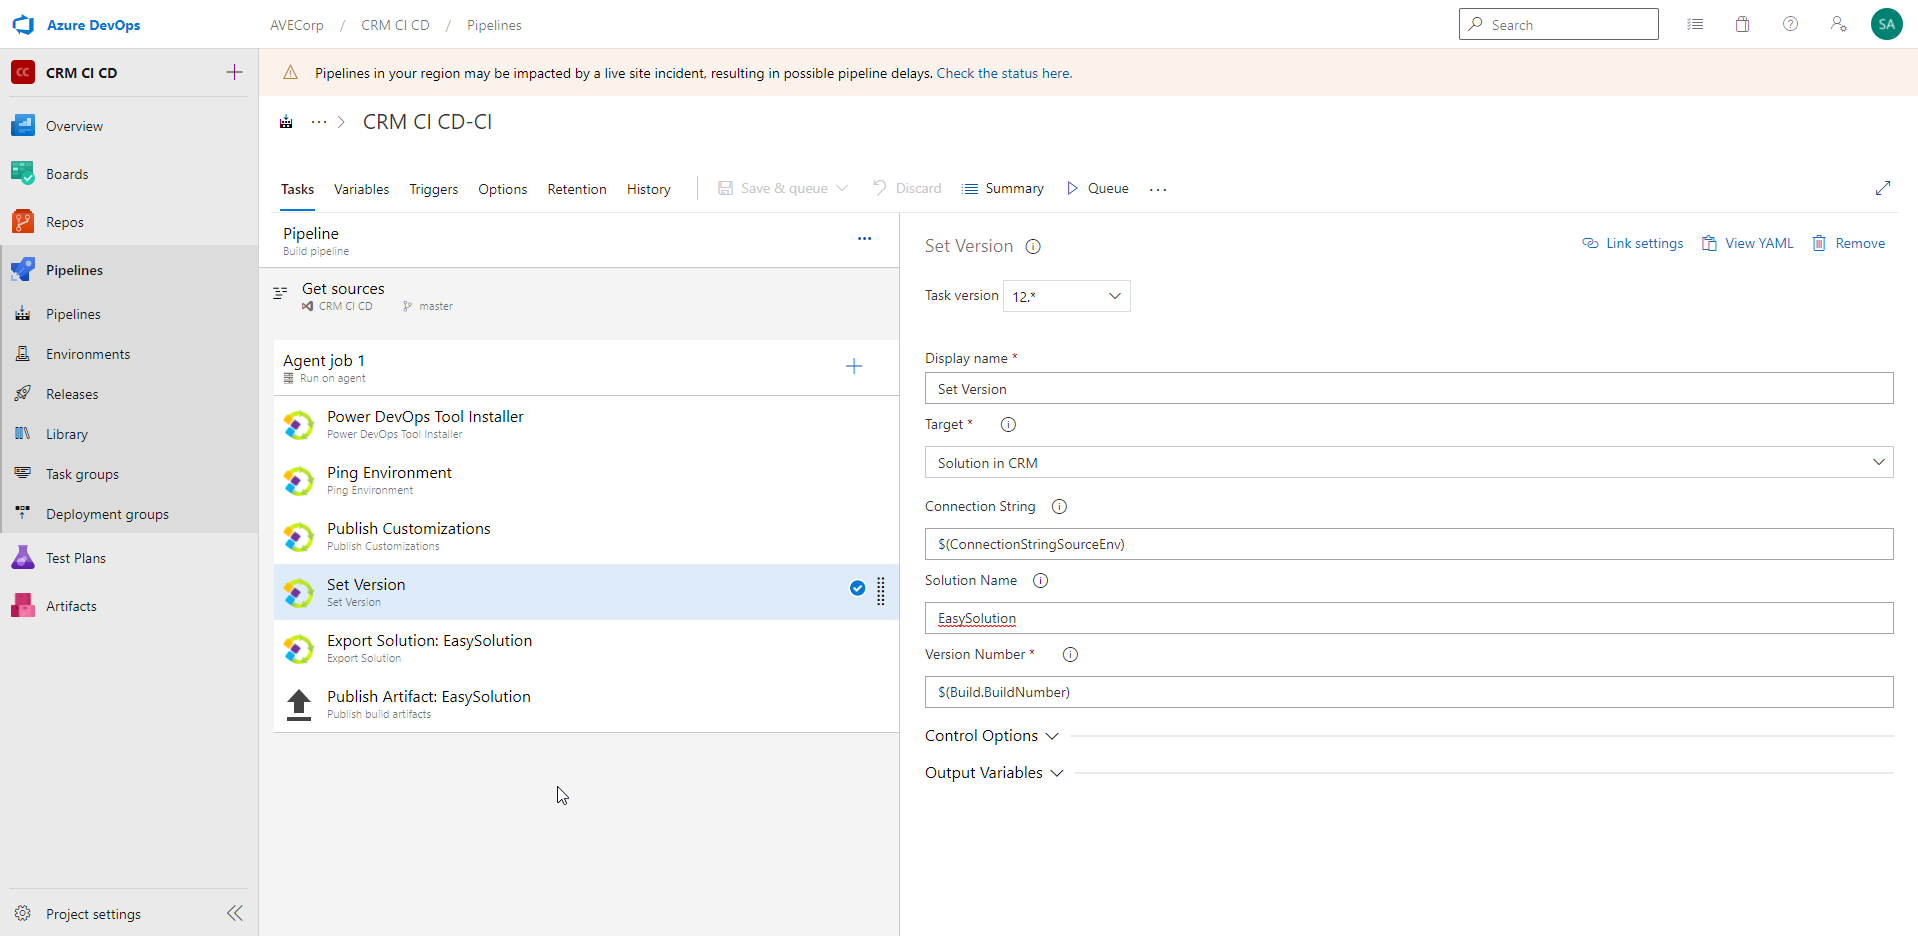
For Target, select "Solution in CRM". This option allows to work directly on the solution in the CRM.
In Connection String, enter the variable already created for previous steps.
In Solution Name, enter the exact name of the Solution you are working on. Here, ours is called "EasySolution".
In Version Number, we choose here to reference the Build Number of the pipeline. This is done with that syntax: $(Build.BuildNumber). And for the Build Number of the pipeline, we set it to : 1.0.0$(Rev:.r) in tab Option, field "Build number format":
This syntax allows to set a build number of kind 1.0.0.1, with the last digit increasing at each build run. Of course, set the version number as you prefer, depending also on the way you want to use your pipelines.
- "Export Solution":
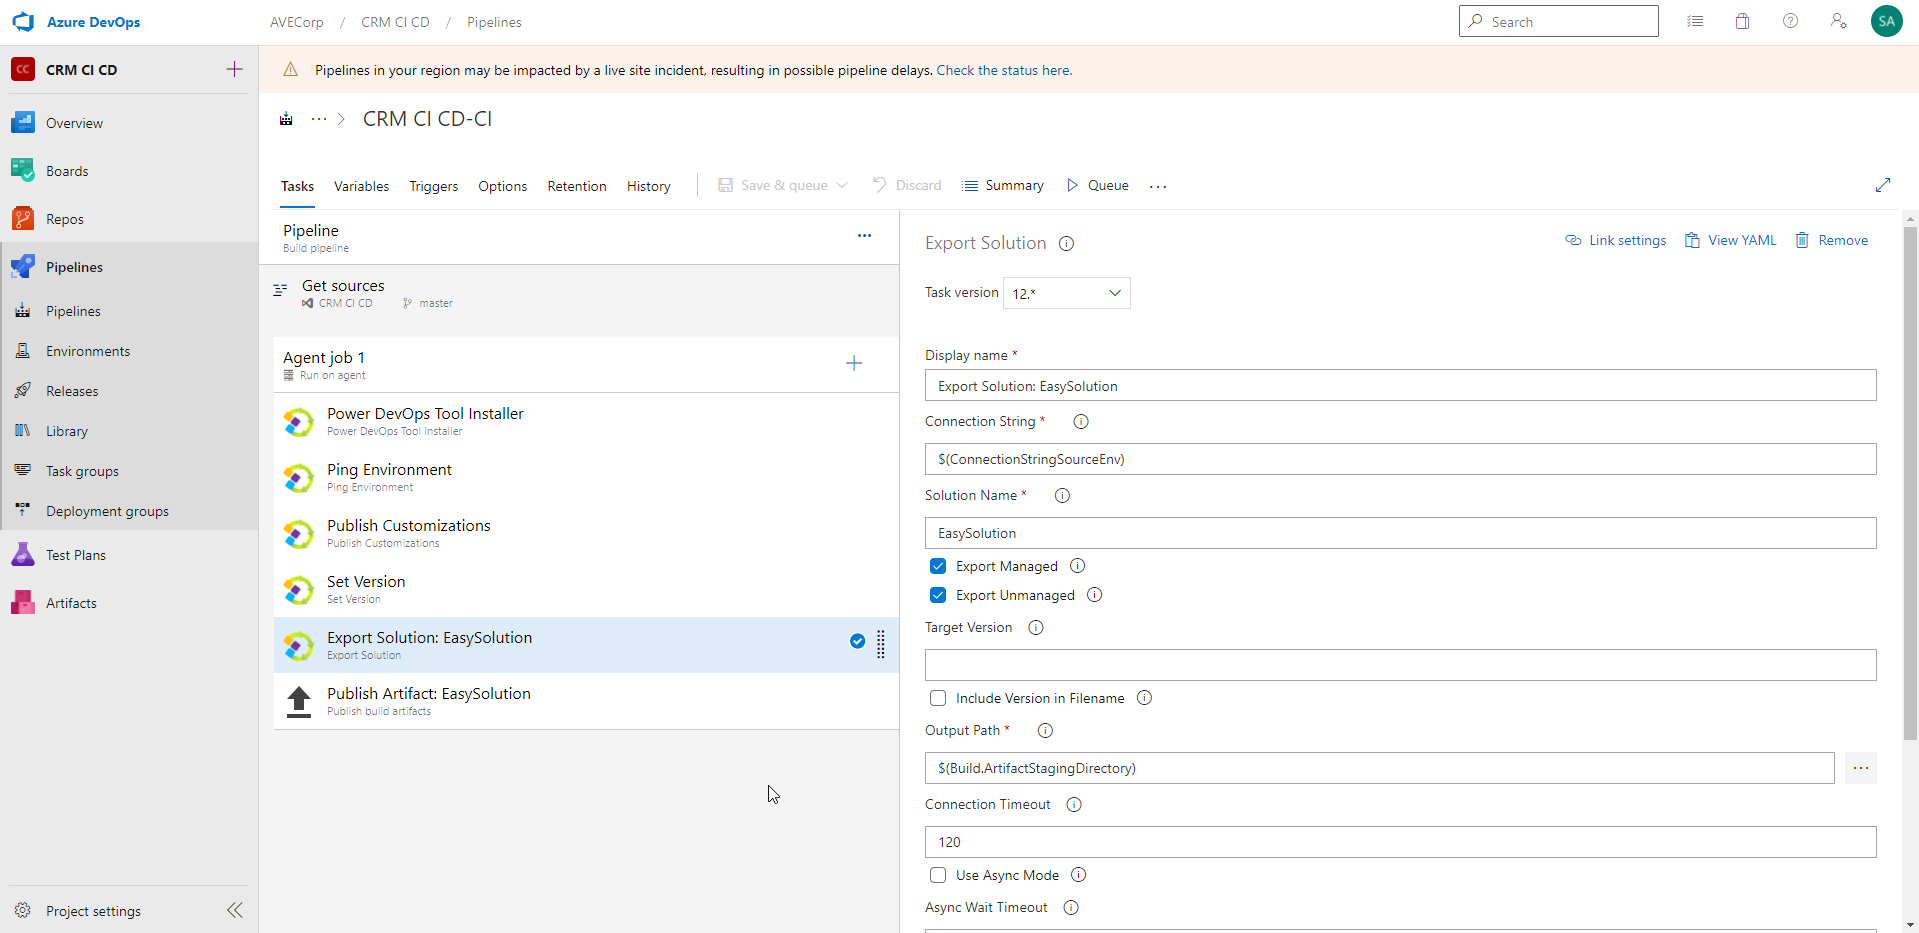
Again, for this step enter the variable of the Connection String.
Put again the name of your Solution.
You have checkboxes to choose if you want to export the solution as Managed, Unmanaged, or both.
In the Output path, you can enter $(Build.ArtifactStagingDirectory). That's the file where the exported solutions will be placed.
- "Publish Artifact"
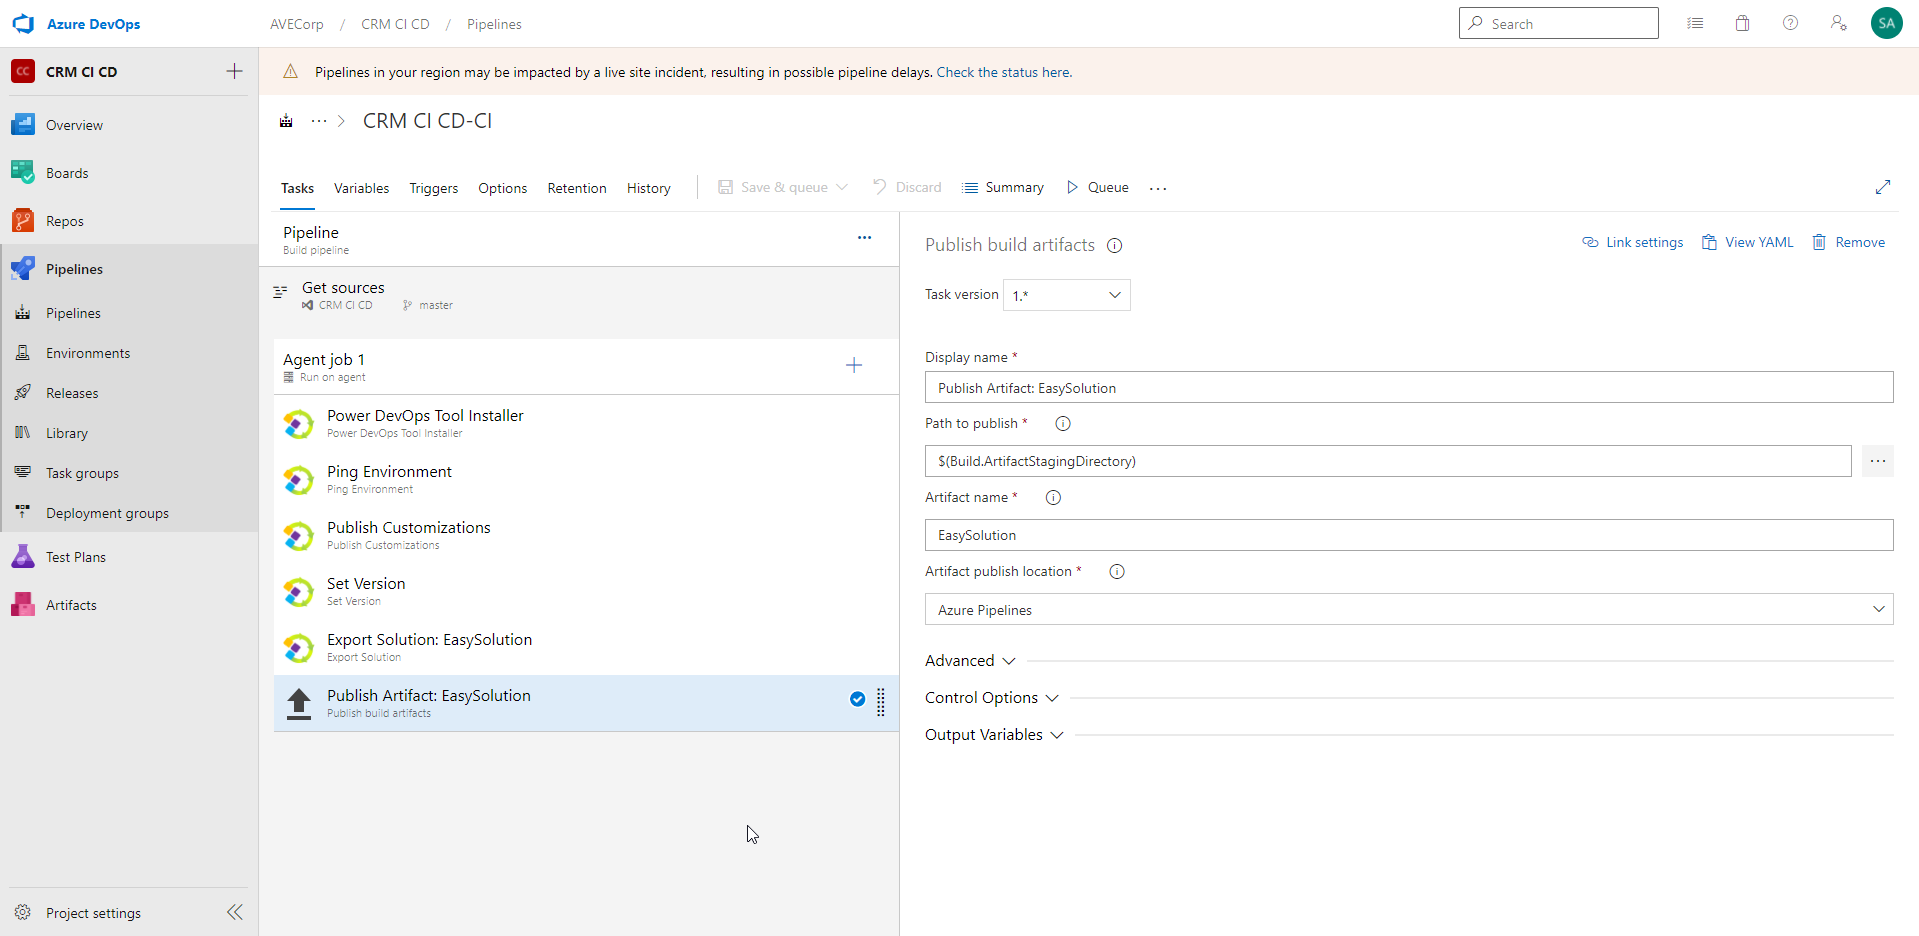
Finally, in this step we publish the artifacts that were created previously.
In "Path to publish", add the output path of the previous step. Here, it is: $(Build.ArtifactStagingDirectory)
And add the name of your Solution. Here it is "EasySolution".
Your build pipeline is now ready!
Tutorial - Release
Now we would like to add a Task to import our exported Solution in the Target environment.
We could add the "Import" Task in our Build pipeline. But we will rather put it in a Release Pipeline, which will allow us to use some nice features such as Pre and Post-deployment conditions.
So, go to "Releases" tab and create a New Release Pipeline.
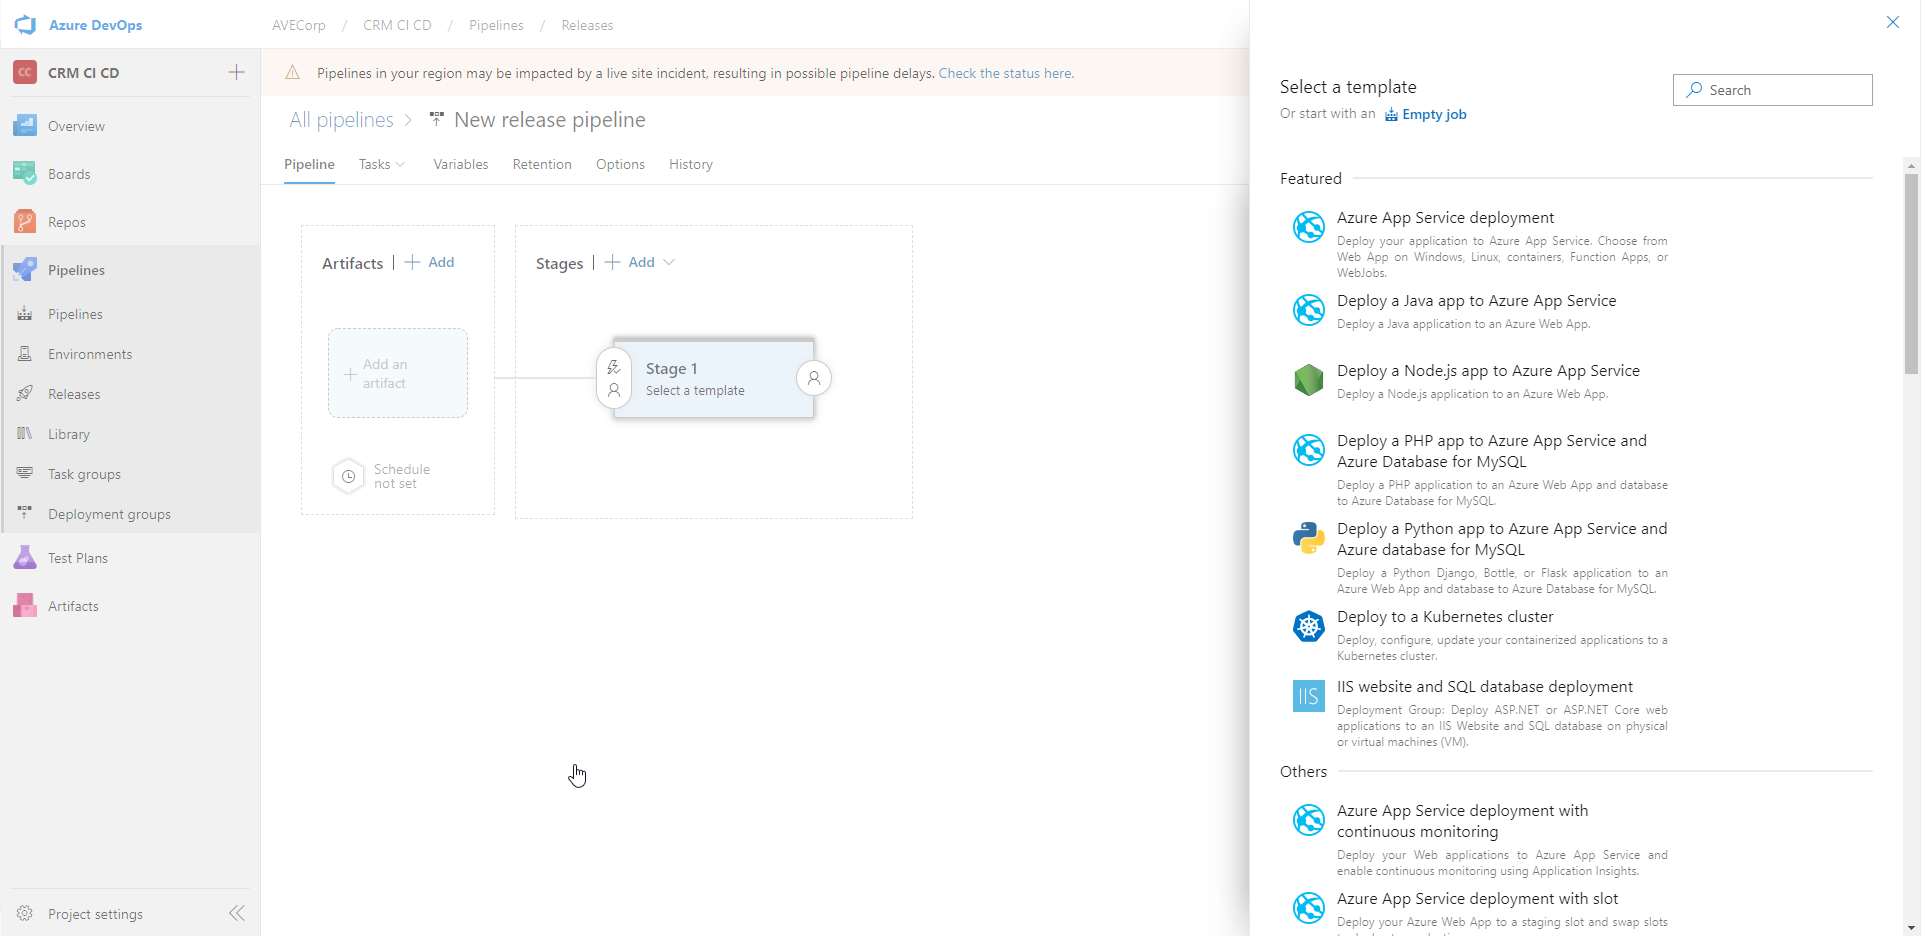
There are several available templates, don't hesitate to browse them. In our case we start from an empty job.
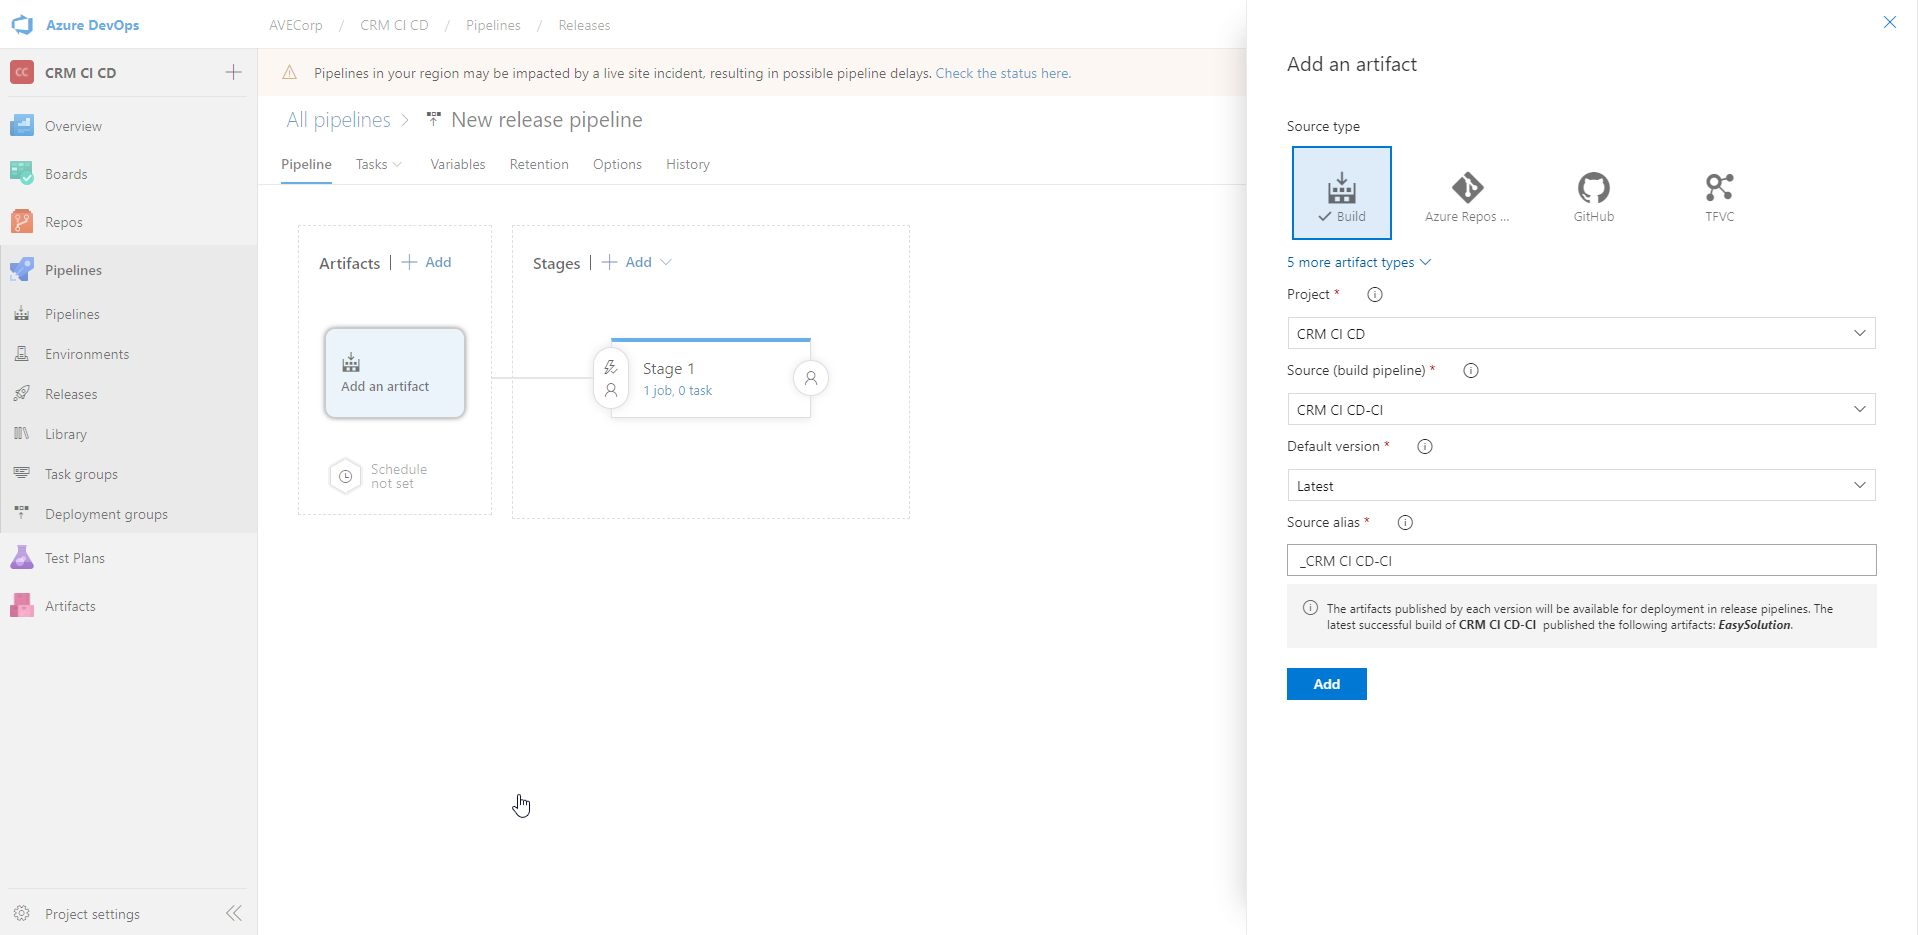
Add an artifact. For the Source, choose your Build pipeline. For Default version, we take the latest (we could also for instance select a specific version):
Now, we add the two Tasks in the Release pipeline as follow:
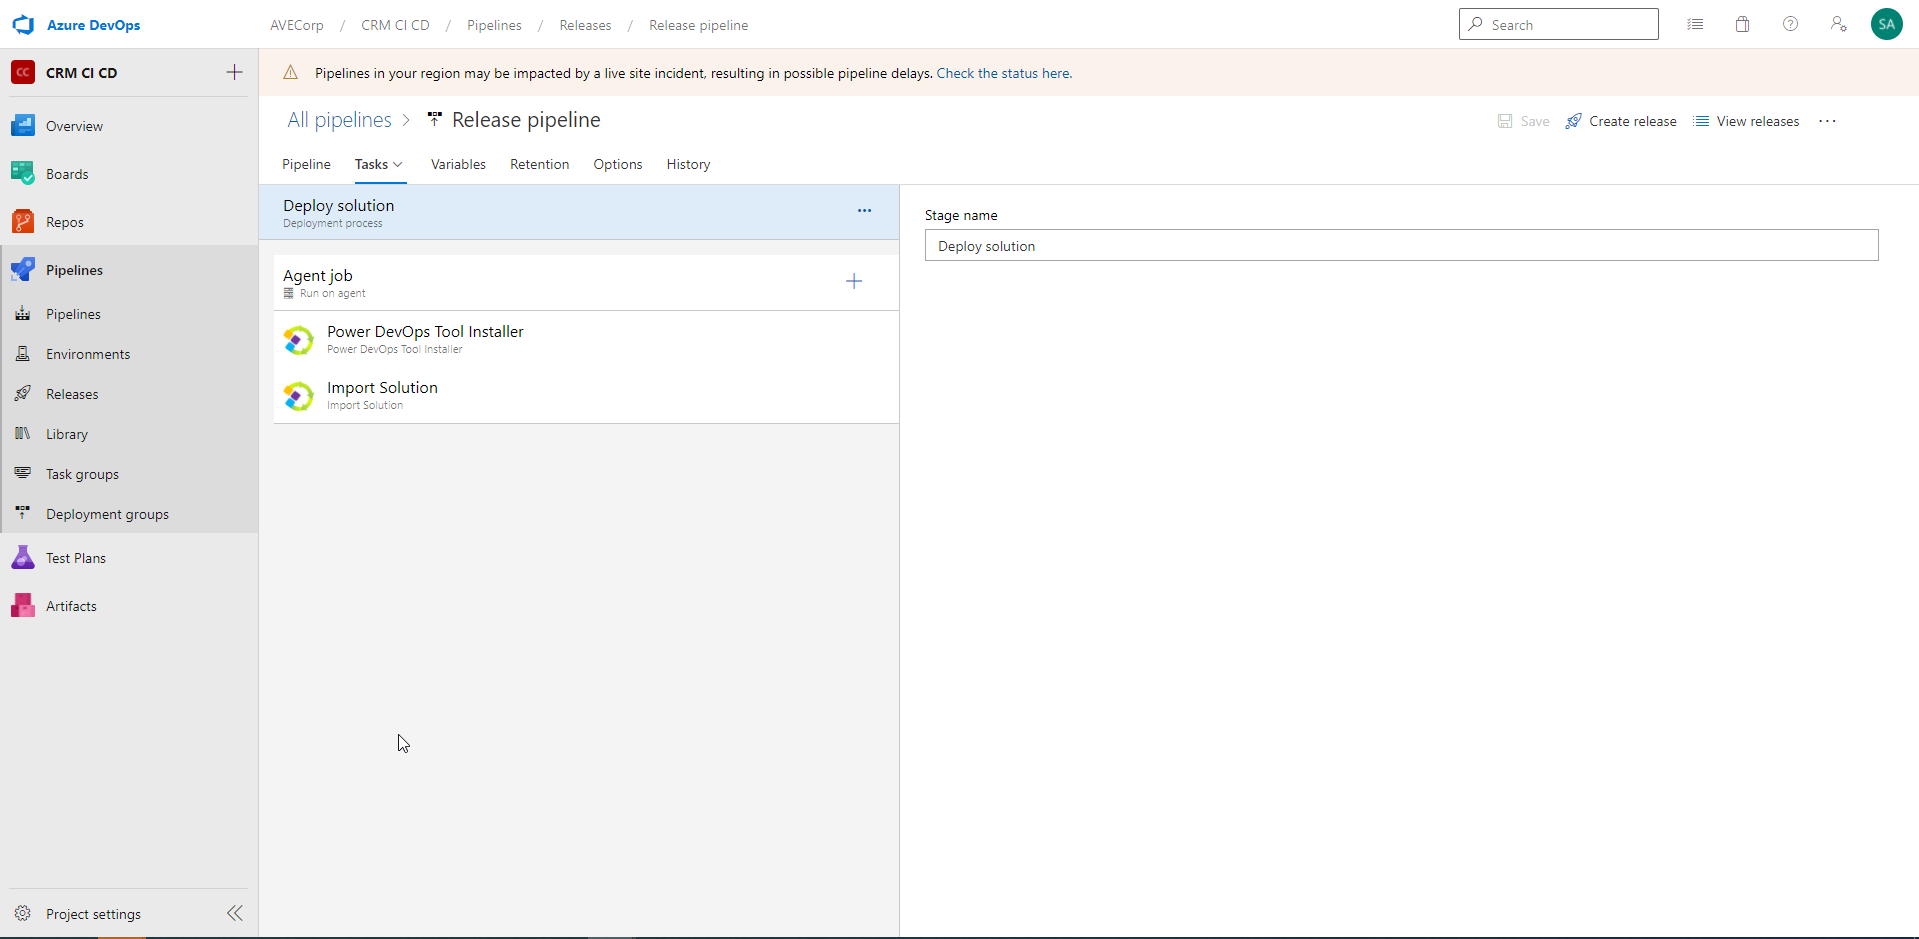
As said before, the first step installs the "Power DevOps Tool" tool in the Agent Job.
Now, for the "Import Solution" step:
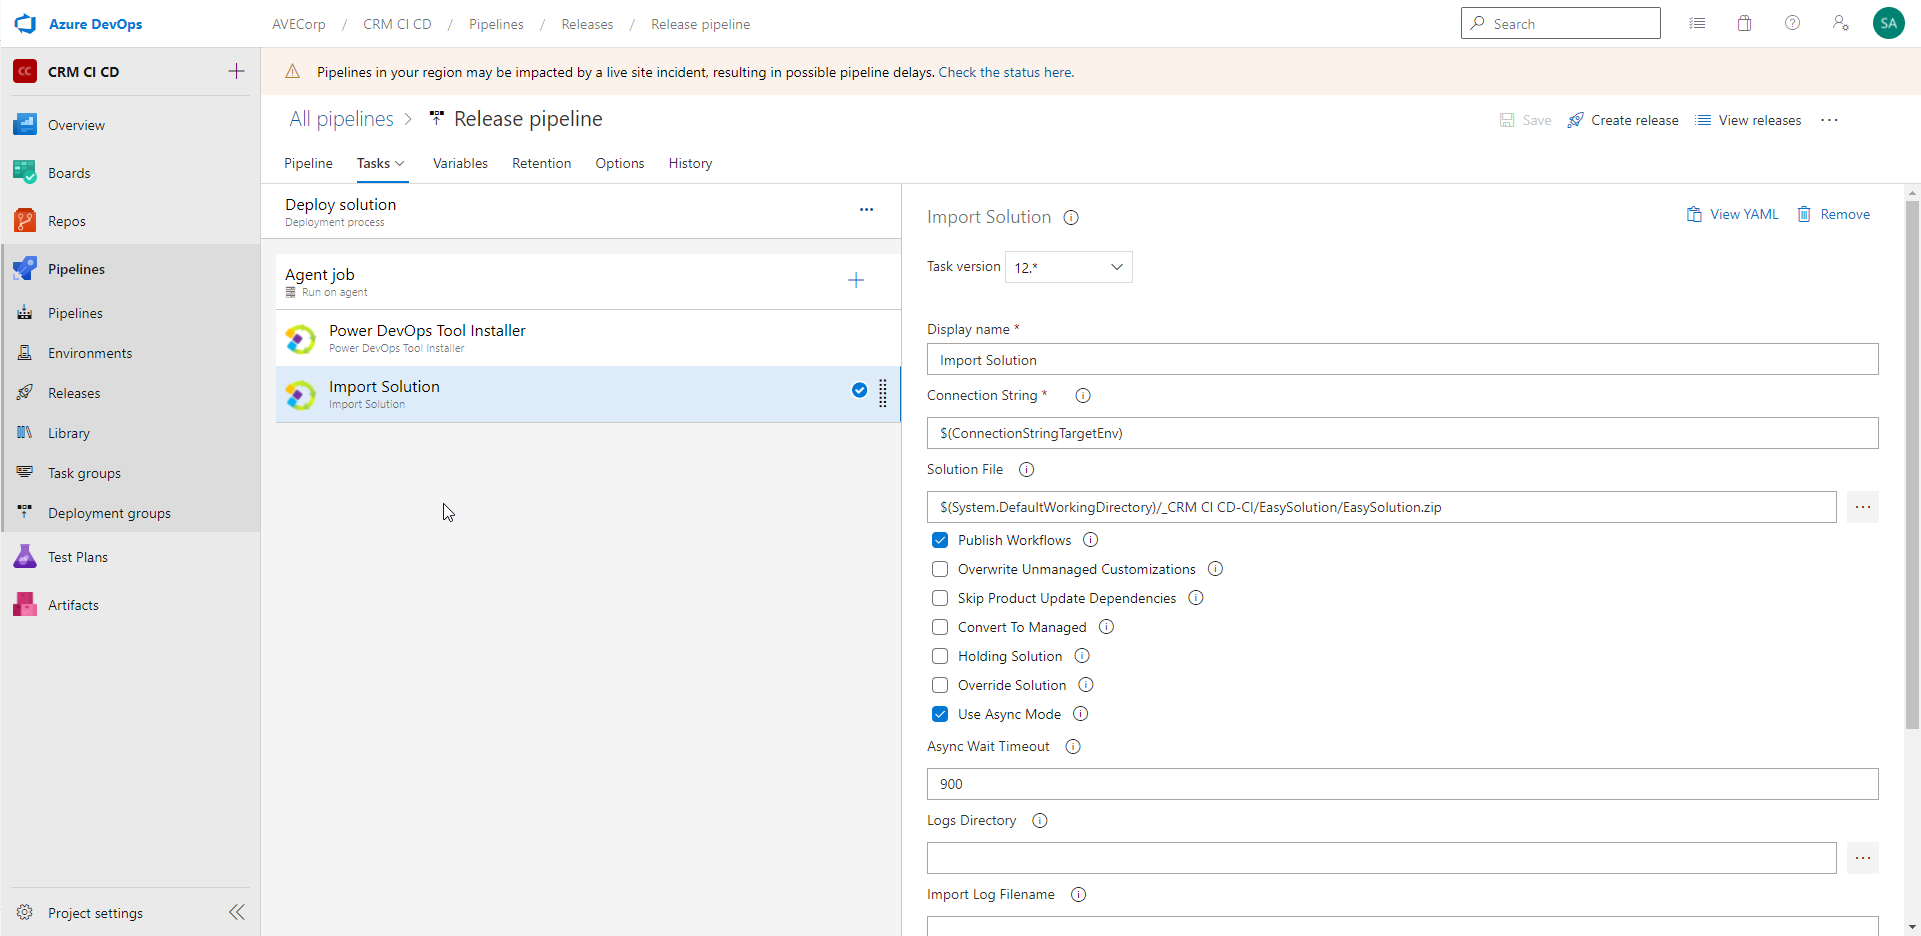
Enter the Connection String of your Target Environment. As for the Build pipeline, I created a variable to store it. And I reference the variable in this step.
In parameter "Solution File", you can browse in the Artifacts to get the exported solutions of the Build pipeline.
And then you have some checkboxes. We choose here to Publish Workflows after importing the solution, to use Asynchronous mode.
You could also convert an unmanaged solution into a managed one; you could override a solution in the target environment event if it has the same version; etc.
We are almost done. Now, come back to the Pipeline view and select the "continuous deployment trigger" icon:
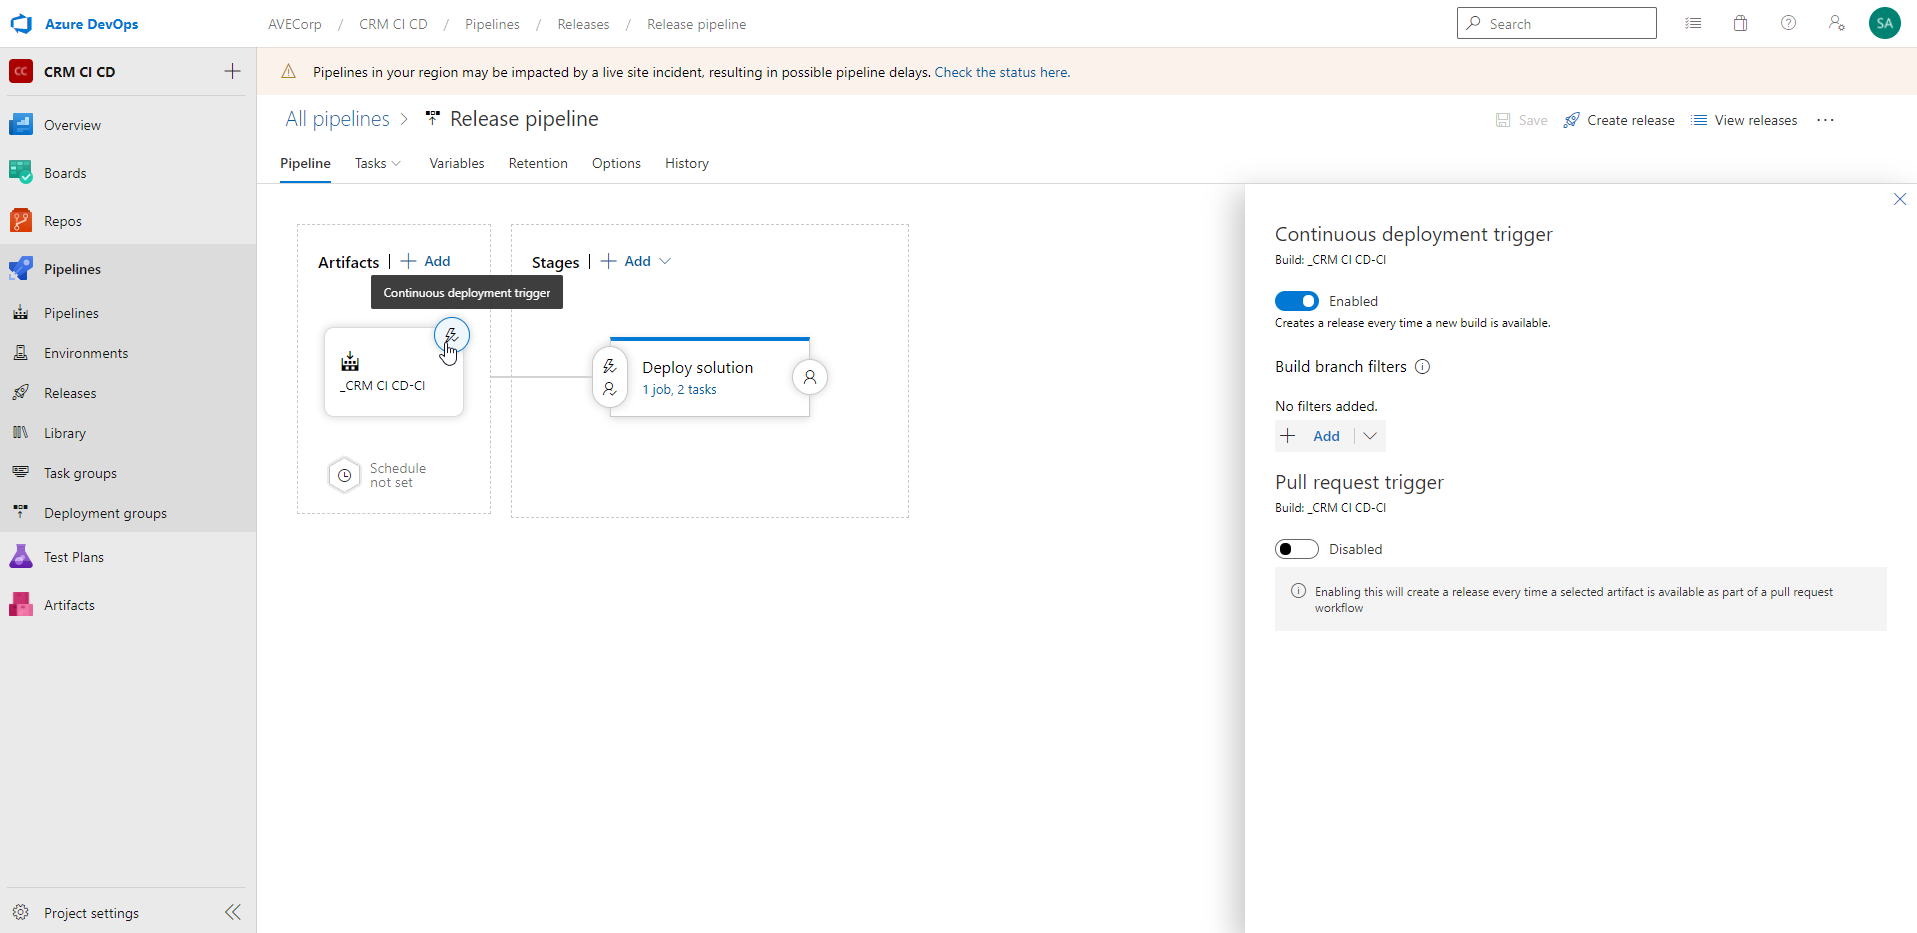
And click Enabled. This will automatically trigger the Release pipeline when a new Build is available !
Finally, we add a Pre-deployment condition:
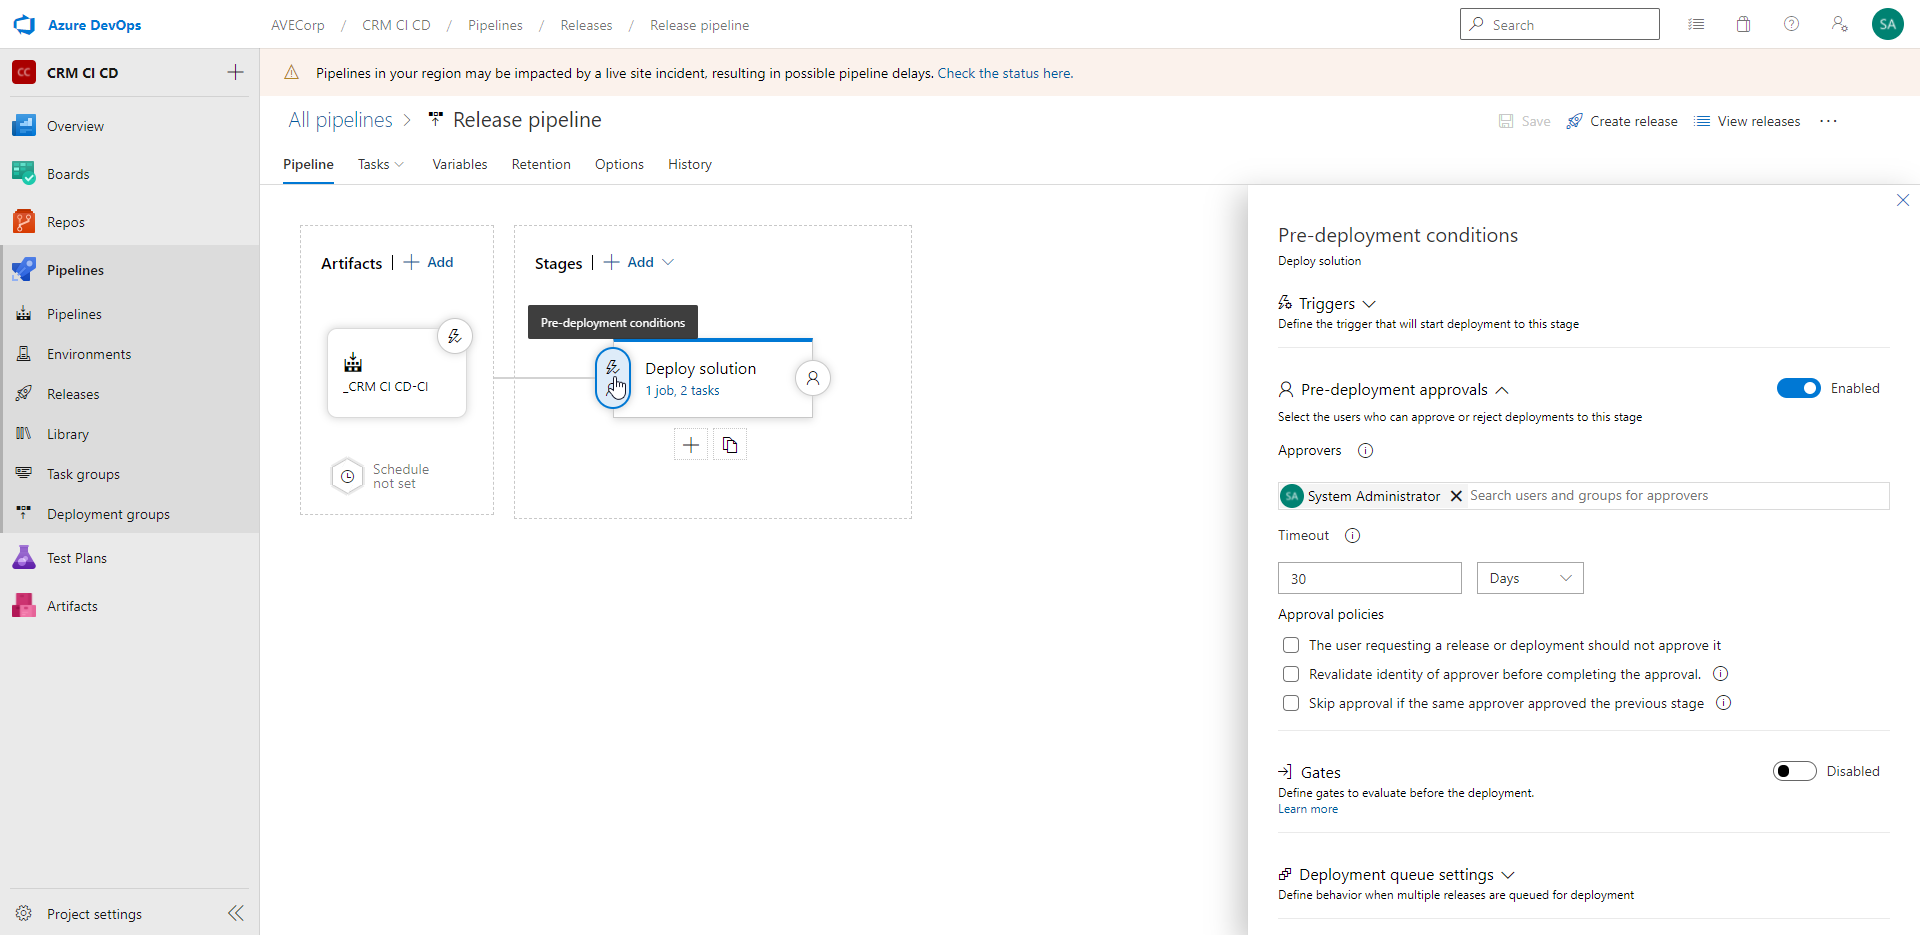
We enable "Pre-deployment approvals", and in "Approvers" field, I add the System Administrator.
So, when the Release gets to this point, a mail will be sent to the System Administrator, and he will be able to validate or reject the request.
If he accepts it, the solution will be imported in the target environment. Otherwise it won't be imported. It is great way to keep control on the deployments !
Test !
Now, let's test our Pipelines !
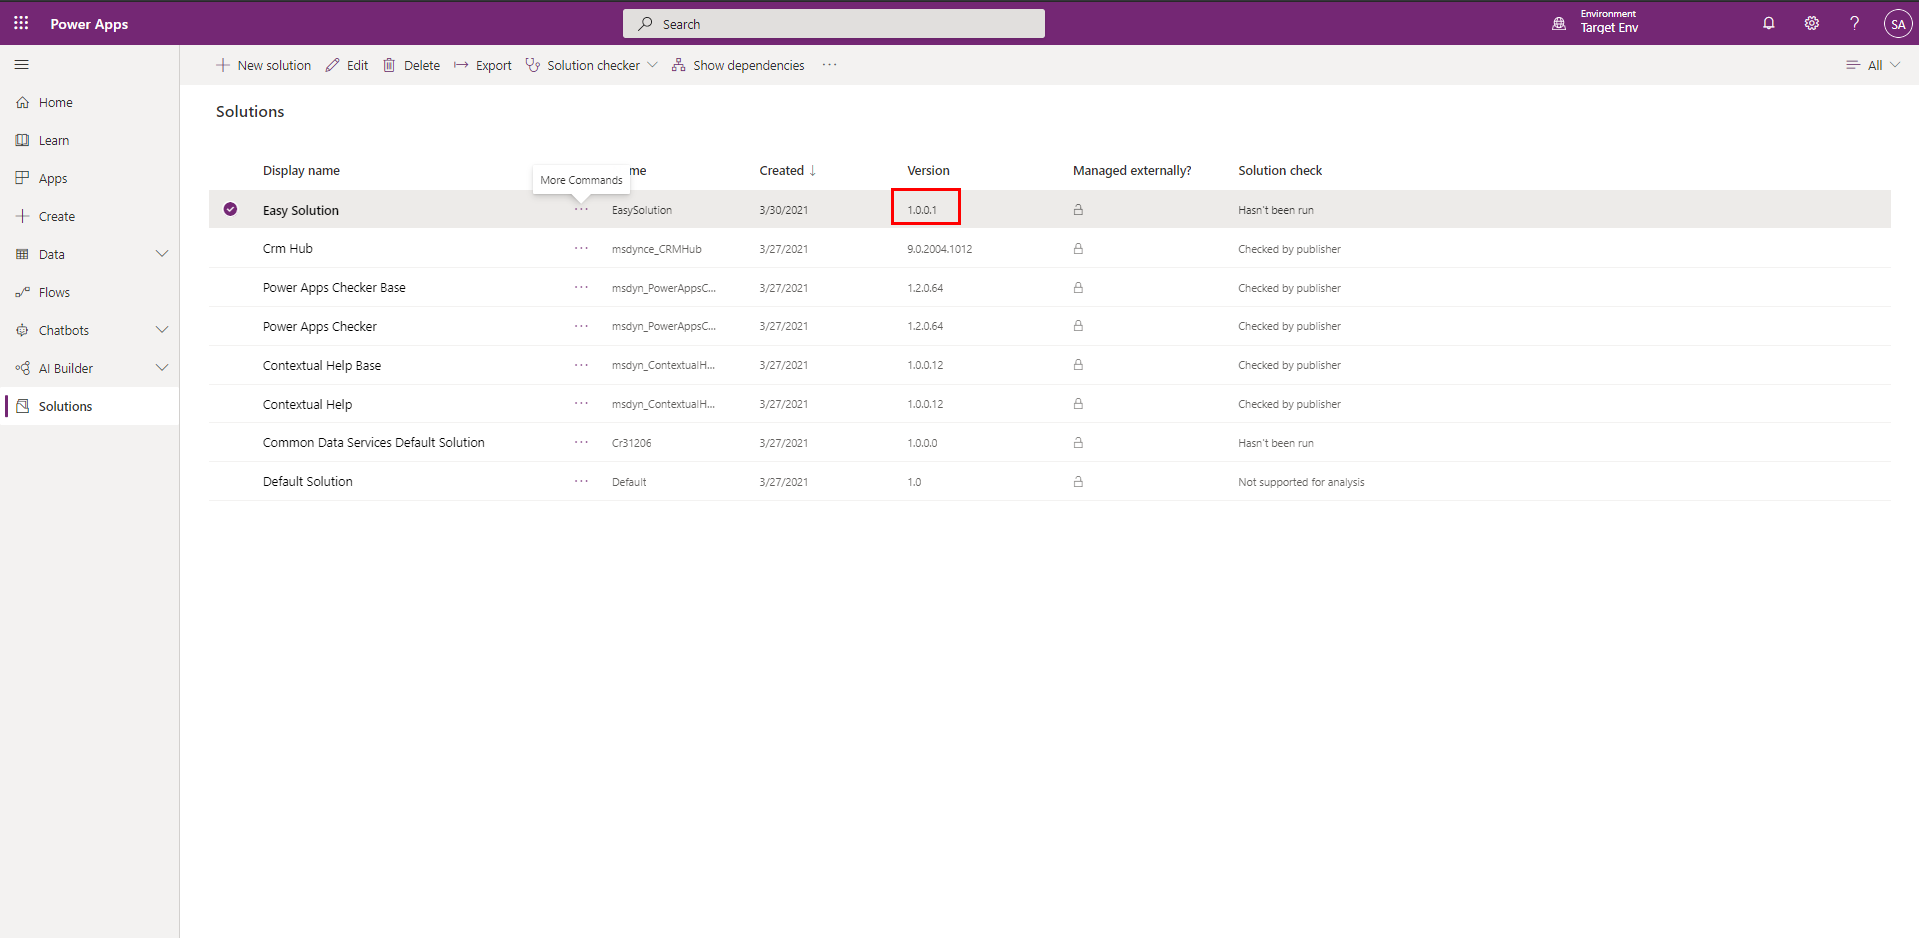
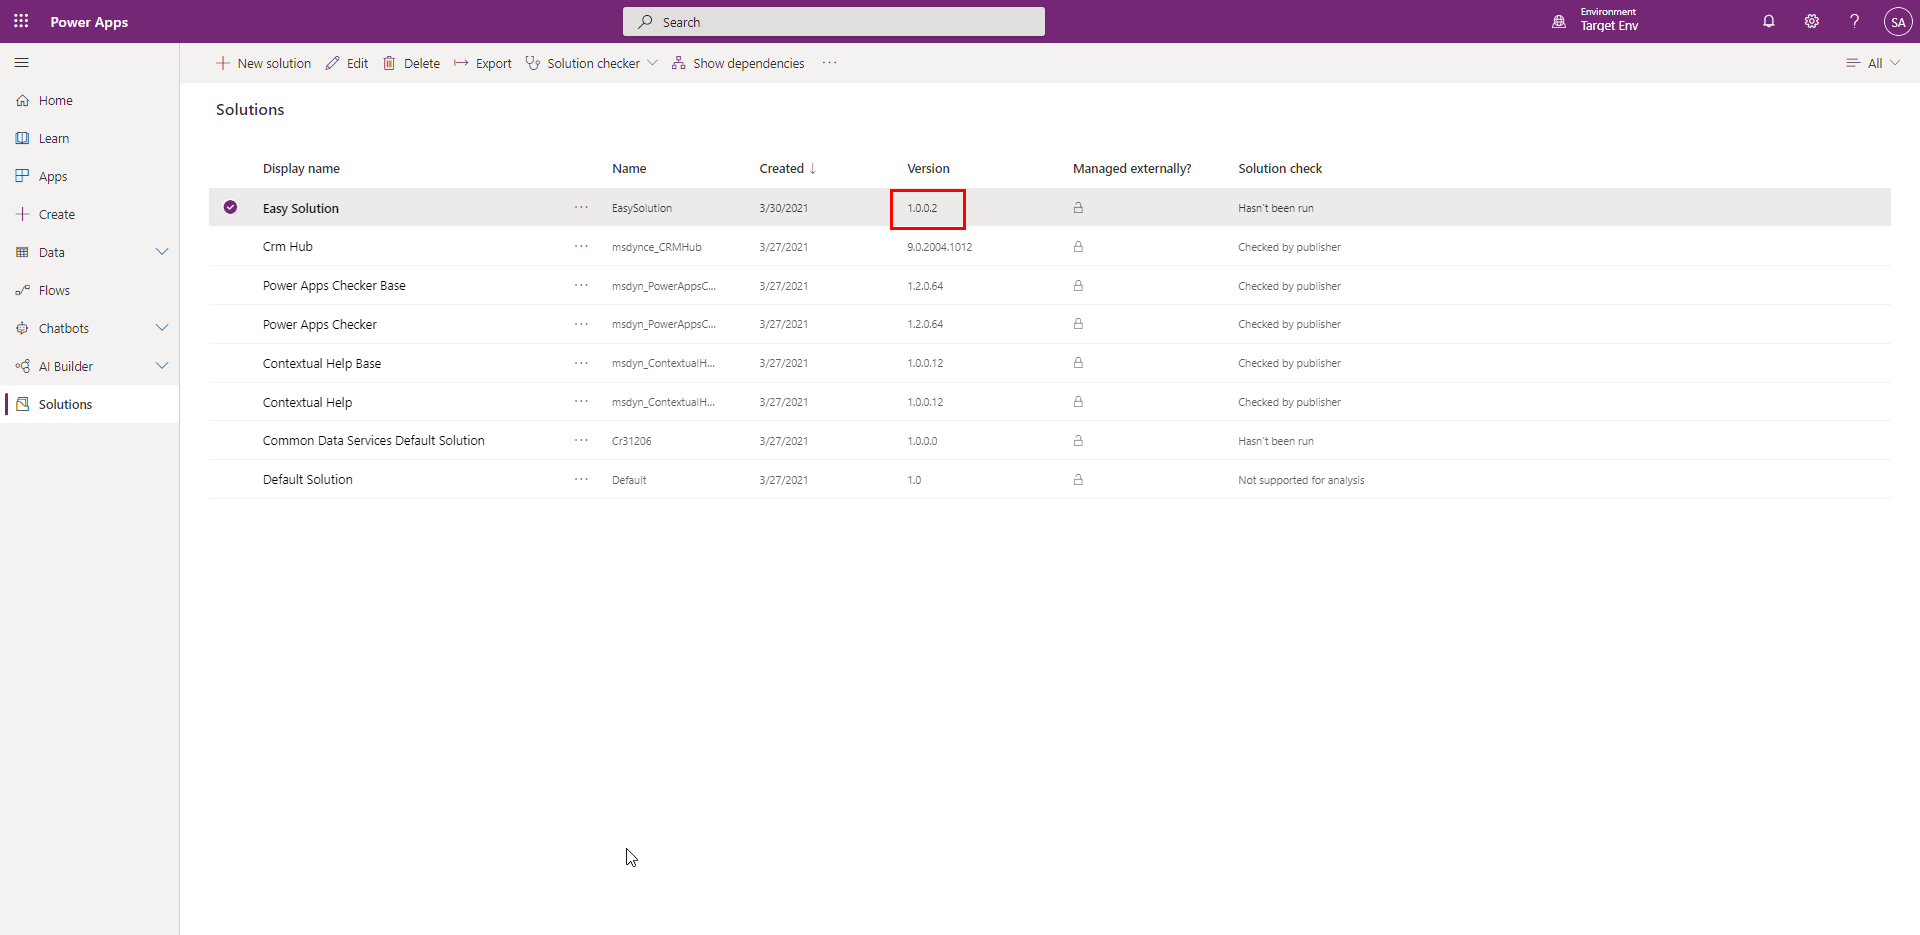
We start with our solution "EasySolution" being in version 1.0.0.1 in our Dev and in Target environment:

I have made a little customization in Dev environment in the Solution "Easy Solution". And I want to push this customization to Target environment. So I will use our DevOps Pipelines !
On purpose, I do not change the version of "EasySolution" in Dev environment, as it will be done by the Build Pipeline.
In Azure DevOps, I manually trigger the Build Pipeline.
After a bit more than 2 minutes, we see that the run was successful:
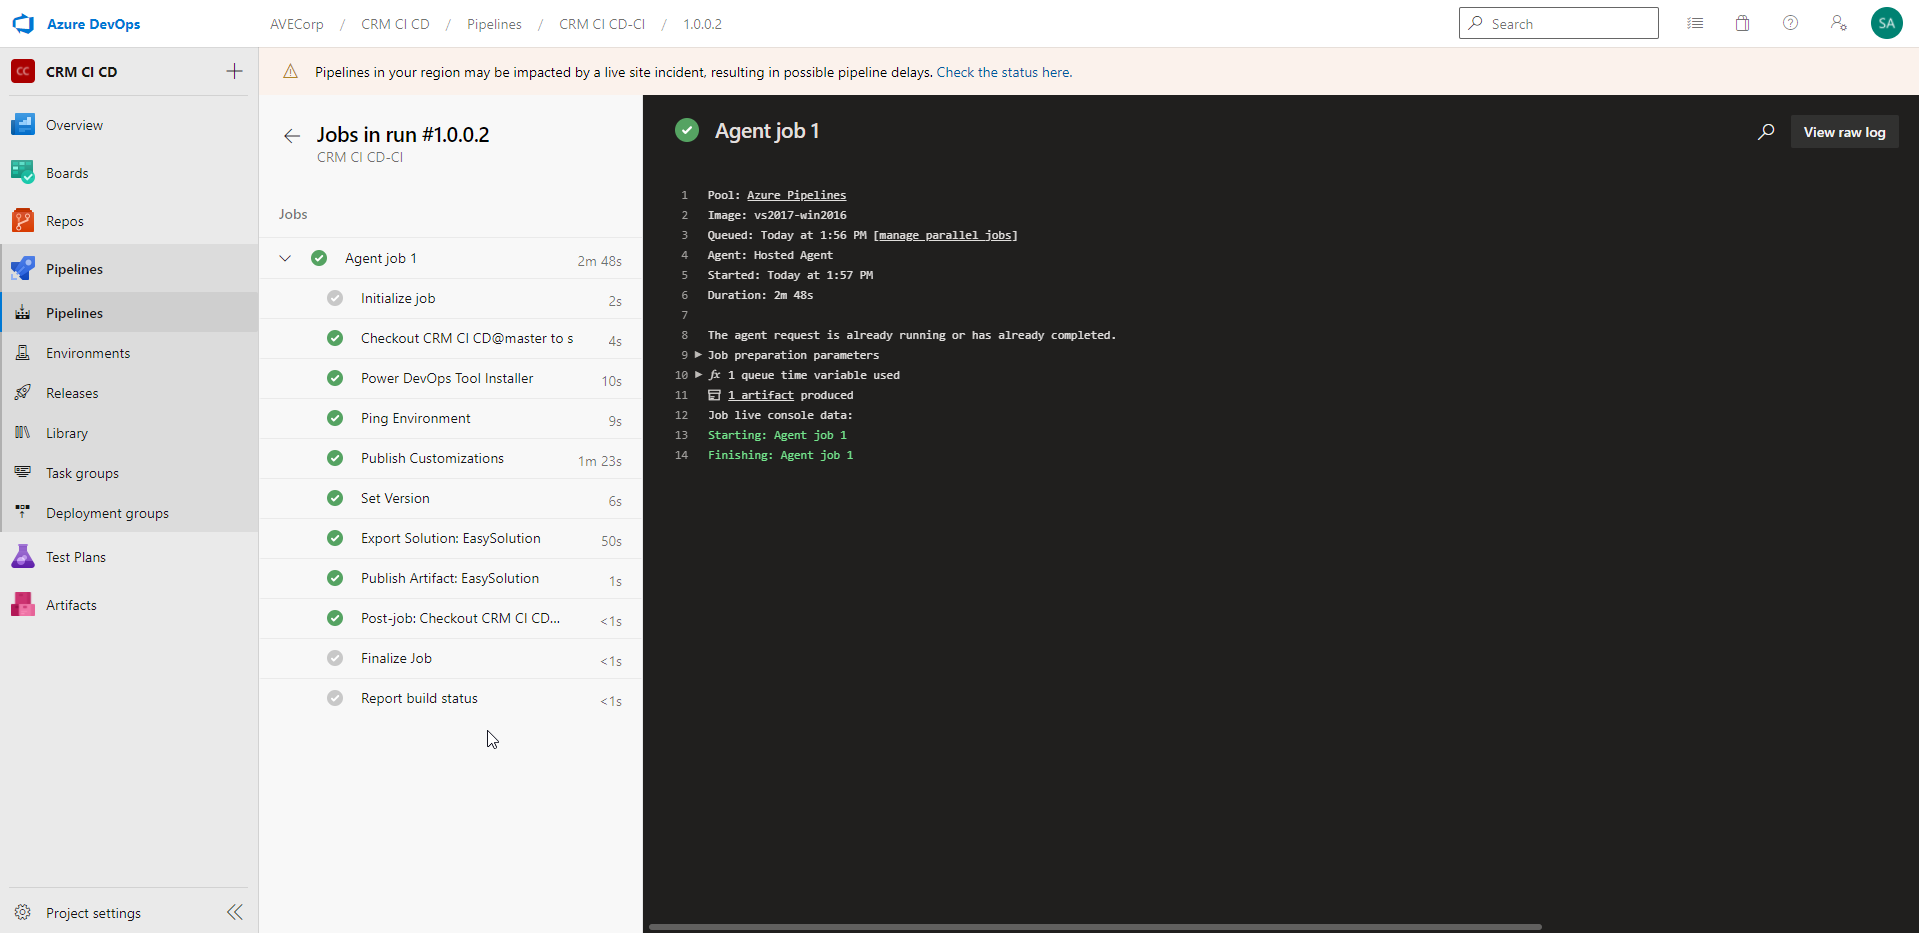
And we can indeed see that the "EasySolution" has been set to version 1.0.0.2 in Dev environment:

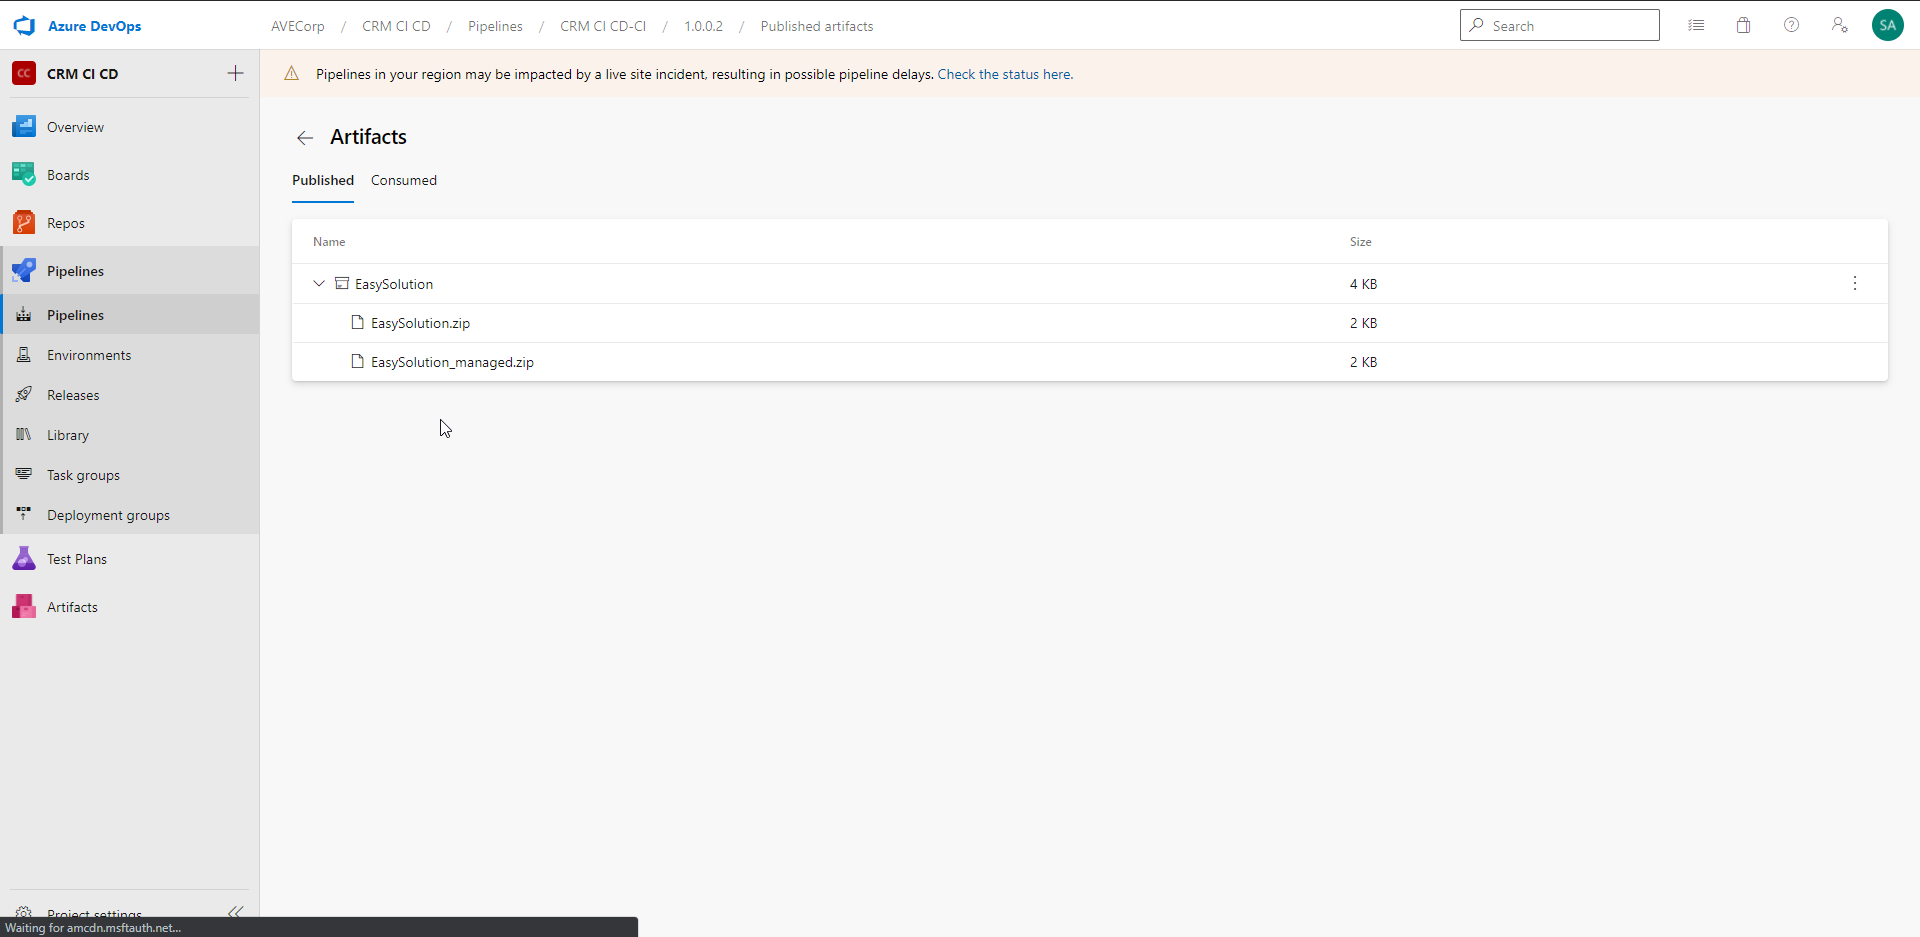
In the Artifacts of this Build, we can see that our Managed and Unmanaged solutions have been exported:
In the Release Pipeline, we see that a new Release has been automatically triggered for this Build:
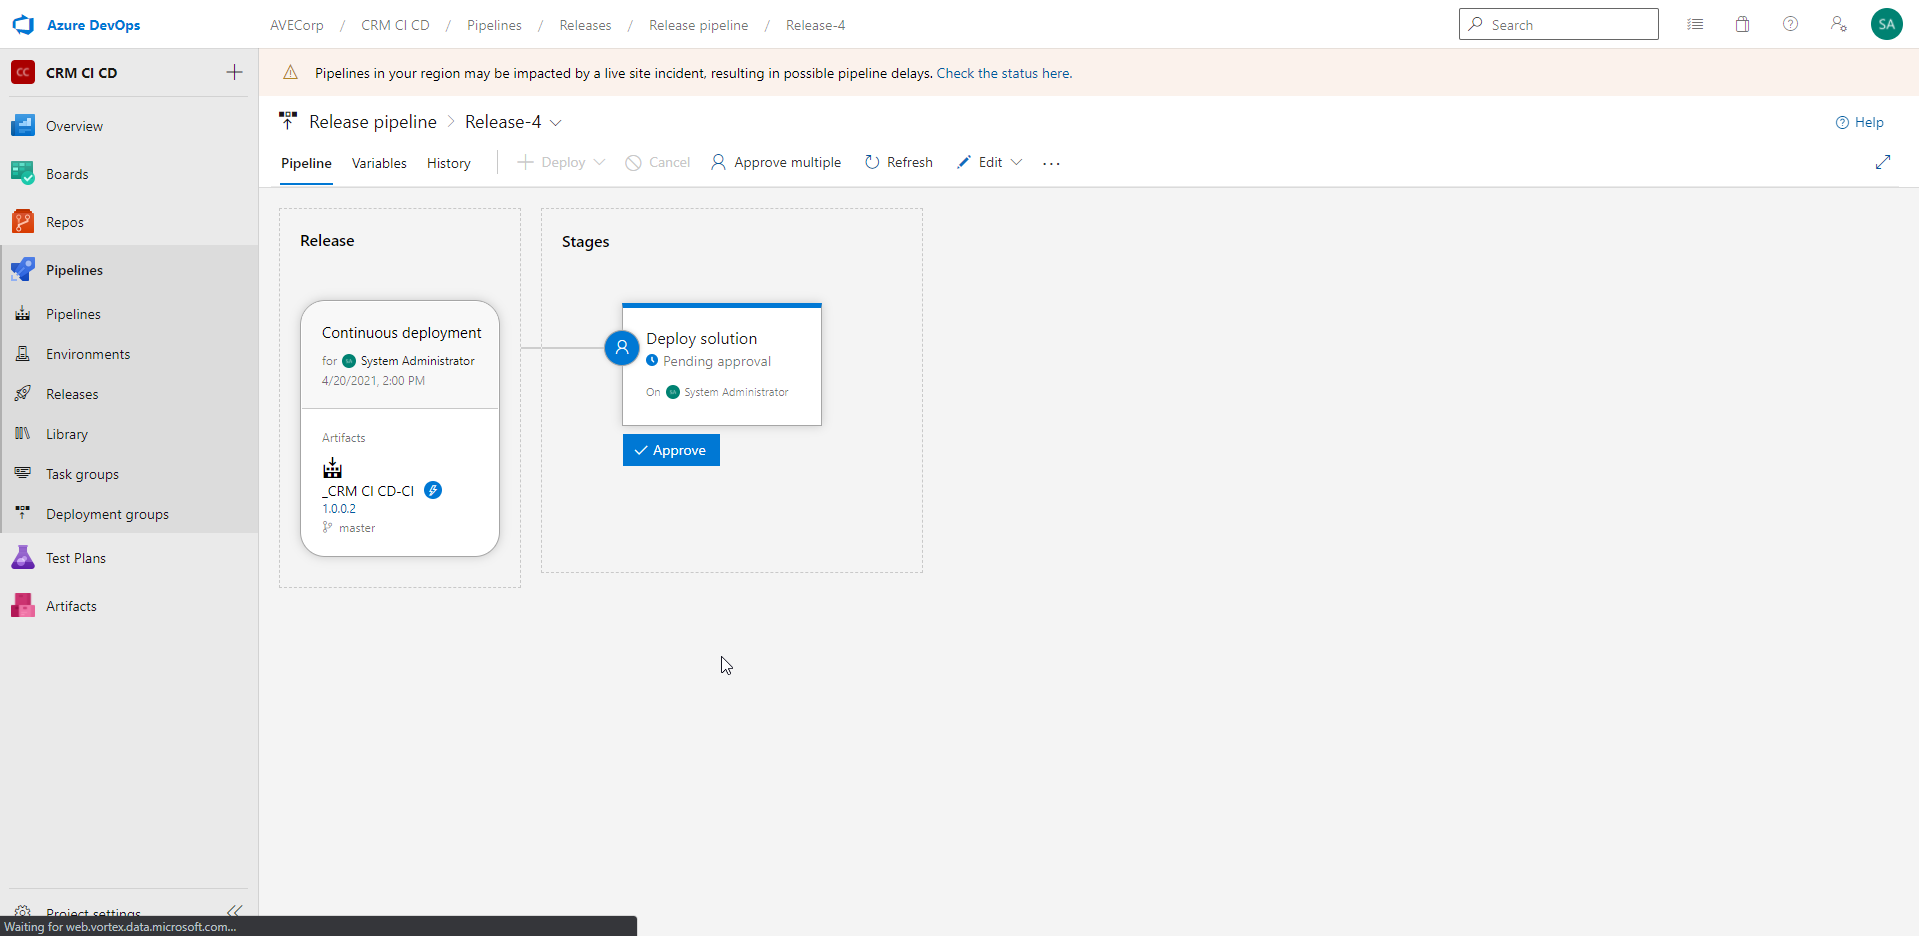
The Release is pending Approval from the System Administrator before going further.
And the System administrator received a mail:
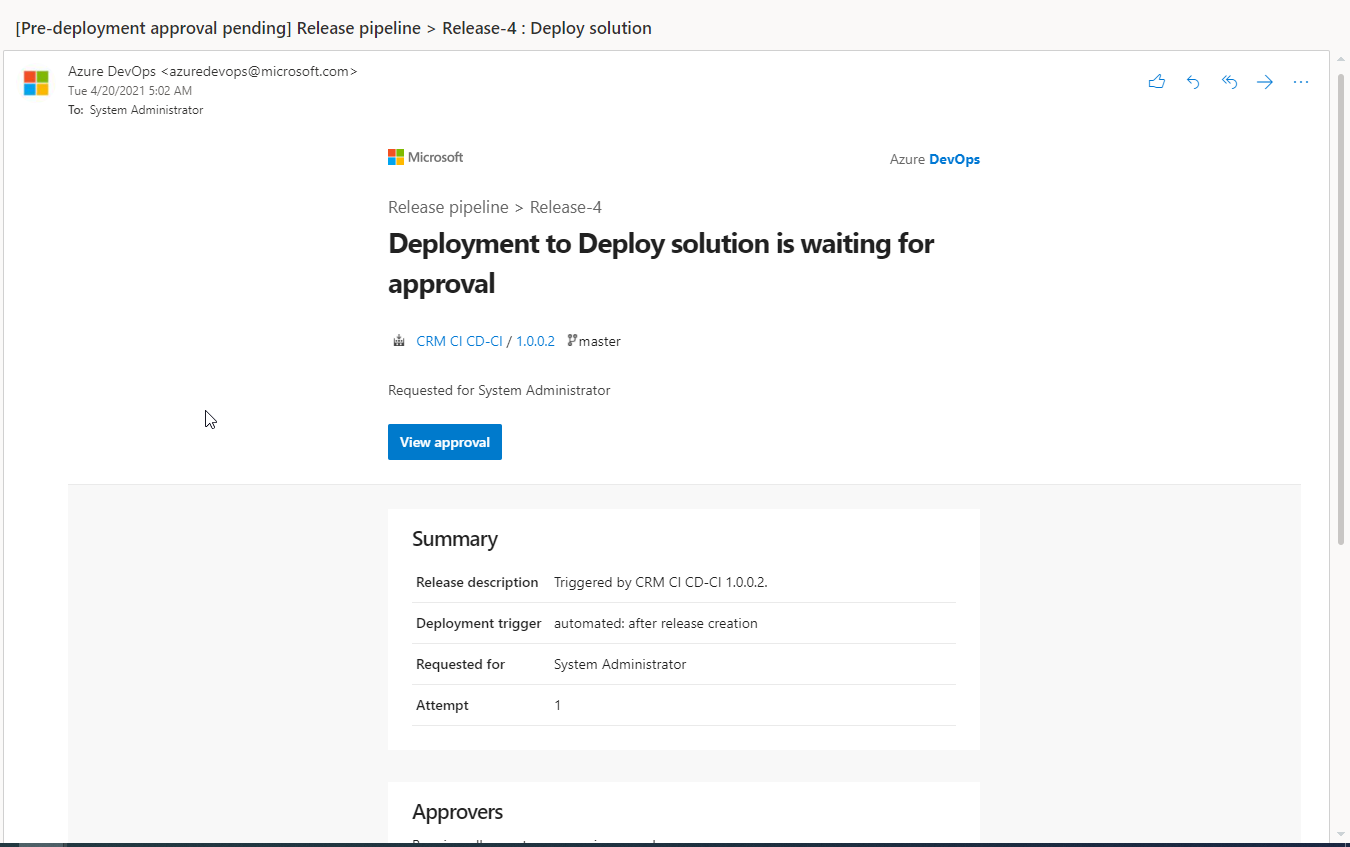
As System Administrator, I now approve the request.
And after a few minutes, the Release pipeline has successfully run:
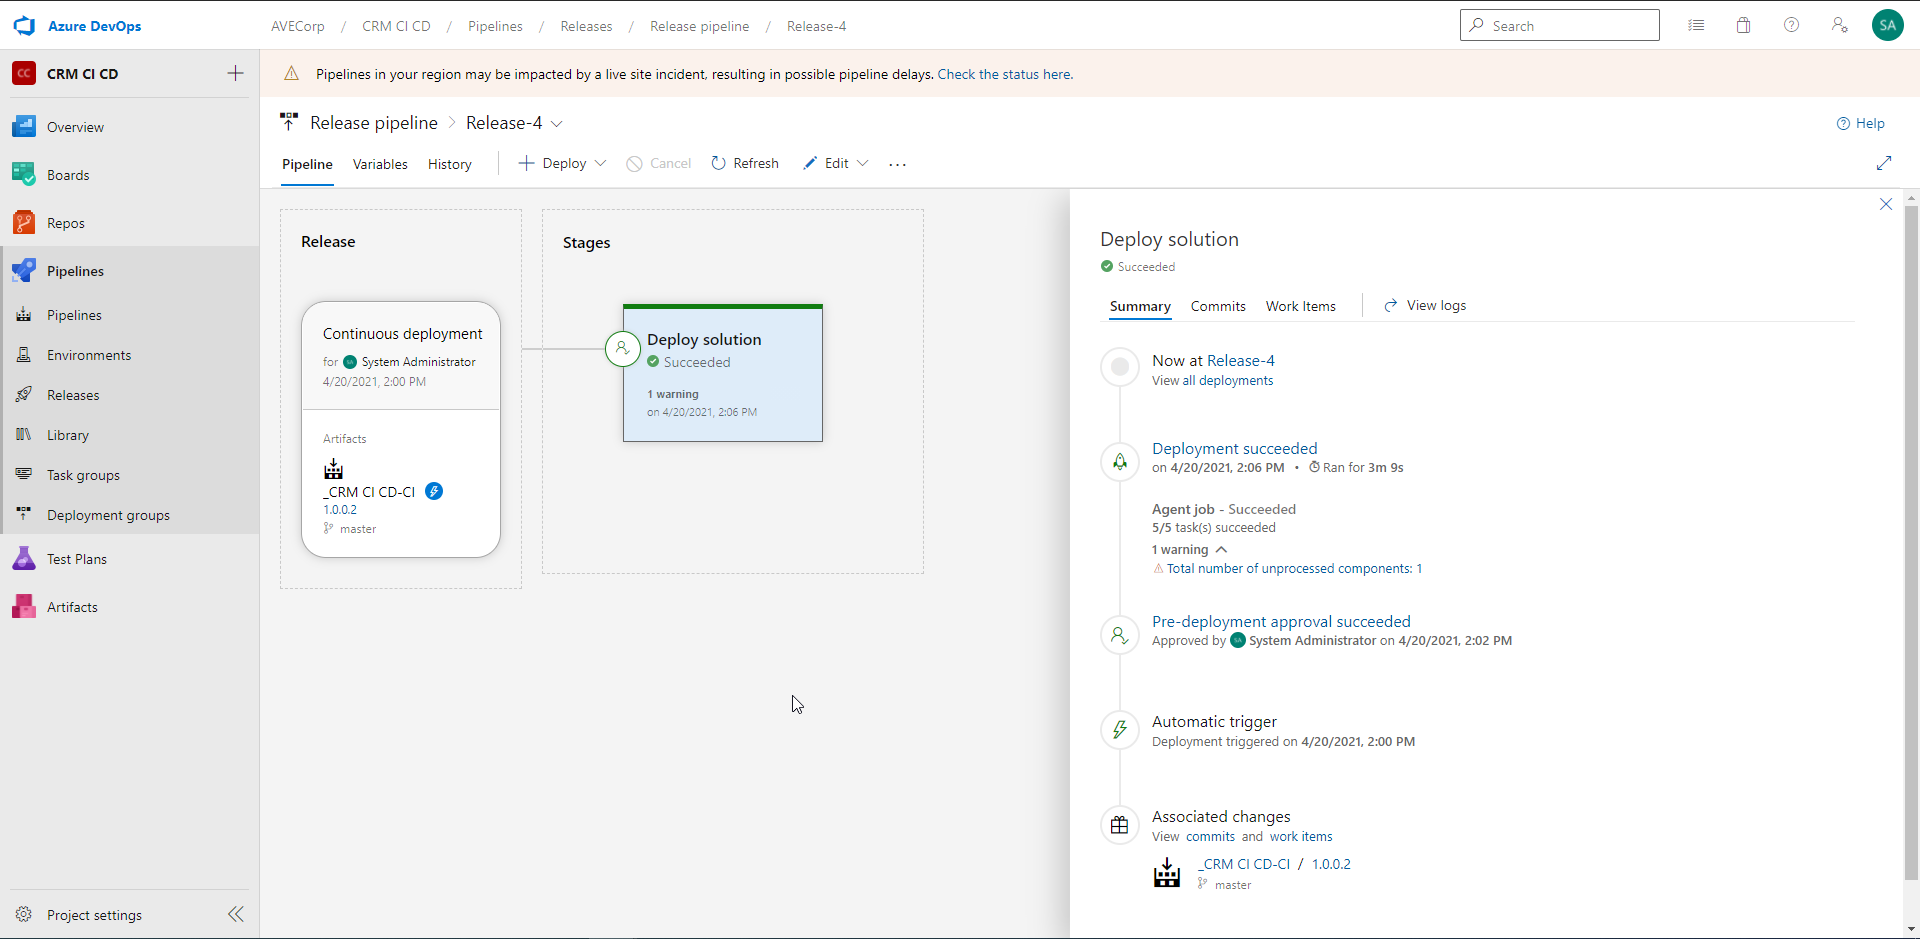
And now, in Target environment the "EasySolution" is set to version 1.0.0.2:
And here we are ! Now customizations I make in Dev environment can be automatically pushed to Target environment, with a validation process !!!
It just takes to click on a Button to trigger the Build Pipeline!
Go further
There are several ways to go further in your Azure DevOps Pipelines for Dynamics 365. Here are a few ideas:
- You could add testing Tasks (with "Visual studio Test" Task) in your Pipelines. If a Test fails, the Pipeline would stop and a notification would be sent. You could Test the CRM using the APIs, or directly test the User Interface using EasyRepro or Selenium (you can see this chronicle to learn more about UI testing on the CRM: Dynamics 365 EasyRepro - Automated test framework)
- Your Build pipeline could be triggered by a push in a Git repository
- You could add more pre-deployment/post-deployment conditions
- You could adapt this tutorial for managing 3 environments instead of 2
Conclusion
To conclude, Azure DevOps is really a powerful product to manage the CI/CD on your Dynamics 365 environments. And more generally, on the Power Platform.
It is very intuitive and quick to put in place.
This may allow you to manage more easily your tests and deployments across environments !!
Azure DevOps for Dynamics 365

Comments
Hello POP, Thanks for your…
Hello POP,
Thanks for your question. As of today, the two tools provide similar features. You can check in the documentations of the two tools which actions they each support and choose depending on your needs.
But today, I wouldn't recommend to use one over the other. Both are really nice
Fails
I followed your instructions but I'm unable to get my pipeline to work because of the first step "Get sources". There is no code in the repo so it fails every time. Any ideas?
Hello Dave, Maybe you can…
Hello Dave,
Maybe you can try to add a simple file in your repo like a Readme file. And then check if it solves your issue.
A working connectionString is not able to connect from DevOps
The connection string i'm using is working when used from XRMToolbox, but my pipeline throws an error
An unsecured or incorrectly secured fault was received from the other party. See the inner FaultException for the fault code and detail. => Authentication Failure Unable to Login to Dynamics CRM..
Could it be because i am creating my pipeline from a different account than the one i use to login to my D365? but my connection string already contains my credentials rite, then why?
Hello Avdhut, Thanks for…
Hello Avdhut,
Thanks for your message. Indeed, this should normally work with your connection string. Did you manage to make it work in the end ?
Best regards
Amaury
getting error Unable to Login to Dynamics CRM - Ping Environment
after giving Connection String in Ping Environment task I am getting below error
##[error]Couldn't connect to CRM instance after 3 attempts: Invalid Login Information : An unsecured or incorrectly secured fault was received from the other party. See the inner FaultException for the fault code and detail.
An unsecured or incorrectly secured fault was received from the other party. See the inner FaultException for the fault code and detail. => An error occurred when verifying security for the message.Unable to Login to Dynamics CRM
Unable to Login to Dynamics CRM
can u please help to resolve this. Thank You